| Hangar |
Aircraft |
Category |
Date |
Preview |
| Skyediamonds1985 | Guillows Series 200 - SE5a | Build | 05-Oct-16 00:08 |  |
| Views : 666 |
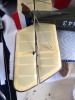
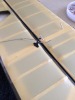
| Control horns and base prior to threading the control "cables" and adding rigging |
| Skyediamonds1985 | Guillows Series 200 - SE5a | Build | 05-Oct-16 00:07 | 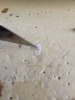 |
| Views : 607 |
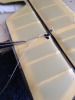
| Used glossy paper to build the base for the control horns. |
| Skyediamonds1985 | Guillows Series 200 - SE5a | Build | 05-Oct-16 00:06 | 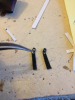 |
| Views : 621 |
|
| Skyediamonds1985 | Guillows Series 200 - SE5a | Build | 05-Oct-16 00:05 | 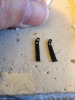 |
| Views : 612 |
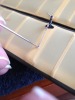
| In my last posting, I believe I mentioned I'll be working on the tail feathers. Here, I am fabricating the control horns. I thought I would give it a bit of "bling" by adding eyeball-straining tiny brass colored beads as bushing. I purposely had my thumb in the picture for scale. Notice the itsy bitsy tiny bead. Ouch! |
| Skyediamonds1985 | Guillows Series 200 - SE5a | Build | 11-Sep-16 21:47 | 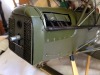 |
| Views : 800 |
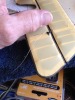
| End result. The cap was a small circular piece of brass that was punched out and glued on top of a small ring to give it depth. Not bad, eh? |
| Skyediamonds1985 | Guillows Series 200 - SE5a | Build | 11-Sep-16 21:44 | 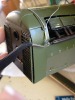 |
| Views : 734 |
| The Vintage Aviator revealed that only on the left side was the turnbuckle. Like the small turnbuckles used in the cockpit area, I cut small sections out of .006" brass tubing and used small really tiny beads. To thread them back over themselves was a challenge. |