| Hangar |
Aircraft |
Category |
Date |
Preview |
| Skyediamonds1985 | Guillows Series 200 - SE5a | Build | 10-Sep-16 13:31 | 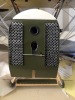 |
| Views : 700 |
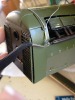
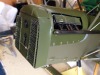
| All the louvers are glued in place along with the small "adjusting" rod and, if you look closely, can see a very fine wire wrapped around the wheel. Sorry about not having the louvers adjustable. It actually occurred to me to try making them adjustable, but reality hit me. I had to keep in mind, "This is only a small stick-n-tissue model." I'm currently having some problems with my ol' laptap. I've taken additional pictures, but can't seem to get them resized into my folder for future submission to this site. I'll keep trying. I sincerely thank everyone for their inputs. I've posted my response in my last post on the 6th. You guys are great. |
| Skyediamonds1985 | Guillows Series 200 - SE5a | Build | 04-Sep-16 17:51 | 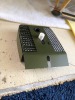 |
| Views : 725 |
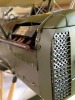
| However, when viewed from an angle, the louvers are very prominent. I could've arranged the louvers to cant downward to visually bring them out. Since this model will be given to my daughter, I have no idea where she'll be displaying it. So, decided a neutral position would be best. |
| Skyediamonds1985 | Guillows Series 200 - SE5a | Build | 04-Sep-16 17:49 | 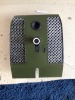 |
| Views : 716 |
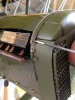
| Finished painting and glued in place the left side. I purposely took this picture straight-on to show how the louvers seemingly disappeared. |
| Skyediamonds1985 | Guillows Series 200 - SE5a | Build | 04-Sep-16 17:48 | 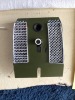 |
| Views : 694 |
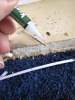
| Not glued yet. Will paint first. |
| Skyediamonds1985 | Guillows Series 200 - SE5a | Build | 04-Sep-16 17:47 | 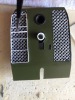 |
| Views : 704 |
| Each louver was placed evenly within the space provided by the previous ones. |
| Skyediamonds1985 | Guillows Series 200 - SE5a | Build | 04-Sep-16 17:45 | 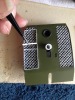 |
| Views : 604 |
| In effort to maintain even distribution of the louvers, I simply filled in the spaces from the middle outwiard |