| Hangar |
Aircraft |
Category |
Date |
Preview |
| Skyediamonds1985 | Guillows Series 200 - SE5a | Build | 02-Jan-17 19:09 | 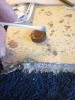 |
| Views : 1077 |
| I used water colors instead of artist's oils or other paints to avoid any reaction with the copper paint. When the wash mixture is dried, I used a damp Q-tip to wipe off the excess, leaving the dark mixture of black and brown deep within the small crevices and cracks to help give the cartridge some depth |
| Skyediamonds1985 | Guillows Series 200 - SE5a | Build | 02-Jan-17 19:06 | 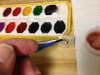 |
| Views : 938 |
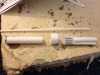
| used water colors heavily diluted with water to about 10-1. This will form what is called a "wash." I applied this wash over the whole cartridge allowing the thinned water/paint mixture to flow through all of the crevices and cracks via capillary action |
| Skyediamonds1985 | Guillows Series 200 - SE5a | Build | 02-Jan-17 19:01 | 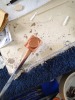 |
| Views : 845 |
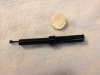
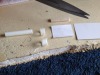
| The "cartridge" was then sprayed from a rattle can of copper |
| Skyediamonds1985 | Guillows Series 200 - SE5a | Build | 02-Jan-17 19:00 | 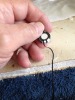 |
| Views : 836 |
| Almost finished |
| Skyediamonds1985 | Guillows Series 200 - SE5a | Build | 02-Jan-17 18:59 |  |
| Views : 841 |
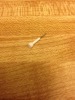
| I added a small circular piece of plastic on top. Then cut very thin strips from black electrical tape. This tape is very flexible. I added each thin strip to the opposite sides to help get a balanced look |
| Skyediamonds1985 | Guillows Series 200 - SE5a | Build | 02-Jan-17 18:57 | 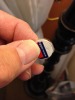 |
| Views : 823 |
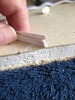
| Just like with the body of the machine gun, I used thin plastic. In this case, its wrapped around the balsa. This will save me lots of sanding, filling, priming and more sanding. |