| Hangar |
Aircraft |
Category |
Date |
Preview |
| Skyediamonds1985 | Guillows Series 400 - P-51 Mustang | Build | 08-Jun-18 21:02 | 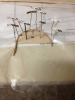 |
| Views : 955 |
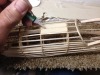
| The plans and the whole frame calls for this piece to be installed. Solution? Laminated strips to the exact same shape as the former. Now, you're probably going to say "Yeah, but because the strips are laminated on the outside circumference of the part, that'll make the final result bigger than the original. Hope you kept in mind my previous posts, that the outline of the fuselage on Guillow's fuselage is slightly more slim than the true outline as compared to the 3-views. Sooo, This should (hopefully) work out with the planking an all..... |
| Skyediamonds1985 | Guillows Series 400 - P-51 Mustang | Build | 08-Jun-18 20:58 | 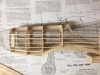 |
| Views : 1041 |
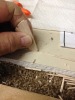
| Here's a good side view of the same part on top of the plans. |
| Skyediamonds1985 | Guillows Series 400 - P-51 Mustang | Build | 08-Jun-18 20:57 | 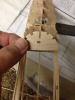 |
| Views : 941 |
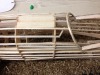
| B-8 is the former that is used to help shape the fuselage around the front windshield and often mistook for the instrument panel. |
| Skyediamonds1985 | Guillows Series 400 - P-51 Mustang | Reference | 08-Jun-18 20:55 | 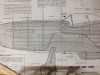 |
| Views : 975 |
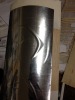
| A close up of the cockpit area shows the coaming around the front windshield to be at an angle. This is where a lot of modelers make a mistake and "assume" this also doubles as the instrument panel. The instrument panel is more vertical and its also located i"inside" or under the coaming. |
| Skyediamonds1985 | Guillows Series 400 - P-51 Mustang | Build | 07-Jun-18 01:05 | 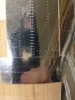 |
| Views : 929 |
| Hey, not too bad, eh? I tried a combination of small panels, butt panels, overlapping panels, single and double rivet patterns. All came out really nice. Total application time for all of the small section panels and rivets, about 15 minutes. |
| Skyediamonds1985 | Guillows Series 400 - P-51 Mustang | Build | 07-Jun-18 01:03 | 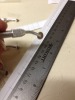 |
| Views : 904 |
| This time I purchased a set of "pounce wheels" from MicroMark to be used to reproduce rivets on the backside for the rivet patterns to be seen on the front side. I only needed to run down the pounce wheel along a straight edge. No mind-numbing tapping of the hammer over tens of thousands of faux rivets. |