| Build Thread, Page :
[ 1 ] 2 (21 posts, 20 posts per page, 2 pages in total)
|
[ Next > ] |
| Don C, Comment for image # 39984 | 07 Mar 18 11:29 |
| And the fun starts. |
| kudzu, Image # 39984 | 06 Mar 18 18:47 |
Install stringers working on the fill blocks now |
| kudzu, Comment for image # 17521 | 20 Feb 18 18:40 |
| Thank you very much Don C. |
| kudzu, Image # 39910 | 20 Feb 18 18:39 |
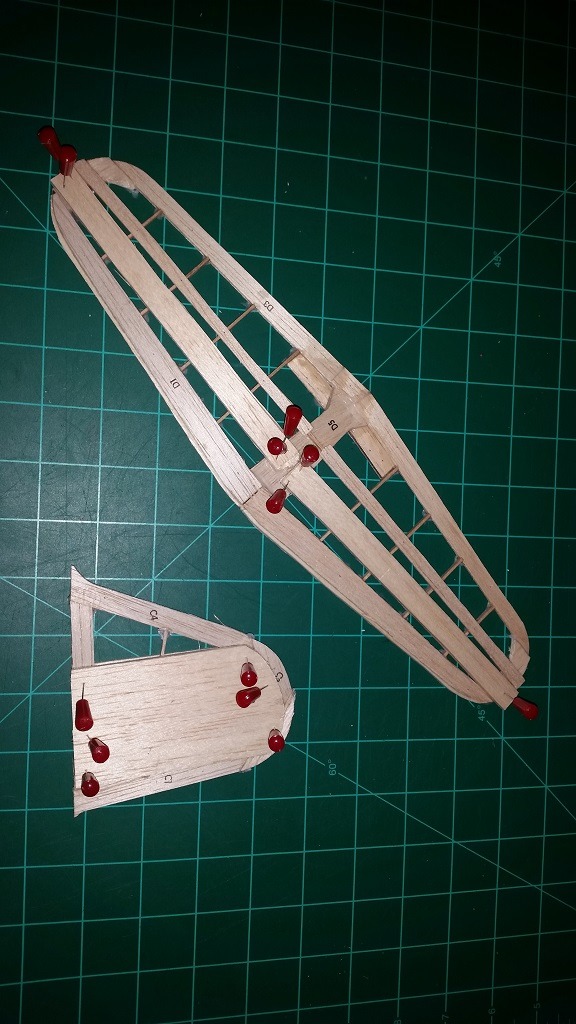
Built the rudder and tail. Added a little meat to aid in the shaping. |
| Don C, Comment for image # 17521 | 13 Feb 18 10:53 |
| Kudzu, I hadn't seen this before, but as Creosotewind said, it's a great explanation. Especially with the picture. A very nice alteration. |
| kudzu, Comment for image # 17521 | 13 Feb 18 05:03 |
| Thanks Creosotewind |
| kudzu, Comment for image # 17455 | 13 Feb 18 05:02 |
| Sorry for the late reply...Thanks BillParker...and I ordered my kit directly from Guillows...and I'm ashamed to say...it was over 8 years ago. the whole kit is probably laser cut now. LOL |
| kudzu, Comment for image # 17371 | 13 Feb 18 04:57 |
| Sorry for the late reply, just got back into the model...harve had it exactly right. |
| kudzu, Image # 39899 | 13 Feb 18 04:53 |
WOW, has it really been 8 years. What can I say, life got in the way. Nothing bad but it did give me some good times and rough times. With some great stories to tell and memories to remember. How surprise I was to come across this kit, still in tacked all the parts still in good shape. So, I believe I will give it another go. And, my apologies for missing the comments on the previous post. I will go back and update them now. |
| harve, Comment for image # 17371 | 28 Nov 10 18:50 |
| I just picked up this kit this weekend. Sheet 'A' is laser cut while the others are die cut. I suspect Guillows is slowly replacing dies with laser cuts as the dies wear out. Can someone confirm this? |
| Creosotewind, Comment for image # 17521 | 18 Nov 10 08:22 |
| Don't apologize for the long descriptions. Helps us all to learn new things. Looking really nice. I need to get this kit. "Honey, Christmas is just around the corner...." |
| lukebozek1, Comment for image # 17371 | 18 Nov 10 08:01 |
| I too am confused, the edges of the formers (the first 4 and the 7th) look like laser burns, but I was unaware that Guillows made a Corsair that was laser cut..... |
| BillParker, Comment for image # 17455 | 01 Oct 10 22:11 |
| He's right. Some of these wing formers are obviously laser cut. Where/when did you buy this kit? |
| scigs30, Comment for image # 17371 | 01 Oct 10 20:09 |
| I am sorry, but what sheets were laser cut? |
| pakasit1812, Comment for image # 17127 | 03 May 10 13:15 |
| Looks like we have something in common but different brand. |
| kudzu, Image # 17698 | 26 Apr 10 07:41 |
Built the right wing the same way I did the left wing. |
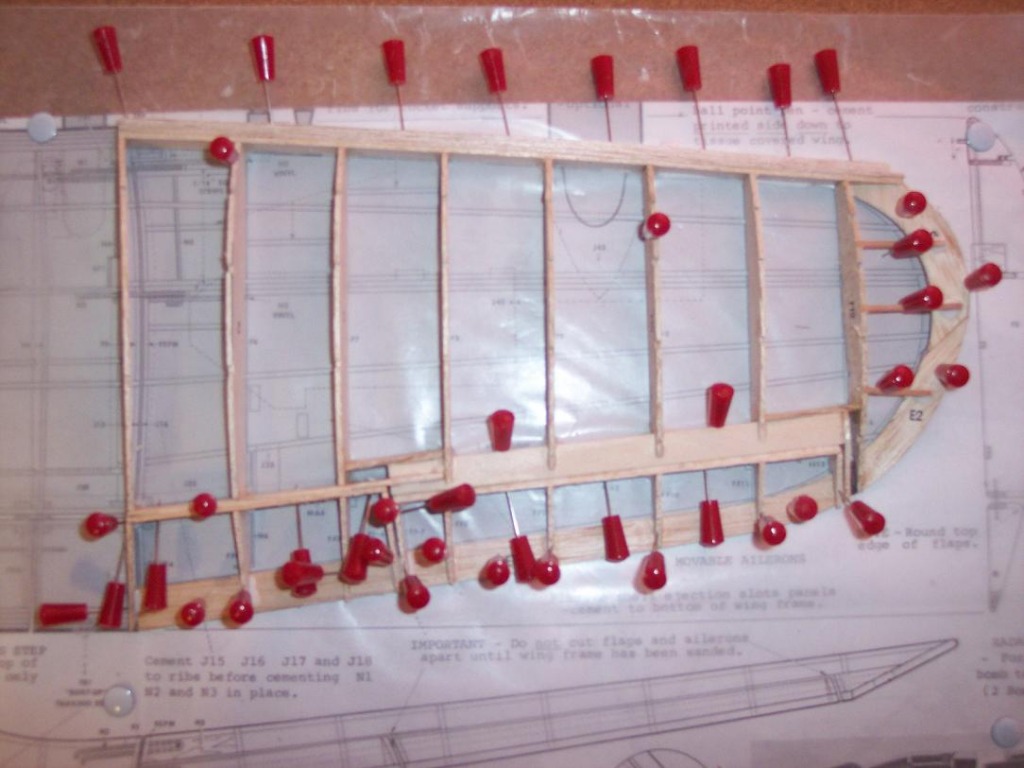
| kudzu, Image # 17521 | 17 Apr 10 05:57 |
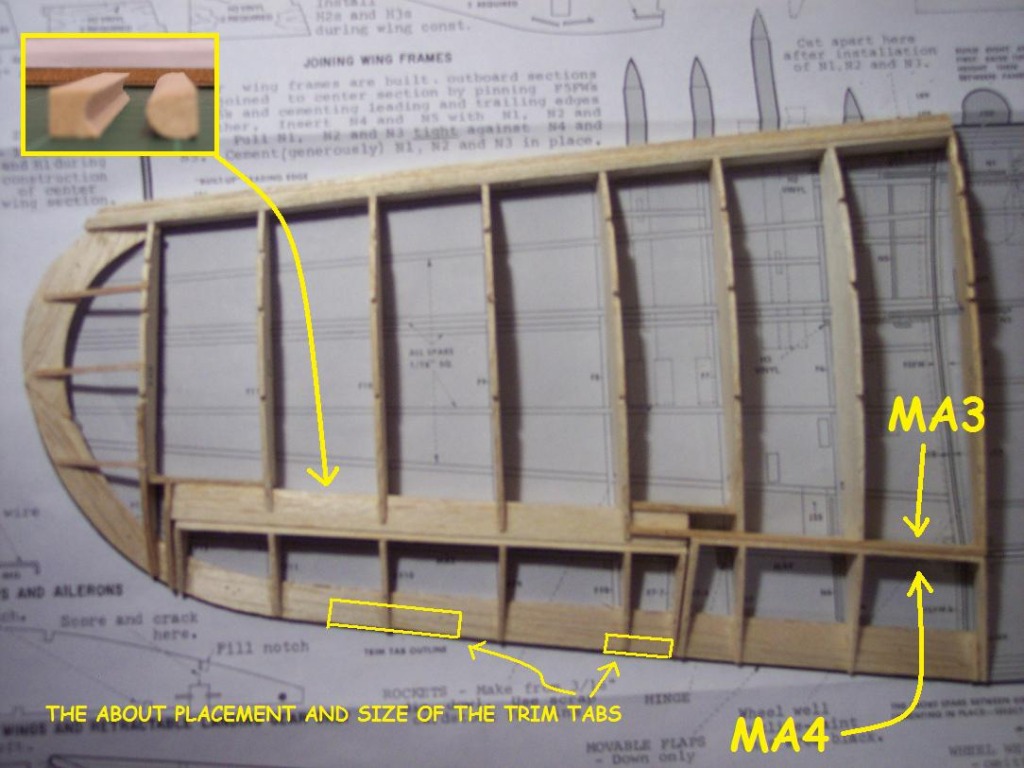
This week I got the left wing framed up kind of to plan. I used a 3/8 square stock balsa to shape a curved movable surface so that I would have a more realistic Aileron seam. I did away with MA4, by aligning the inside curve to the MA4 on plan and built outward from that point. I notched F8, F9, F10, F11, and MA3 to fit over the 3/8 stock. The outside curve became MA2 after fitting and trimming to the same location on the plan layout as MA2. The back third of MA4 was to be the front part of the Flap, however like the center wing it was a little too short. So, I remade MA4 Flap to match MA3. Also added a few supports to the 3/8 stock and the wing tip. The Trim Tabs are very small so I will cut them out and add them at finial shaping. The stringers will be add latter when I dry fit and do the rough shaping. I will start the right wing this week so if any wants more pictures during the build or anything let me know, sorry for this long description. |
| kudzu, Image # 17455 | 11 Apr 10 18:11 |
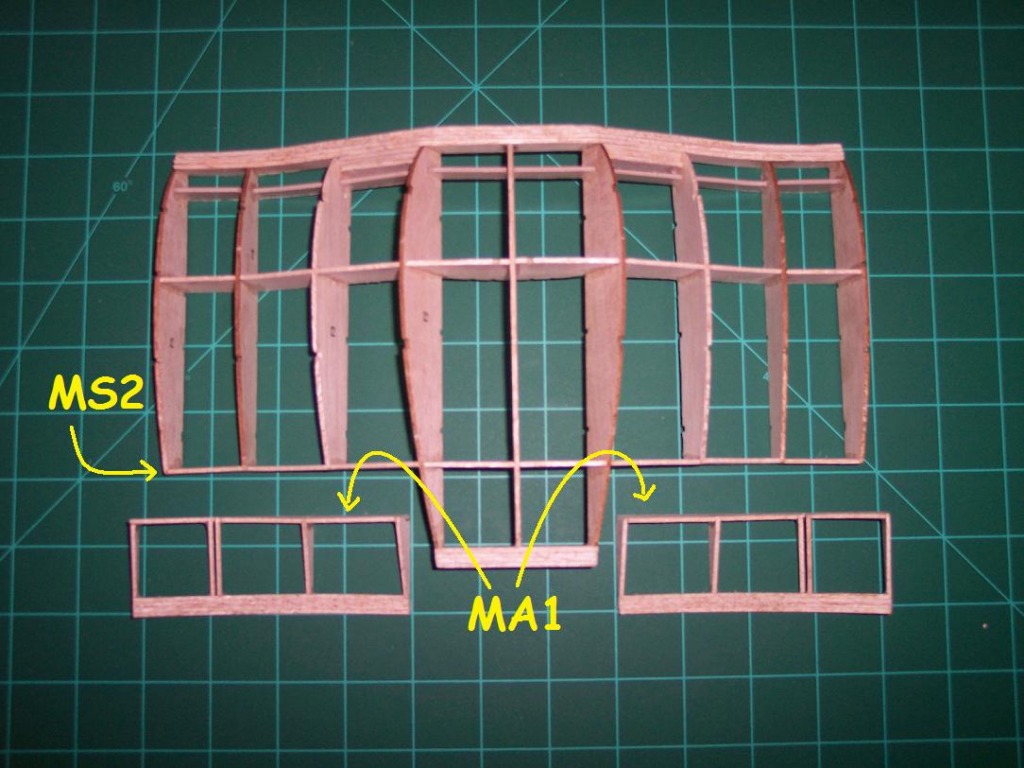
Center wing and flaps framed up almost to plan -- I give a BIG THANKS to Mr. David Duckett and his post dated 2-29-08 he saved me lots of time by not having to learn that on my own --I remade part # MA1 to match the height and shape of part number # MS2 also a remade the flap pieces by making them just a little taller --I still have to do the stringers and some shaping of the leading and trailing edges but I’m going to take another tip I got from one of David’s post and shape them after the build--Sorry I do not remember what post that I got it from David , however thanks to you and all the great builders on here. |
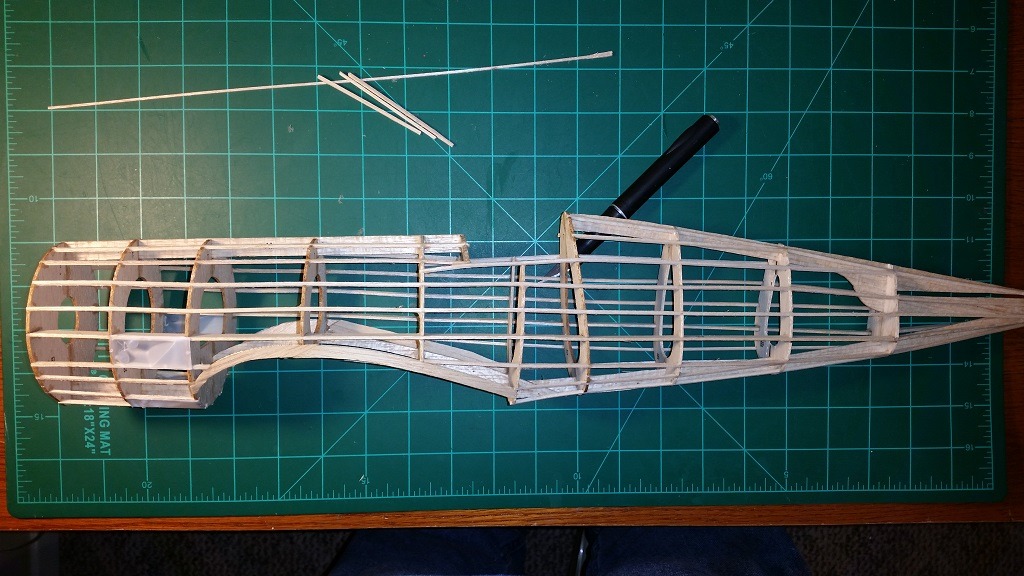
| kudzu, Image # 17371 | 04 Apr 10 17:16 |
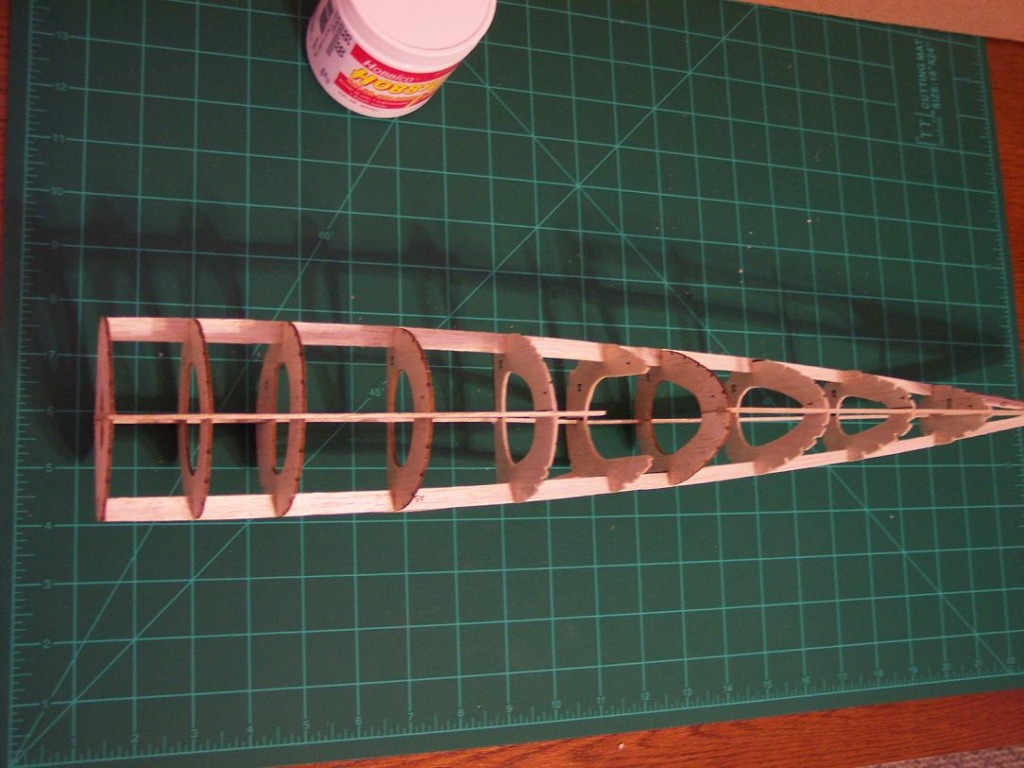
Fuselage framed per plan - stringers to be added later. The sheets marked “A†where laser cut (I think you can see some of those pieces in the photo), the rest where die-cut very nicely, however one sheet there is no hope of saving due to it being die-crushed. All in all very happy with the kit and the wood, first time I ever had any laser cut parts and let me say “I’m loving it!!!!†|
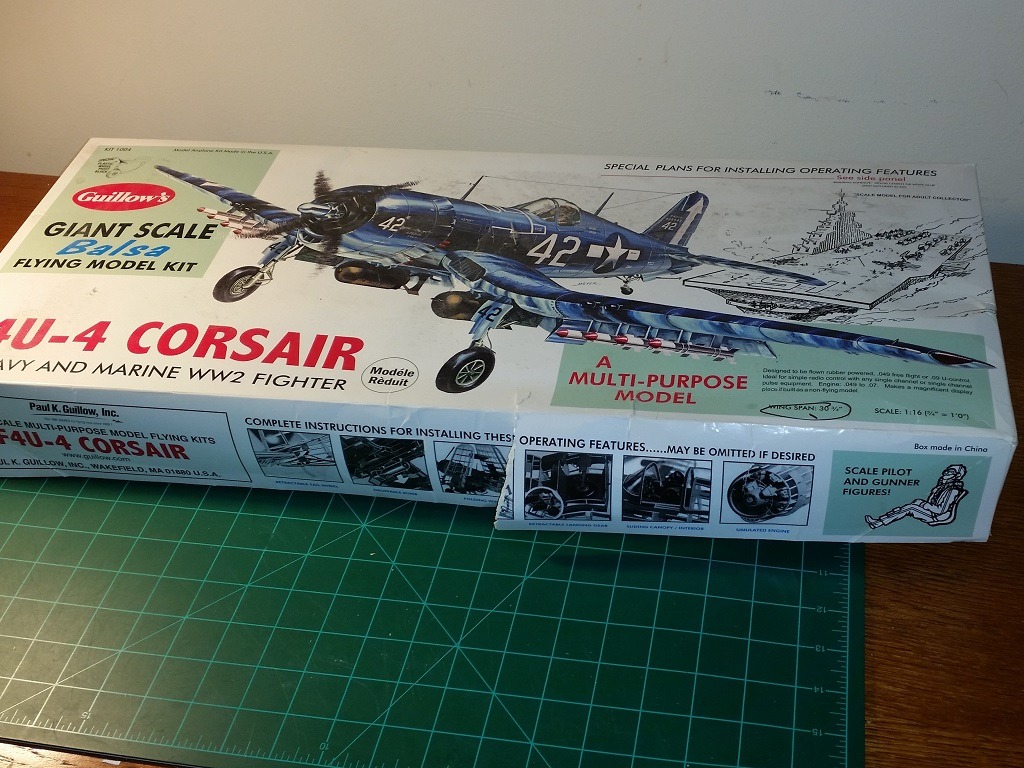
| kudzu, Image # 17267 | 28 Mar 10 14:10 |
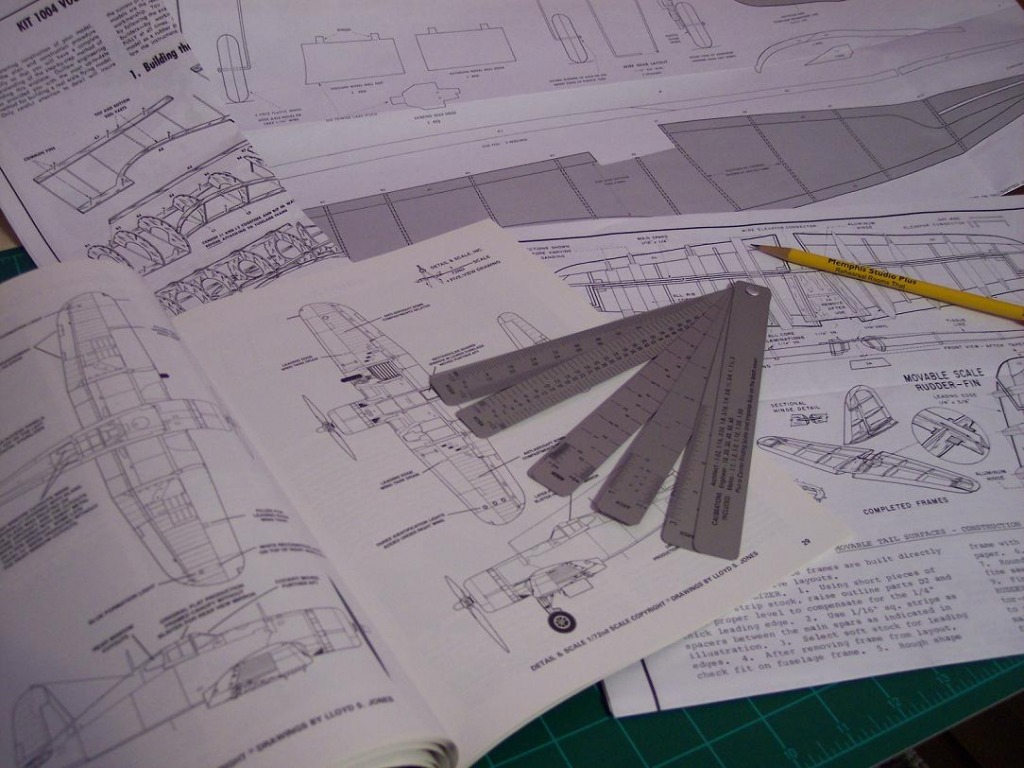
After spending many hours reading about the Corsair in books and on the internet. I have found that MOST versions where upgrades to older models. So in honor of the Johnny Cash song “One Piece at a Time†I’m going to build me a 1942, 43, 44, 45,…..Automobile…..ER….Airplane |
| Build Thread, Page :
[ 1 ] 2 (21 posts, 20 posts per page, 2 pages in total)
|
[ Next > ] |
