| Build Thread, Page :
<< 2 3 4 5 6 [ 7 ] 8 9 10 11 12 >> (570 posts, 20 posts per page, 29 pages in total)
|
[ < Prev ] [ Next > ] |
| Skyediamonds1985, Comment for image # 37765 | 16 Jan 17 12:29 |
| Rayl: I've been studying and reviewing your posts several times and each time I'm learning something new and truly appreciate the quality of workmanship and the extraordinary level of attention to detail. Amazing! It's a few days past, but I'd like to thank you for take the extra time to reveal how you did the engine face plate. Thank you very much. As I'm seeing your posts for rigging: fabricate the brackets, solder the cross pins in the brackets, glue the brackets with pins through the base holes onto the covered surface, then paint the colors of both the surface and different color for the bracket/tiedowns. When covering, did you add the cut outs for the slots to allow for the brackets to come through the covering? Then do you add a touch of a small strip of extra covering to help conceal the base plate of the brackets? They seemed to have disappeared, which is great. Shows you how I've been studying your posts and trying to learn from them. -Skye |
| Skyediamonds1985, Comment for image # 37756 | 16 Jan 17 12:20 |
| Rayl, thank you very much for going out of your way to show me how you achieved the results for the engine face covering. Really helps. My next project will be the Boeing F4B and it too, has an engine face plate. -Sky |
| Skyediamonds1985, Comment for image # 37768 | 15 Jan 17 19:47 |
| I still keep visiting this site. Wonderful sense of humor for us all. |
| Skyediamonds1985, Comment for image # 37765 | 15 Jan 17 19:45 |
| Thanks Rayl for the reply. It's really appreciated. Again, you've done a fantastic job on this model. I can see that you've even taken the time to ensure that the base of N struts match the curve of the wing's airfoil. Beautiful! |
| rayl, Comment for image # 37765 | 15 Jan 17 14:58 |
| Sky; The N struts have brass wire embedded in them and matching oversized holes drilled into blocks under the covering. Slow-set gel cyano was used to anchor them to the wings. The rigging was not painted yet. The stretchy stuff was supposed to be black, but the second roll that I used was rather translucent. I will use a black sharpie to cure that problem. |
| Skyediamonds1985, Comment for image # 37765 | 15 Jan 17 13:08 |
| Meant to comment also that you did a beautiful job on the N struts. Were they glued on? Did you have any wires inside the struts to help hold them? |
| Skyediamonds1985, Comment for image # 37765 | 15 Jan 17 12:57 |
| Wondered what you used for rigging. Very nicely done. Loved the doubled flying wires. That was a "bone of contention" for me with the S.E. 5. Tighten one, and the other part of the double rigging goes slack. Did you paint the rigging? Silver marker? |
| Skyediamonds1985, Comment for image # 37768 | 13 Jan 17 22:57 |
| lOl... Now that's funny. |
| Skyediamonds1985, Comment for image # 37763 | 13 Jan 17 22:54 |
| Rayl, beautiful work. Really looks great! Words escape me.... It's incredible. |
| rayl, Image # 37768 | 13 Jan 17 14:53 |
How is your Boiler installation coming along John? |
| hjlittman, Comment for image # 37753 | 13 Jan 17 14:51 |
| Have to admire this. It is coming along very, very nicely. |
| julinick, Comment for image # 37763 | 13 Jan 17 11:01 |
| This is really top notch craftsmanship!!! |
| rgood, Comment for image # 37763 | 12 Jan 17 23:42 |
| Wonderful work and model Rayl! Love that clean & tidy workplace too. |
| rayl, Image # 37765 | 12 Jan 17 16:08 |
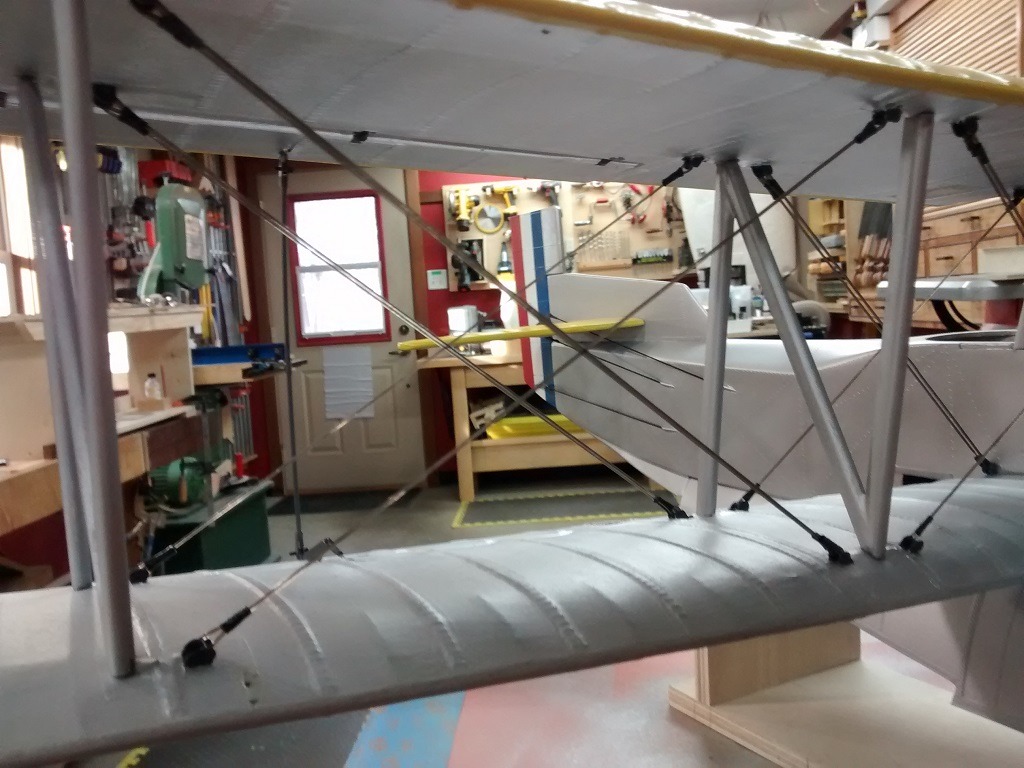
Another shot. Used the 1 mm "Stretchy" stuff. |
| rayl, Image # 37763 | 12 Jan 17 16:07 |
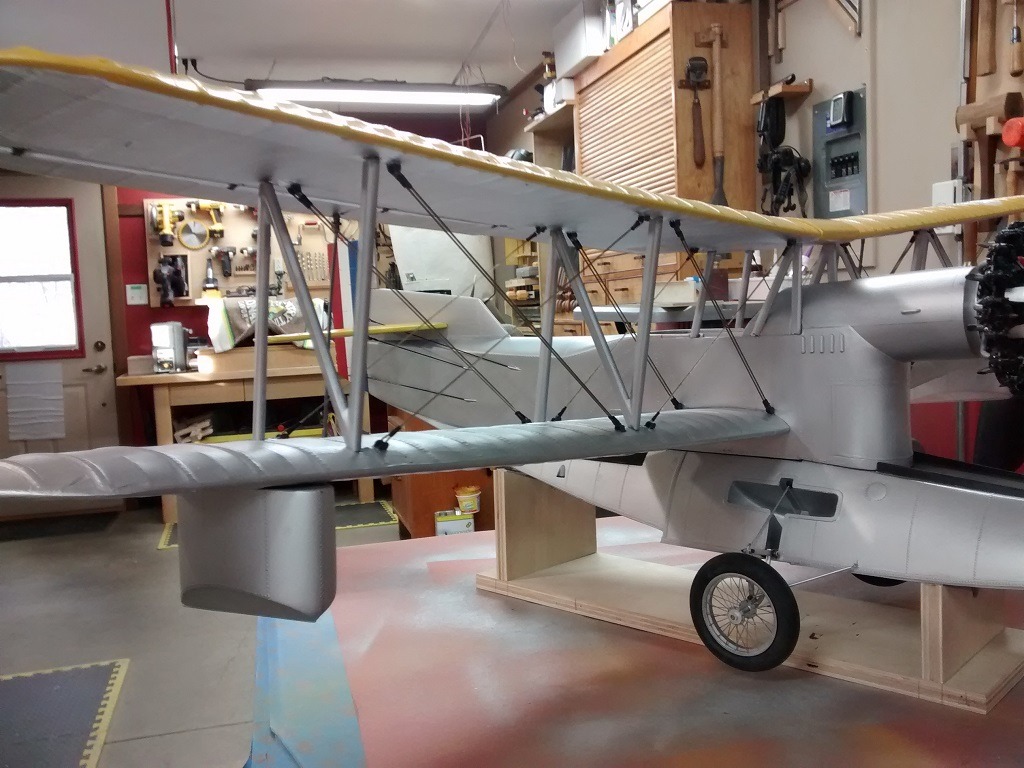
THANK GAWD!!!! Rigging is done, would have been less painful to have a root canal without Novocaine. Also got the floats attached and the Aileron struts installed. |
| LASTWOODSMAN, Comment for image # 37753 | 12 Jan 17 10:55 |
| Real planes had round engines and two wings ... |
| rayl, Comment for image # 37753 | 12 Jan 17 09:47 |
| Again, Thanks for all of your kind comments. I don't know about the Museum Quality but; Thank You Poppy. |
| biplane guy, Comment for image # 37755 | 12 Jan 17 08:06 |
| Very well executed, rayl. |
| rayl, Image # 37757 | 11 Jan 17 10:12 |
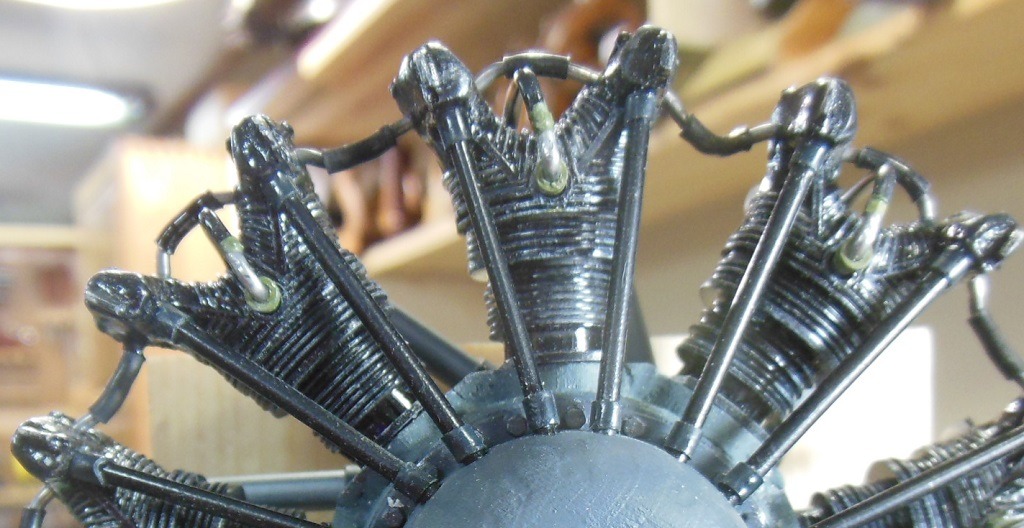
Sky: I presume that you were asking about the inter-cylinder oil drain lines(?). These wer made from 0.050 soft solder and shrink-tubing. They were "manipulated" to fit into pre-drilled holes in the cylinder heads. |
| rayl, Image # 37756 | 11 Jan 17 10:09 |
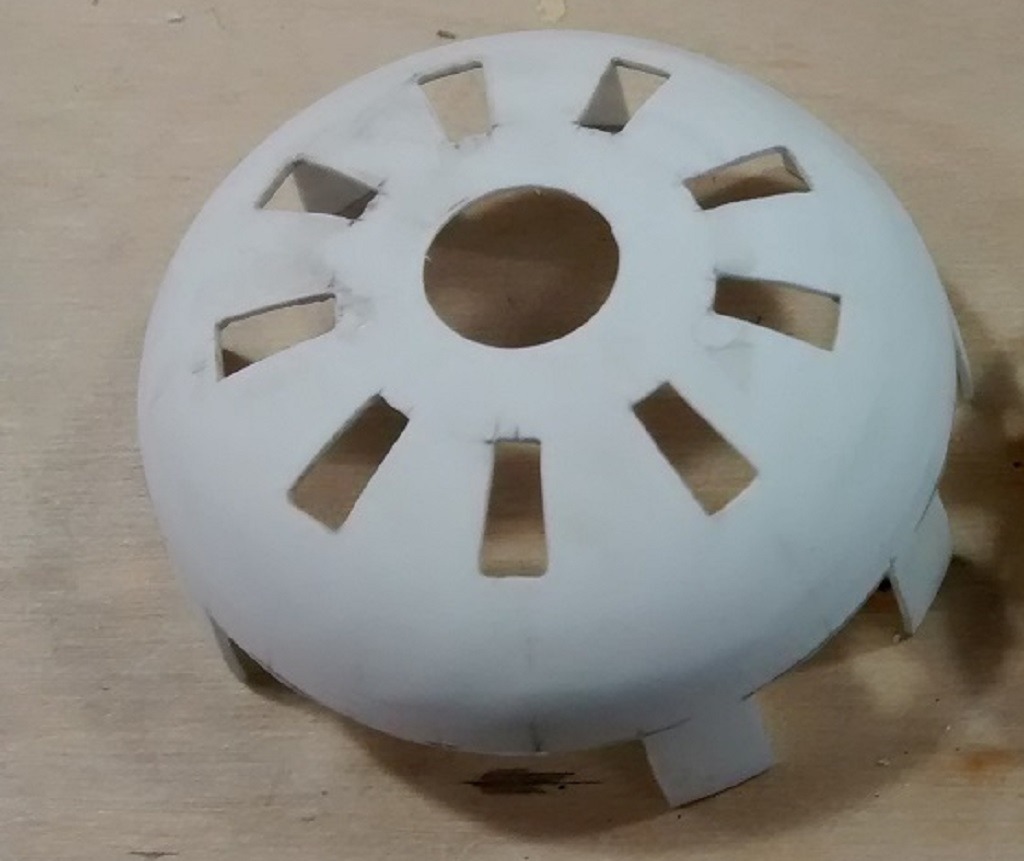
Sky; the finished product. |
| Build Thread, Page :
<< 2 3 4 5 6 [ 7 ] 8 9 10 11 12 >> (570 posts, 20 posts per page, 29 pages in total)
|
[ < Prev ] [ Next > ] |
