| Build Thread, Page :
<< 9 10 11 12 13 [ 14 ] 15 (282 posts, 20 posts per page, 15 pages in total)
|
[ < Prev ] [ Next > ] |
| David Duckett, Image # 39548 | 28 Oct 17 07:54 |

This EC-130 has major modifications to the fuselage which is all for Electronic Counter Measures. |
| David Duckett, Image # 39547 | 28 Oct 17 07:52 |

At the other house, we were right in line with the approach to Tucson International for flights from Las Vegas and points west. Here we are under the approach from the east and the planes are lower. Here's a sample. American Airlines Boeing 737 |
| David Duckett, Image # 39546 | 28 Oct 17 07:45 |

|
| rgood, Comment for image # 36744 | 26 Oct 17 20:01 |
| Looking forward to seeing your progress. |
| rgood, Comment for image # 36744 | 26 Oct 17 20:01 |
| I love this aircraft David - if we were rich I would buy one!
They are thirsty gas-wise though, so maybe not a good idea! |
| David Duckett, Image # 39544 | 26 Oct 17 16:18 |
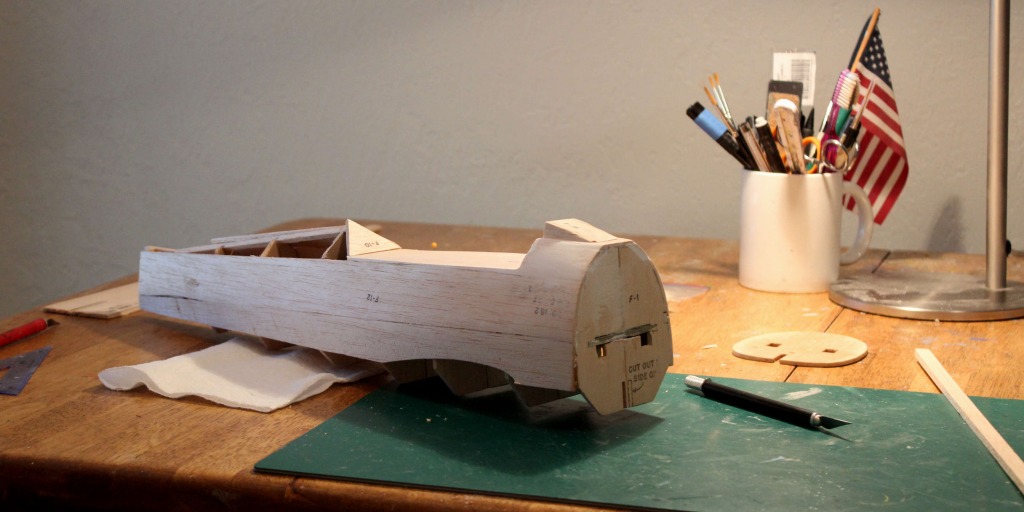
I'm waiting for CA accelerant before continuing with the fuselage. The wing is built next and attached to the fuselage. |
| David Duckett, Image # 39543 | 26 Oct 17 16:16 |
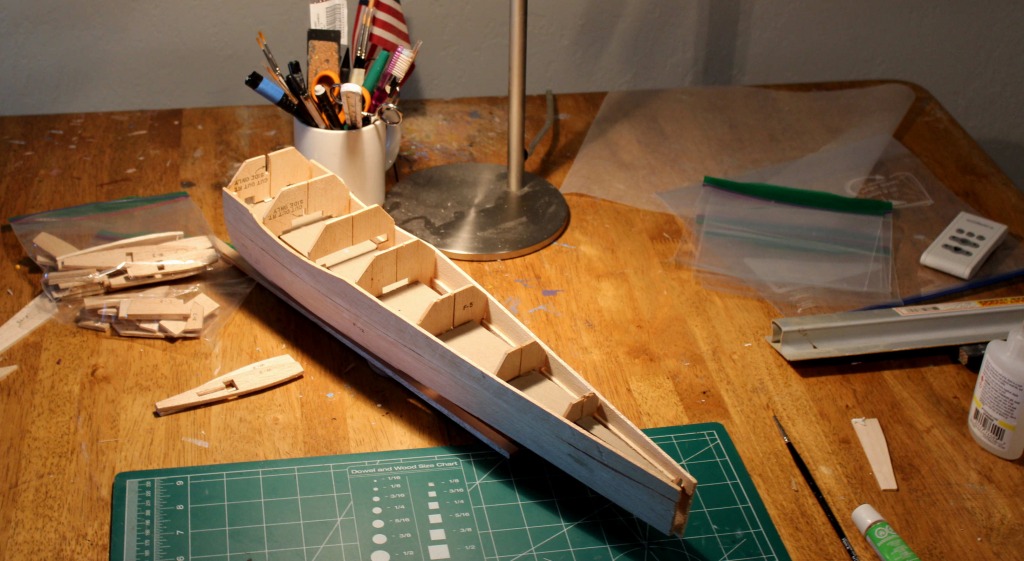
The formers are glued to a stiff paper jig, side rails are glued to the formers, and wood panels are then glued on. It is all 1/8" construction. The paper jig is supposed to be removed to allow control line installation. |
| David Duckett, Image # 39542 | 26 Oct 17 16:11 |
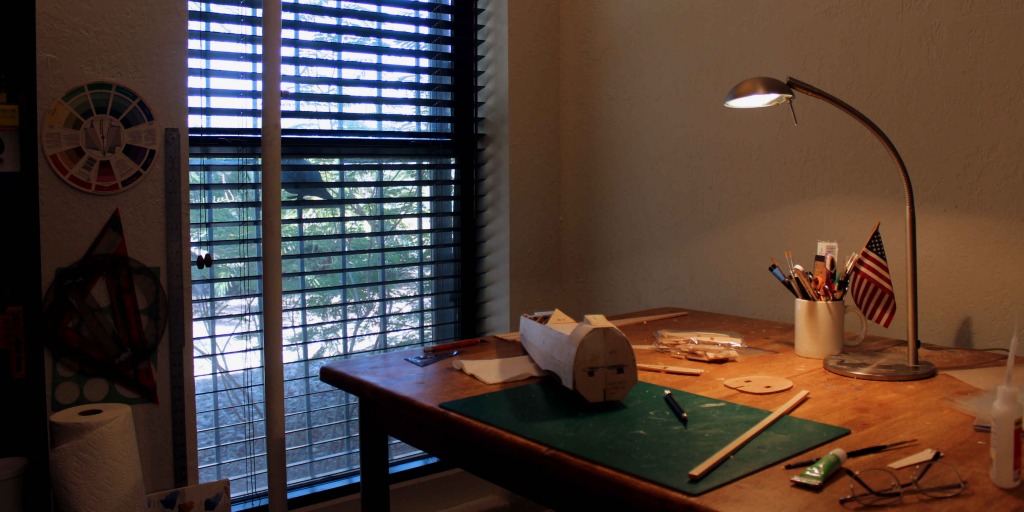
The modeling muse won... |
| rgood, Comment for image # 37031 | 26 Oct 16 14:32 |
| Love the T28! |
| David Duckett, Comment for image # 37032 | 26 Oct 16 05:26 |
| At Marana Regional |
| jgood, Comment for image # 36746 | 17 Sep 16 11:02 |
| Interesting discussion! |
| David Duckett, Comment for image # 36746 | 16 Sep 16 11:23 |
| Thanks, Ray. After looking up mandrel, I have an idea of what you're saying. |
| rayl, Comment for image # 36746 | 16 Sep 16 10:34 |
| David, I have been thinking about your problem here since you posted it. The issue is that the metal has been stretched when it was formed. What I would try is: Get yourself a piece of large hardwood dowel, the bigger the better, as long as it fits into your cowling. Round the end off a little bit to prevent the sharp edge from distorting the cowl. Get yourself a SMALL hammer, preferably with a nylon face, (Harbor Freight has on for about $4.00). Using the dowel as a horizontal mandrel, best if it is solidly clamped in something, start tapping the ridges flat and work away around the cowl. Go easy with the process and I think that you can fix the problem. My $.02 worth anyway. I don't think that you would be happy with a Bondo application on this thing. |
| David Duckett, Comment for image # 36746 | 16 Sep 16 03:25 |
| I think you're missing the point. I know what the indentations are for and have a fairly good idea how to fabricate the exhausts ( see my Sea Fury, Bearcats,109, and Skyraider builds). The problem is those three rings around the perimeter. They are ridges left over from the process which formed the cowl and are not part of the design. There are metal cowling on the Berkeley Savage in my hanger and they were perfectly smooth, albeit too small. There's probably some Bondo in my future,.....and someone who knows how to use it. |
| Skyediamonds1985, Comment for image # 36746 | 15 Sep 16 22:31 |
| The forward portion of the small intakes are for the oil coolers... my guess. If everyone is discussing about the circular rings around the cowl, then there might be a good reason particular to that variant. -Sky |
| Skyediamonds1985, Comment for image # 36746 | 15 Sep 16 22:26 |
| My guess is that the indentations are for the exhaust stacks that were the trademarks of the T-28 series. These same exhaust stacks were responsible for that distinctive "barking" noise so often associated with the Trojan trainers. Having said that, this is just an observation or suggestion, but rather than to smooth out the ridges, to actually make the most of it by adding extremely short simulated stacks to butt up against the forward portion of of the "dents" and then follow up by adding some Evergreen "tin roof" patterned plastic for the remainder of the "dent." I would've suggested "corrugated" but the company also makes "tin roof" patterns of varying numbers of "ribs" per square inch and to me, anyway, more accurately representative of the reason for the shaped cowl. The exhaust stacks are very short, almost hidden, unless one is to look at the cowl from behind. If the ridges are too shallow for the whole piece of Evergreen sheet, then perhaps some thin strips, like those of Don C's aileron on his DeHavilland Beaver, only more close together, might be a better alternative. - Sky |
| David Duckett, Comment for image # 36746 | 14 Sep 16 05:11 |
| Jim, that's all Greek except the cowl is indeed rigid. |
| meku, Comment for image # 36746 | 14 Sep 16 01:18 |
| Difficult case. |
| Creosotewind, Comment for image # 36746 | 13 Sep 16 17:41 |
| This does have a real pretty shape to it. You might want a few different shaped mandrills for inside the cowling when you do get around to working the aluminum. One or two ball bearings for the front, and maybe a short length of brass tubing for the rear. That would allow you to apply just a bit of pressure as you work. But I do know that the pressed aluminum does have a bit of rigidity to it. |
| lukebozek1, Comment for image # 36746 | 13 Sep 16 08:03 |
| Try the Dremel with some jeweler's rouge. |
| Build Thread, Page :
<< 9 10 11 12 13 [ 14 ] 15 (282 posts, 20 posts per page, 15 pages in total)
|
[ < Prev ] [ Next > ] |

