|
|
| Hangar |
Aircraft |
Category |
Date |
Preview |
| David Duckett | Dave Diels Engineering, Inc Kit #29 Hawker Typhoon Mk 1B | Build | 10-Apr-15 14:33 | 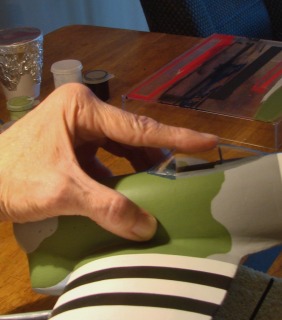 | | Views : 1005 | | Gently pressing down on the canopy will force the sides into contact with the fuselage. Put a very small drop on each side, about where my finger is, to secure. Finally put a small drop at the rear. Once securely in place, I used the pin to apply VERY small amounts of CA around the eges to seal. I filled a couple of small gaps with white glue. |
| David Duckett | Dave Diels Engineering, Inc Kit #29 Hawker Typhoon Mk 1B | Build | 10-Apr-15 14:29 | 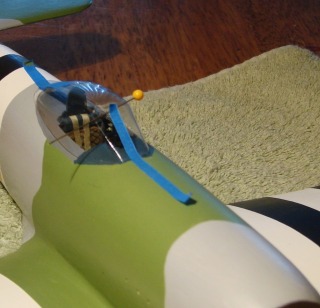 | | Views : 895 | | See the pin? Use a straight pin to put a TINY amount of medium CA at the very edge of the front. While true that CA will fog plastic, used in very small amounts it won't show. VERY SMALL AMOUNTS! |
|


