| Build Thread, Page :
<< 24 25 26 27 28 29 30 31 32 33 34 (695 posts, 20 posts per page, 35 pages in total)
|
[ < Prev ] [ Next > ] |
| bsadonkill, Comment for image # 43389 | 27 Aug 21 19:47 |
| Very nice smooth finish. |
| bobgood, Comment for image # 43389 | 27 Aug 21 18:18 |
| Thanks Ed - I pre-doped the wing frame, then applied the material in very small steps, working from the root out the tip. Fingers covered in dope at finish! I then gave the un-doped panels a coat of 50/50 nitrate dope and thinners. I am not sure though, now, what I can apply to get my desired colour for the finished coats. Hmmmm! |
| edtherenderman, Comment for image # 43389 | 27 Aug 21 16:54 |
| Nice covering. Do you apply this like tissue? I used a polyester heat activated covering like monokote on several R/C biplanes, and for the sails of a R/C sailboat I scratch built. Never tried fabric covering with dope before. |
| bobgood, Comment for image # 43389 | 27 Aug 21 14:56 |
| I tried a silk fabric firstly - but it failed to shrink when doped - it looked a hopeless mess. Had to give that up as a bad job! |
| bobgood, Comment for image # 43389 | 27 Aug 21 14:43 |
| I will cover the upper surface in the morning - let this side completely dry overnight. |
| bobgood, Image # 43389 | 27 Aug 21 14:41 |
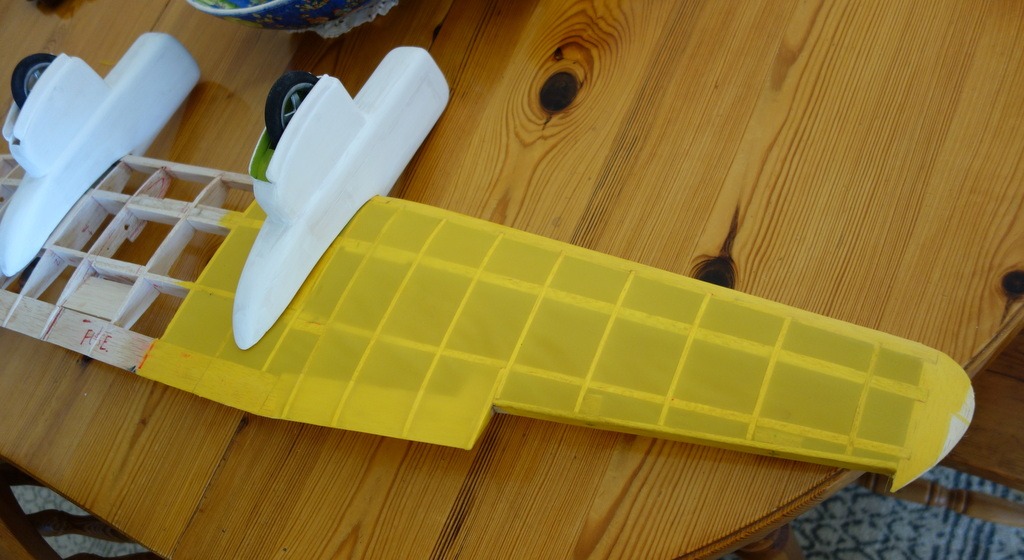
First lower surface now covered in the polyester material. It is strong and dried out wrinkle-free. Took a while but pleased that I can use this covering material - it has been in my model store for about30 years!!!! |
| bobgood, Image # 43388 | 26 Aug 21 20:21 |

Back to the Q6 after weeks of kitchen up-grade work. |
| biplane guy, Comment for image # 43355 | 17 Aug 21 20:08 |
| Wow, Bob, beautiful build. I understand your sense of satisfaction with a scratch-built project. I have a love-hate relationship with the WACO. I had to carve my first prop ever for the WACO after the one I was planning to use from a Guillows PT-17 kit warped. I foolishly used a heat gun to try to straighten the plastic and totally screwed it up. The basswood was kinda stringy when cut but after sanding and three coats of polyurethane it finally took a decent paint job. Can't wait to see your progress on the Q6. |
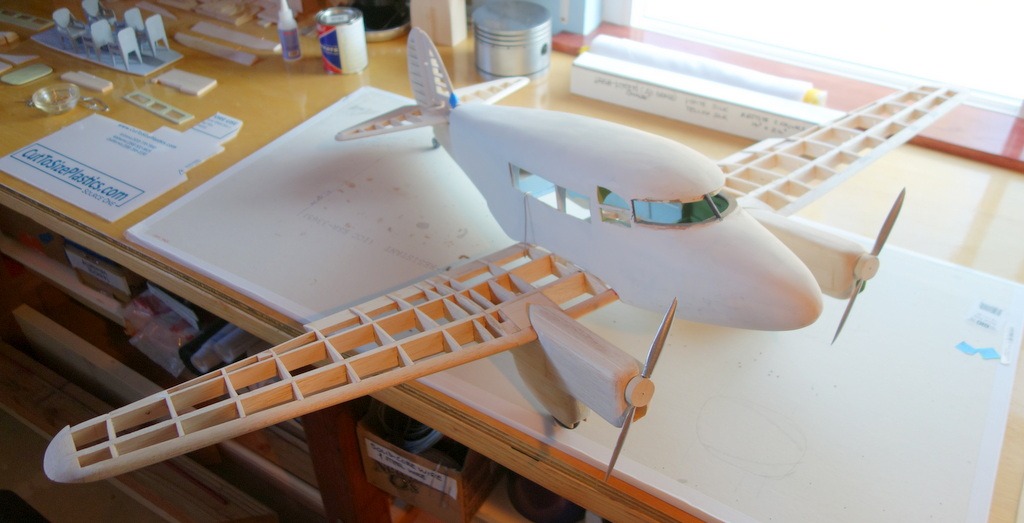
| bobgood, Comment for image # 43355 | 17 Aug 21 16:40 |
| It will not be "museum quality" when finished, but every piece has been cut out by my hands, and built to my own drawings and plans. So quite satisfying....
The props were carved from 5/16" thick Bass wood - very fiddly and delicate stuff..... |
| Dfell, Comment for image # 43355 | 17 Aug 21 05:38 |
| Looking really good. |
| jgood, Comment for image # 43355 | 16 Aug 21 23:50 |
| Nice to see her on the wheels! |
| bobgood, Image # 43355 | 16 Aug 21 20:26 |
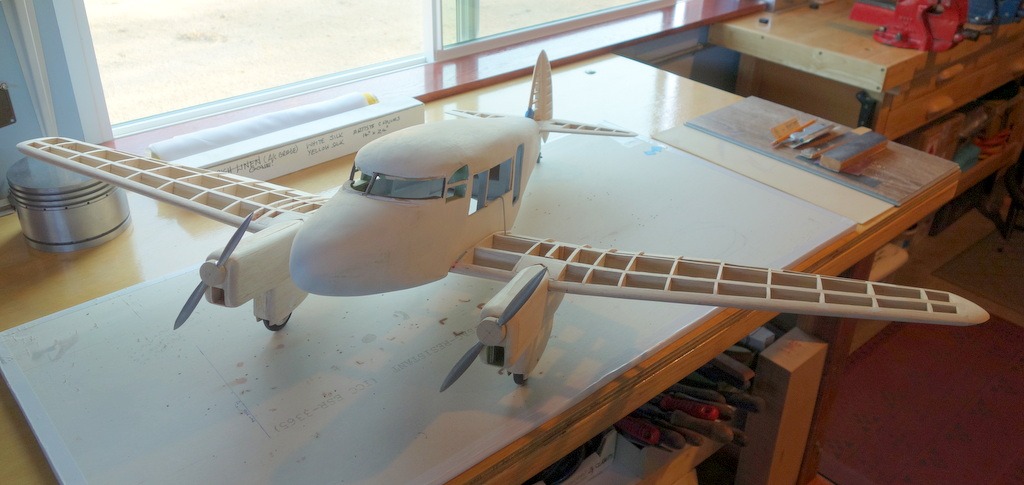
A long way to go still.... but some progress today ( despite the on-going kitchen saga! |
| bobgood, Image # 43354 | 16 Aug 21 20:23 |
On her own wheels for first time! |
| edbecky, Comment for image # 43352 | 16 Aug 21 09:16 |
| Very well done. |
| edtherenderman, Comment for image # 43351 | 16 Aug 21 08:01 |
| Agreed! I love the details and those chairs really make it! |
| heywooood, Comment for image # 43352 | 16 Aug 21 05:39 |
| Your project done your way - that’s the ticket.
She looks amazing Bob - I look forward to every update |
| heywooood, Comment for image # 43351 | 16 Aug 21 05:36 |
| Agree 100% terrific effort and smooooooth looking results at this point.
Inspiring work ! |
| jgood, Comment for image # 43351 | 15 Aug 21 21:18 |
| The bits and bobs look great, Dad! |
| bobgood, Comment for image # 43352 | 15 Aug 21 17:46 |
| ....you know, I'm not sure it was covered in fabric! Hard to tell from the available photo's. Mine will have silk covered flying surfaces. Right or wrong! |
| bobgood, Comment for image # 43352 | 15 Aug 21 09:25 |
| Yes it did.... |
| Build Thread, Page :
<< 24 25 26 27 28 29 30 31 32 33 34 (695 posts, 20 posts per page, 35 pages in total)
|
[ < Prev ] [ Next > ] |
