| Hangar |
Aircraft |
Category |
Date |
Preview |
| pfinn | Scratch Built Holiday | Build | 16-Oct-19 02:35 |  | | Views : 317 | | After drawing up the a rough wing plan in CAD (I actually used a proven airfoil for this project!) i printed out the rib profiles and tack glued them to some sheet. I used a Balsa stripper to keep the cuts as square as possible. Using a Scalpel blade which is thinner than an Exacto made this easier. |
| pfinn | Scratch Built Holiday | Parked | 16-Oct-19 02:23 |  | | Views : 277 | | Hello. It's been a while! I'd like to add a model to the list. "Scratchbuilt RØMØ Own design". This will be a small Slope Glider with Pivot wings that I can travel with on my journeys throughout Europe. Starting with a trip to Denmark in a couple weeks to the Island of... RØMØ. Hence the name..haha. I have moved to Germany and finally have some time to build. Yay!! |
| bsadonkill | Comet Kit #3302 - Cessna C-37 | Flying | 14-Oct-19 10:18 |  | | Views : 1035 | | Landing |
| bsadonkill | Comet Kit #3302 - Cessna C-37 | Flying | 14-Oct-19 10:18 |  | | Views : 940 | | Calm winds |
| bsadonkill | Comet Kit #3302 - Cessna C-37 | Flying | 14-Oct-19 10:17 |  | | Views : 951 | |
| bsadonkill | Comet Kit #3302 - Cessna C-37 | Flying | 14-Oct-19 10:16 |  | | Views : 934 | | Early morning |
|
| Hangar |
Aircraft |
Category |
Date |
Preview |
| bsadonkill | Comet Kit #3302 - Cessna C-37 | Parked | 14-Oct-19 10:16 |  | | Views : 1012 | | Last Flight |
| edtherenderman | West Wings Hawker Tempest | Build | 14-Oct-19 09:04 |  | | Views : 396 | |
| edtherenderman | West Wings Hawker Tempest | Build | 14-Oct-19 09:04 |  | | Views : 440 | |
| edtherenderman | West Wings Hawker Tempest | Build | 14-Oct-19 09:03 |  | | Views : 392 | |
| edtherenderman | West Wings Hawker Tempest | Build | 14-Oct-19 09:03 |  | | Views : 354 | |
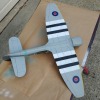
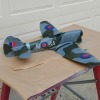
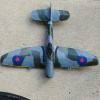
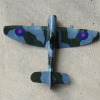
| edtherenderman | West Wings Hawker Tempest | Build | 14-Oct-19 09:02 |  | | Views : 392 | | I haven’t posted much recently on the Tempest. Nice summer weather in the Pacific NW has kept me outside most of the summer, but now that things are turning wet again, back to inside hobbies! Since I last posted, I finished painting the Identification Stipes, decals, and panel lines. The decals were a pain. I tried to use the decals in the kit but they were just too then and old. So I created my own decals in PhotoShop and printed them out on waterslide inkjet paper. Much better results! When I put decals down, I spray the surface with gloss to give it a good surface to adhere to, then overspray with flat. I tried using Tamiya clear for the overspray and it really messed up the finish. Not sure if it reacted with the paint below, or something else, but it was a mess. So reading how many of you finish your models, I decided to overspray the top and sides (left the bottom flat) with a Krylon Satin finish. It’s an interesting effect. I’m not sure I like it as much on a stick and tissue model because it accentuates all he stringers. But I can see this being really good looking on a model that have been filled in. I’m going to leave it like this for now. Panel lines were done with black or gray colored felt tip drafting pens. Usually 0.3 or 0.1. I created templates from paper for the Gear doors, elevator, ailerons, rudder and flaps so that they are consistent. Next is to finish the propeller (I’ll post that journey soon!), attaching the canopy, and weathering. |
|

