| Hangar |
Aircraft |
Category |
Date |
Preview |
| Skyediamonds1985 | Guillows Series 200 - SE5a | Build | 16-Nov-15 11:19 | 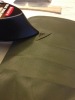 |
| Views : 1096 |
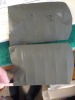
| After gluing the strips of Solartex around the plastic window, I used just a spot of glue to help hold the whole inspection window assembly in place while I used the iron to the fabric |
| Skyediamonds1985 | Guillows Series 200 - SE5a | Build | 16-Nov-15 11:17 | 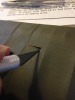 |
| Views : 942 |
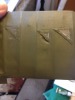
| Used an X-Acto to cut out the surface outline |
| Skyediamonds1985 | Guillows Series 200 - SE5a | Build | 16-Nov-15 11:16 | 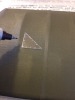 |
| Views : 927 |
| Using a thin marker, I drew the outlines of the "window" on my sample wing. |
| Skyediamonds1985 | Guillows Series 200 - SE5a | Build | 16-Nov-15 11:14 | 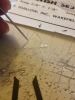 |
| Views : 949 |
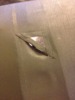
| A close up photo from The Vintage Aviator website revealed that the inspection window had small screws or rivets. So, I used a large pin and pushed out some "rivets" from the backside of the plastic "window." I hope this feature shows through the strips of fabric covering. |
| Skyediamonds1985 | Guillows Series 200 - SE5a | Flying | 16-Nov-15 11:11 | 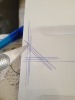 |
| Views : 880 |
| Marked off the appropriate size and shape of the plastic window itself. The outer and inner most lines denotes the fabric strip used to cover the edges and hold down the window. The middle line is the actual outline of the plastic window itself. |
| Skyediamonds1985 | Guillows Series 200 - SE5a | Build | 16-Nov-15 11:08 | 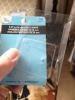 |
| Views : 852 |
| I started by using some clear plastic packages used for my cylinder rings of the PT-17. Amazing how one manages to save such seemingly items destined to the trash bin |