|
Main Menu
User Login
View By Aircraft
Top Ten Aircraft :
(numbers in brackets represent number of images online)
Top Six Manufacturers :
|
How To Carve A Prop BladeBy David Duckett, 4-Aug-09
| 1 | The blade is made from three laminations of 1/16" balsa. The center piece is colored with a marker and given a coat of dope and then the other two pieces are glued to it to make the basic blank. Coloring the center piece will help prevent excessive sanding and maintain the shape throughout the process. Giving it a coat of dope makes it stronger and also aids in keeping the shape. Sand the blank to the outline of the colored center and cover the hub end with masking tape. This will allow easier handling while shaping the blade.
The blank is now tapered from the tape to the end of the blade using a sanding block. The taper stops at the colored center piece and both sides are tapered the same. Apply another coat of dope and when it dries, sand it and draw the curve as shown on the BACK of the blade. This doesn't have to be precise unless you're really good. You can also use the 50/50 white glue mixture instead of dope in this process. | 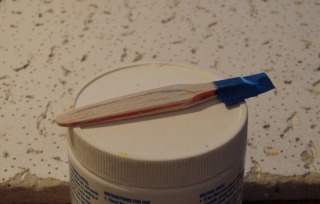 |
| 2 | In the second photo, I used a xacto knife and removed the area previously drawn and colored it to make it clearer. Use sandpaper and the natural curve of your fingers to smooth this into a shallow depression like a spoon. The complex shape of a real prop blade is way beyond most of us but just a slight amount of curvature on the back side makes a lot of difference in final appearance. |  |
| 3 | Turn the blade over and carve and sand the front to the shape of a wing, which is what a prop is. I advise you to do this slowly and carefully since there's really not much to work on and it's easy to mess it up. Use small cuts and a light touch. Remove the tape and trim the hub end by first lightly carving away the square edges and then using sandpaper on your finger blend it with the blade. It almost naturally makes a circle as you do it. The final step is to check the fit of the blade into the hub. Before assembly the blade is given a coat of filler and sanded and a final coat of dope is applied. You can take this further if you want a shinier surface... | 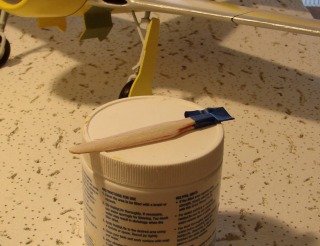 |
| 4 | The hub ends are painted black and checked again for fit into the hub before gluing. The tips are given a couple of coats of white and then yellow. The yellow tips are masked and the rest of the blade is painted black. The blade is now ready for installation and can be given a coat of clear gloss if desired before final assembly. | 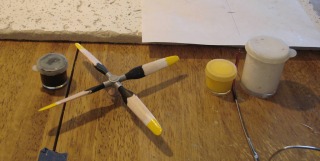 |
| 5 | Though not part of the "how to" I included the card of the man who made the prop hub in case someone might want such a thing and not have a clue how to make it. He certainly knows "how to." | 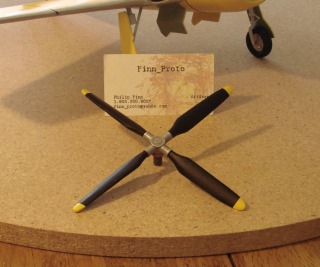 |
|
