|
|
| Hangar |
Aircraft |
Category |
Date |
Preview |
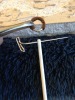
| Skyediamonds1985 | Guillows Series 200 - SE5a | Build | 08-Feb-16 19:49 |  | | Views : 630 | | Here's a close up of what I used for simulating the rigging and turnbuckles for the cockpit interior. I tied a small knot at the end of silver-colored thread being used as wiring, so as to keep the small tubing from slipping off. I then glued a tiny brass bread to the end of my (now) turnbuckle. Cut off the excess thread, leave the knot in place and glue the knot onto the framework, making sure that it lines up with the direction of the wiring. |
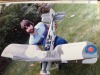
| Skyediamonds1985 | Guillows Series 200 - SE5a | Build | 08-Feb-16 13:59 | 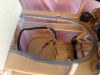 | | Views : 657 | | Pilot's seat installed. |
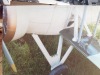
| Skyediamonds1985 | Guillows Series 200 - SE5a | Build | 08-Feb-16 13:32 | 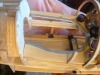 | | Views : 652 | | Vertical supports were wood stained, glued into place. Turnbuckles were made from small brass tubing cut to size and a small bead was added to top. All glued into place. |
| Skyediamonds1985 | Guillows Series 200 - SE5a | Build | 08-Feb-16 13:23 | 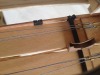 | | Views : 585 | |
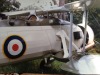
| Skyediamonds1985 | Guillows Series 200 - SE5a | Build | 08-Feb-16 13:23 | 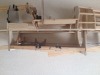 | | Views : 632 | | The horizontal wooden support and the "brackets" glued in place. Not paying attention to the outside which no one will see. In deference to Don D, yep, everyone on this site will know!.. LoL |
| Skyediamonds1985 | Guillows Series 200 - SE5a | Parked | 08-Feb-16 13:20 | 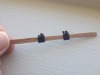 | | Views : 617 | |
|