|
|
| Hangar |
Aircraft |
Category |
Date |
Preview |
| David Duckett | Dumas Kit #1815,DeHavilland DH89 Dragon Rapide | Build | 20-Mar-10 16:11 | 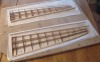 | | Views : 928 | | The leading edge is two pieces of 3/32" x 3/8" glued one at a time to the front of the ribs. |
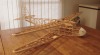
| David Duckett | Dumas Kit #1815,DeHavilland DH89 Dragon Rapide | Build | 20-Mar-10 16:09 | 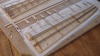 | | Views : 955 | | The laser cut pieces make the top wing assembly simple and accurate. |
| David Duckett | Dumas Kit #1815,DeHavilland DH89 Dragon Rapide | Parked | 19-Mar-10 18:24 | 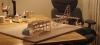 | | Views : 939 | | Patches and the Dragon |
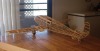
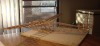
| David Duckett | Dumas Kit #1815,DeHavilland DH89 Dragon Rapide | Build | 19-Mar-10 18:22 | 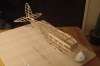 | | Views : 903 | | I removed the outside blue wray from the clear plastic nose piece and painted it with Top Flite white primer. I then glued it on to the 4 corners of the frame with plastic cement and used medium CA later. I glued the formers up to the edge of the piece and filled the spaces between the formers with 1/16" sticks. After light sanding I added some filler to make it all smooth and when that was dry and sanded I used just a spot or two of MIcro-Fill to finish. It needs just a light sanding and a couple of coats of dope to be ready to cover and at this point it weighs 1.8 oz or 53 grams. Although not to be used, I've put in the rails for the servos for strength and reference. |
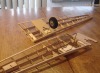
| David Duckett | Dumas Kit #1815,DeHavilland DH89 Dragon Rapide | Build | 19-Mar-10 18:13 | 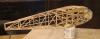 | | Views : 981 | | This is all the stringers. The 1/16" wood is fairly hard which is a plus. |
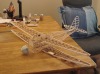
| David Duckett | Dumas Kit #1815,DeHavilland DH89 Dragon Rapide | Build | 19-Mar-10 18:10 | 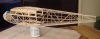 | | Views : 892 | | The instructions for gluing the sides together are easy to understand but getting the nose to curve that much isn't. After breaking it once, I made a piece from 3/32" balsa to fit between the sides and glued the sides to the piece. Leaving that top piece out, for now, made fitting the front plastic piece easier. |
|