|
|
| Hangar |
Aircraft |
Category |
Date |
Preview |
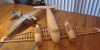
| David Duckett | Cleveland de Havilland Mosquito | Build | 10-Mar-14 05:26 | 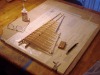 | | Views : 486 | | I wrapped the plan around the building board to keep it intact. This is the only thing that will be built directly on the plan. Patterns for for the other structures were done with traving paper. As I've used nothing from the kit I'll be putting it back on ebay when I'm finished with it. |
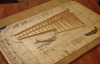
| David Duckett | Cleveland de Havilland Mosquito | Build | 10-Mar-14 05:22 | 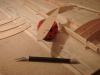 | | Views : 569 | | I used the parts in the kit as patterns for the pieces I'm actually using to build the kit. I left extra wood at each end of the rib so it can be cut to fit precisely. |
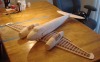
| David Duckett | Cleveland de Havilland Mosquito | Build | 10-Mar-14 05:16 | 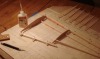 | | Views : 578 | | It's very important to insure the leading and trailing edges are prevented from warping by the addition of the ribs so they are pinned in place on the outsideof, not through, the wood. Due to the curvature of the bottom of the ribs, the aileron spar must also be blocked up. |
| David Duckett | Cleveland de Havilland Mosquito | Build | 09-Mar-14 05:48 |  | | Views : 513 | |
| David Duckett | Cleveland de Havilland Mosquito | Build | 09-Mar-14 05:47 | 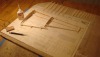 | | Views : 505 | | The plans say to block up the leading and trailing edges but do not say how much. I pinned the front spar in place and then set the outer, inner, and middle ribs in place. THe leading and trailing edges were then set in place using the ribs as guides. The leading edge is 1/4" x 1/2", spars and trailing edge are 1/8" stock, and the aileron spar is 3/16" stock. |
| David Duckett | Cleveland de Havilland Mosquito | Build | 06-Mar-14 05:22 | 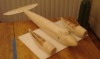 | | Views : 530 | | For now..... |
|