|
|
| Hangar |
Aircraft |
Category |
Date |
Preview |
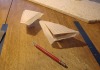
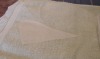
| David Duckett | Dumas Kit #503, Boeing AV 8B Harrier | Build | 03-Dec-09 18:26 | 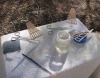 | | Views : 841 | | A primer on wet covering. First, paint the frames with a coat of thinned clear dope and let dry. ( I use nitrate ) sand the frames and apply another coat and sand hen dry. Paint all the structure, not just the perimeter. |
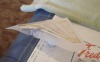
| David Duckett | Dumas Kit #503, Boeing AV 8B Harrier | Build | 03-Dec-09 11:14 | 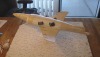 | | Views : 809 | | All the bottom covering, except the small section at the nose, is done and the next step is to glue the wing to the fuselage. |
| David Duckett | Dumas Kit #503, Boeing AV 8B Harrier | Build | 03-Dec-09 11:11 | 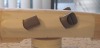 | | Views : 704 | | Wooo hooo! |
| David Duckett | Dumas Kit #503, Boeing AV 8B Harrier | Build | 03-Dec-09 11:10 | 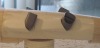 | | Views : 782 | |
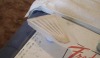
| David Duckett | Dumas Kit #503, Boeing AV 8B Harrier | Build | 03-Dec-09 11:09 | 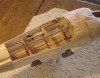 | | Views : 939 | | Exhausts are in place. |
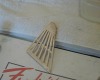
| David Duckett | Dumas Kit #503, Boeing AV 8B Harrier | Reference | 02-Dec-09 11:25 | 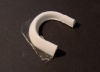 | | Views : 774 | | And finally... This is what happens if you remove the blue plastic from the clear part. It's absolutely permanently in there. Of course, there is a bright side I realizeed too late to use this piece. All the excess can be trimmed away and it would be just fine. In fact, that's exactly what I did with the front exhaust pieces. |
|