| Hangar |
Aircraft |
Category |
Date |
Preview |
| David Duckett | Dumas Kit #503, Boeing AV 8B Harrier | Build | 03-Dec-09 18:29 | 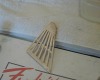 | | Views : 741 | | Paint the outside edges with a coat of clear dope. This looks excessive but it's just the lighting. |
| David Duckett | Dumas Kit #503, Boeing AV 8B Harrier | Build | 03-Dec-09 18:28 | 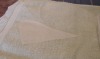 | | Views : 792 | | Dip the silkspan in water and lay it on a towel. |
| David Duckett | Dumas Kit #503, Boeing AV 8B Harrier | Build | 03-Dec-09 18:26 |  | | Views : 841 | | A primer on wet covering. First, paint the frames with a coat of thinned clear dope and let dry. ( I use nitrate ) sand the frames and apply another coat and sand hen dry. Paint all the structure, not just the perimeter. |
| David Duckett | Dumas Kit #503, Boeing AV 8B Harrier | Build | 03-Dec-09 11:14 | 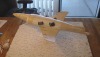 | | Views : 809 | | All the bottom covering, except the small section at the nose, is done and the next step is to glue the wing to the fuselage. |
| David Duckett | Dumas Kit #503, Boeing AV 8B Harrier | Build | 03-Dec-09 11:11 | 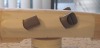 | | Views : 704 | | Wooo hooo! |
| David Duckett | Dumas Kit #503, Boeing AV 8B Harrier | Build | 03-Dec-09 11:10 | 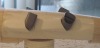 | | Views : 782 | |
|
| Hangar |
Aircraft |
Category |
Date |
Preview |
| David Duckett | Dumas Kit #503, Boeing AV 8B Harrier | Build | 03-Dec-09 11:09 | 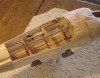 | | Views : 939 | | Exhausts are in place. |
| David Duckett | Dumas Kit #503, Boeing AV 8B Harrier | Reference | 02-Dec-09 11:25 | 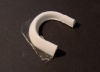 | | Views : 774 | | And finally... This is what happens if you remove the blue plastic from the clear part. It's absolutely permanently in there. Of course, there is a bright side I realizeed too late to use this piece. All the excess can be trimmed away and it would be just fine. In fact, that's exactly what I did with the front exhaust pieces. |
| David Duckett | Dumas Kit #503, Boeing AV 8B Harrier | Reference | 02-Dec-09 11:20 | 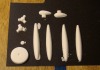 | | Views : 1054 | | This is how they look unmolded. The pieces with the blue plastic practically fell out. The flash around the pieces can easily be trimmed away with a razor knife and then sanded. The halves can be glued together with plastic cement, or CA if you're brave, and then sanded and filled with filler before painting. They are fairly heavy for their size. The instructions also come with a pamphlet showing how to make molds from parts. This is all I do with the stuff, Pfinn makes much more with it. Much more. |
| David Duckett | Dumas Kit #503, Boeing AV 8B Harrier | Reference | 02-Dec-09 11:09 | 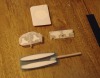 | | Views : 720 | | About 25 minutes into it and the curing is nearly complete. When it no longer feels sticky it's ready to unmold. It gets warm while curing and thicker concentrations cure faster. To unmold, bend the plastic away from the mold and..... |
| David Duckett | Dumas Kit #503, Boeing AV 8B Harrier | Reference | 02-Dec-09 11:06 | 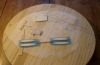 | | Views : 745 | | About 10 minutes later the curing process is well underway and my faith in chemistry restored. I always have serious doubts when I first pour the clear mixture in the mold. |
| David Duckett | Dumas Kit #503, Boeing AV 8B Harrier | Reference | 02-Dec-09 11:03 | 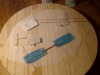 | | Views : 763 | | THe mixure has been poured into the molds and has cleared up. This is good. |
|
