|
Main Menu
User Login
View By Aircraft
Top Ten Aircraft :
(numbers in brackets represent number of images online)
Top Six Manufacturers :
|
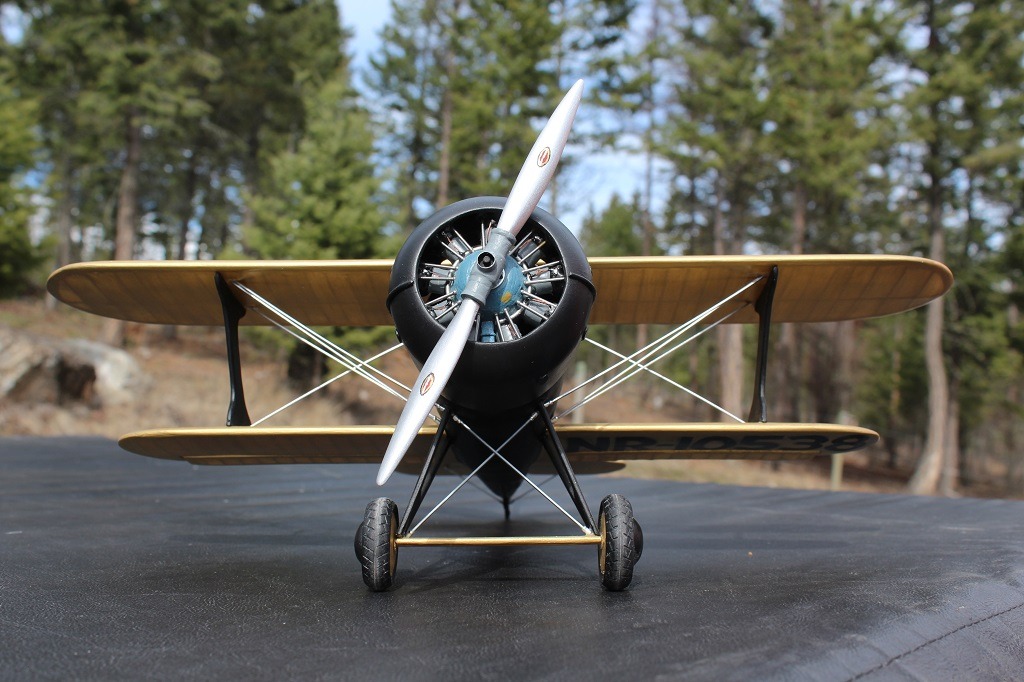
Scratch Built Laird Solution by Don C. Viewed 591 times.
Build Thread
|
|
|
| Image Comments |
| Don C | 19-Mar-17 17:23 | | Thanks guys. Huey, the prop is 6.5 inches- which should make it 8' 9" on the real thing. |
| LASTWOODSMAN | 20-Mar-17 09:49 | | Don - thanks for posting your whole, very compelling, "Speedwing" build, and the excellent sunlit baby pics from all angles. I really enjoyed it. Now you've got me researching the plane, the 1930 Thompson Race, and the pilot, C. W. "Speed" Holman. |
| rayl | 22-Mar-17 08:10 | | Cute little bugger. Really nice job on the engine & prop. The treads on the tire are a nice touch. |
| Creosotewind | 22-Mar-17 13:06 | | Real nice Don. Looks like the real thing (and I don't mean Coke) |
| Don C | 22-Mar-17 14:11 | | Thanks Ray and Creosotewind. Creosotewind - if you get on that Mystery ship (Which I think this one was built to challenge), you,Huey and I have the makings of a race. |
| Huey V77 | 31-Mar-17 13:28 | | Don, old buddy old pal, how can I get a copy of your prop hub? Its perfect for the Gee Bee. |
| John M Oshust | 31-Mar-17 13:51 | | Great photo. Nice model,, |
| Don C | 31-Mar-17 15:39 | | Thanks Mr. O. Huey, there's a picture of the prop before assembly on page 4 of the build thread. I used a Cleveland plan. They have pretty good scale drawings for things. I'll try to keep it short. 1/16 scale. 3/8" dowel. Used the drill press for crankshaft hole and lengthwise hole(1/8")for props. Took a few tries to get them correct. Hub is 1' long. Left extra inch on end to put in chuck. Now it is a "vertical mill". Needle files and sandpaper to shape. The extra on the ends is then sanded off on either belt or disc sander. File a small flat on one side of crankshaft hole and glue a short piece of brass tube for the large ring. Crankshaft is end of an "Oshust" bearing. Mr. O diagrammed that in one of his builds. I copied it because it works well and is easy. Ask if I didn't explain well enough. |
|
|
Please sign in to comment on this image.
|
|
|
