| Build Thread, Page :
1 [ 2 ] 3 4 5 6 (114 posts, 20 posts per page, 6 pages in total)
|
[ < Prev ] [ Next > ] |
| edtherenderman, Image # 43425 | 15 Sep 21 19:10 |
|
| edtherenderman, Image # 43424 | 15 Sep 21 19:10 |
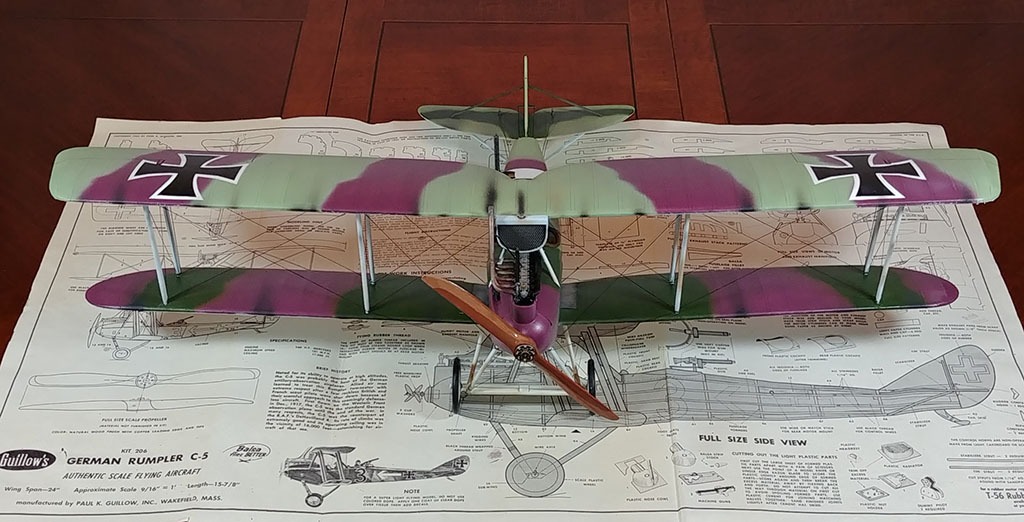
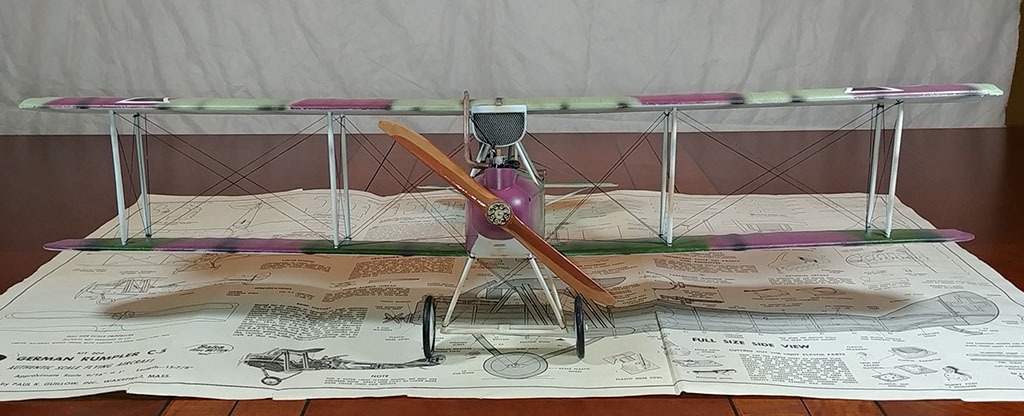
The Rumple C.4 is done! This is what I call the “50 year project” because this kit was the very first balsa model I ever tried to build when I was about 7 or 8 years old! Way too young to take on a project like this, but my dad was kind enough to let me have the model and give it a go. Of course, this isn’t the SAME kit I had 50 years ago. Thanks to another member of VA, I got a duplicate kit that was just waiting for me to build it. I’m glad I can finally put this one to bed and feel good that I finished something that I started so long ago! |
| edtherenderman, Comment for image # 43397 | 30 Aug 21 09:47 |
| That's very true. I help the decals stick in two ways. 1) I paint gloss clear where the decals will go. Gives them a smooth surface to hold to, 2) I use "decal set" to soften the decals to that they form themselves to the surface. I use this https://www.amazon.com/gp/product/B01LXZ03W9/ref=ppx_yo_dt_b_search_asin_title?ie=UTF8&psc=1. |
| bsadonkill, Comment for image # 43397 | 30 Aug 21 08:29 |
| Very nice! Decals work well on painted surfaces. Not to well on plain doped tissue. |
| Dfell, Comment for image # 43397 | 30 Aug 21 00:32 |
| Impressive |
| edtherenderman, Image # 43398 | 29 Aug 21 21:54 |
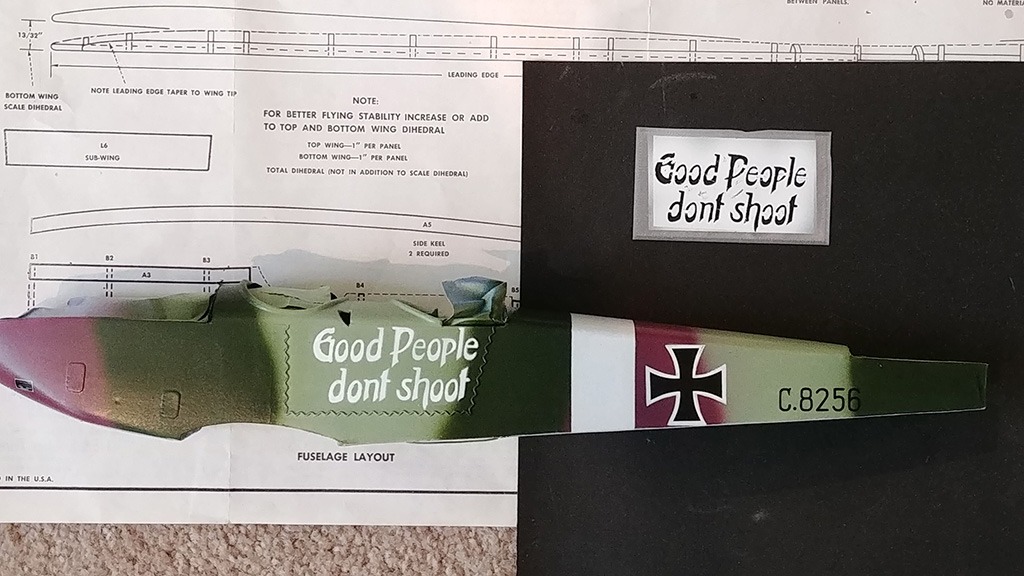
I found the “Good People Don’t Shoot” script when researching the Rumpler C4 on Wingnutwings.com. Instead of trying to create a decal for this, I created a stencil in Blender, which I then 3D printed. I had to do a little touch-up but was pretty easy. You will also see zig-zag lacing on the fuse sides. This aircraft had canvas side panels that could be opened on the ground by removing this lacing that held it in place. Interesting detail that I though really adds to the realism. I used ABS material extruded from my 3D printer. |
| edtherenderman, Image # 43397 | 29 Aug 21 21:49 |
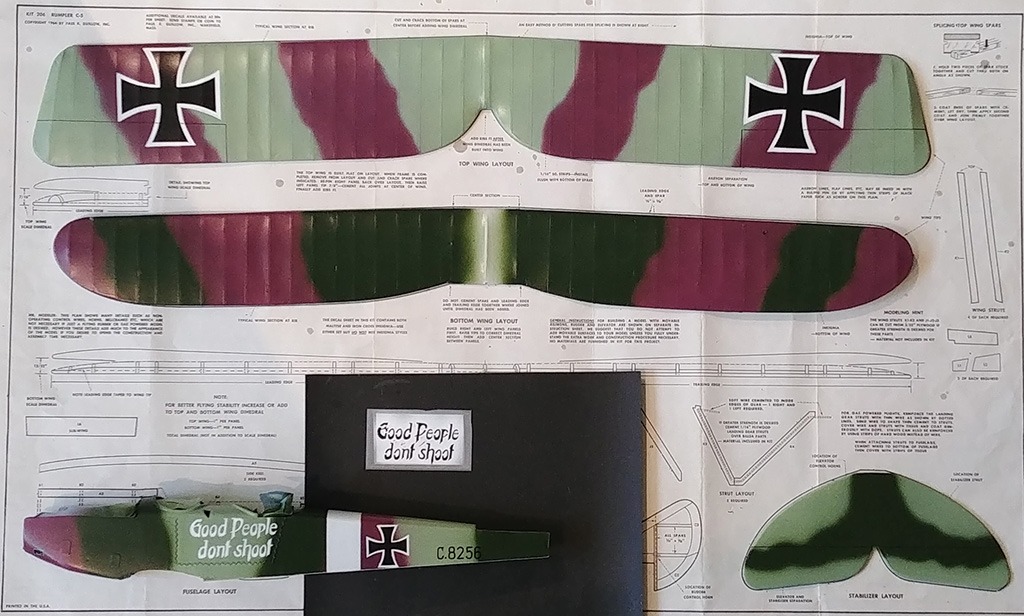
More paint and decals. I created the decals in my usual way, Photoshop, inkjet print onto waterslide decal sheets and overcoat with clear gloss acrylic. The upper surfaces and the fuse have all be sprayed with rattle can satin finish. |
| bobgood, Comment for image # 43377 | 23 Aug 21 21:13 |
| Great colours and I like those wing profiles! |
| BriandKilby, Comment for image # 43377 | 23 Aug 21 17:03 |
| looks like you'll be all camoed out ed! good job! |
| edbecky, Comment for image # 43377 | 23 Aug 21 10:59 |
| Nice job Ed. |
| edtherenderman, Image # 43377 | 23 Aug 21 10:52 |
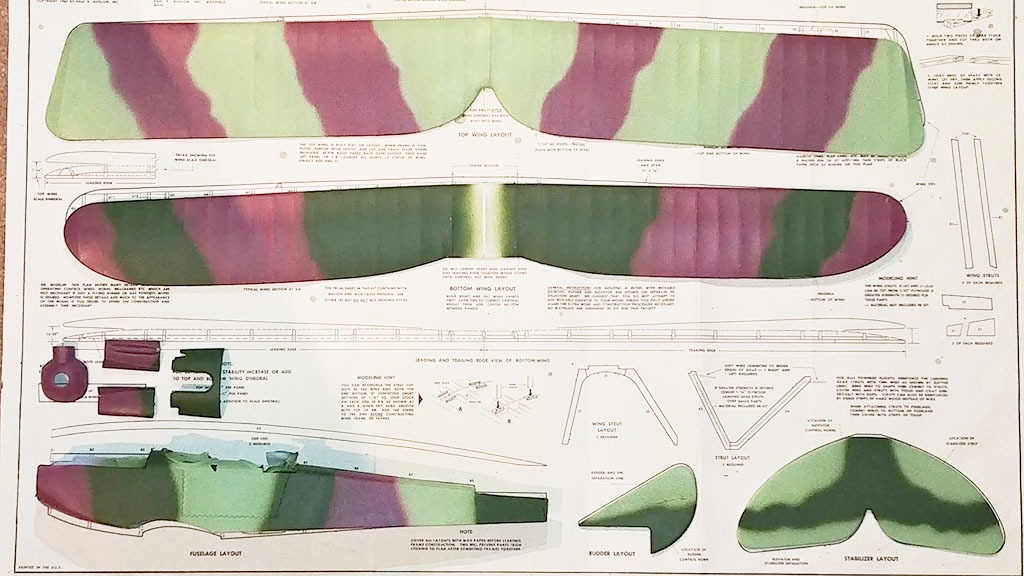
Rumpler went into the paint rack for initial color coats. Used white rattle-can primer on all surfaces, then combination of Vallejo Model Air (Dark Green) and Army Painter - Warpaints (Light green and Mauve). The Mauve did not cover well. I needed to thin it to get it through the airbrush, but then it wouldn't cover. So it took four to five coats! The Light green when on fine with a little thinning. I had issues with the Model Air too, but I think that was dried lumps in the paint that I couldn't filter out. I've had that paint for awhile so I suspect that's the problem. Took a lot of airbrush cleaning to keep it going. I still haven't painted the bottoms (light sky blue). Once I have that, it will be time for decals and details. |
| edtherenderman, Comment for image # 43350 | 19 Aug 21 10:47 |
| Hah! Thanks! I'm willing to model items if people are interested. For me, modeling these detail parts is as fun as building the airplane itself. |
| biplane guy, Comment for image # 43350 | 18 Aug 21 14:11 |
| You know you could make a decent living printing parts just for VA members. |
| edtherenderman, Image # 43350 | 13 Aug 21 11:59 |
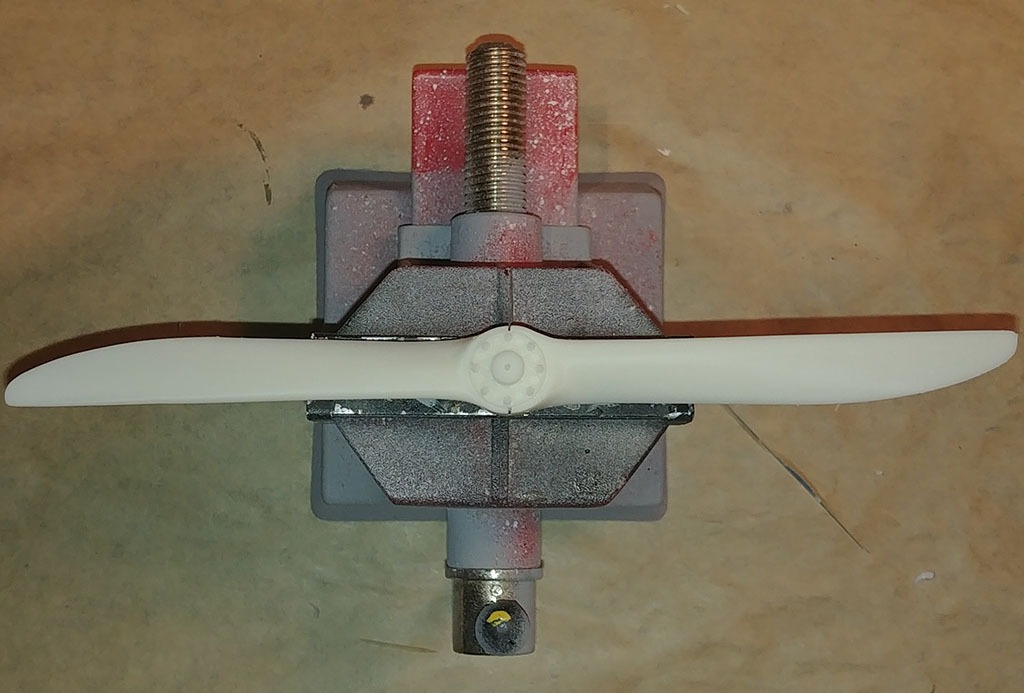
Close up of propeller. I was originally going to use an AXEL style, which I had already 3D modeled for the Hannover, but after printing it decided to change to a HEINE brand, which meant that I had to model that one. Fortunately, I had modeled the hub separately and was able to reuse it. I ended up printing four propellers for this. The first print failed, the second was the AXEL, the third looked good, but I realize I reversed the rotation direction, so flipped it and printed a fourth, which you see here. This is printed at 50 microns and took over 9 hours to print. |
| edtherenderman, Image # 43349 | 13 Aug 21 11:26 |
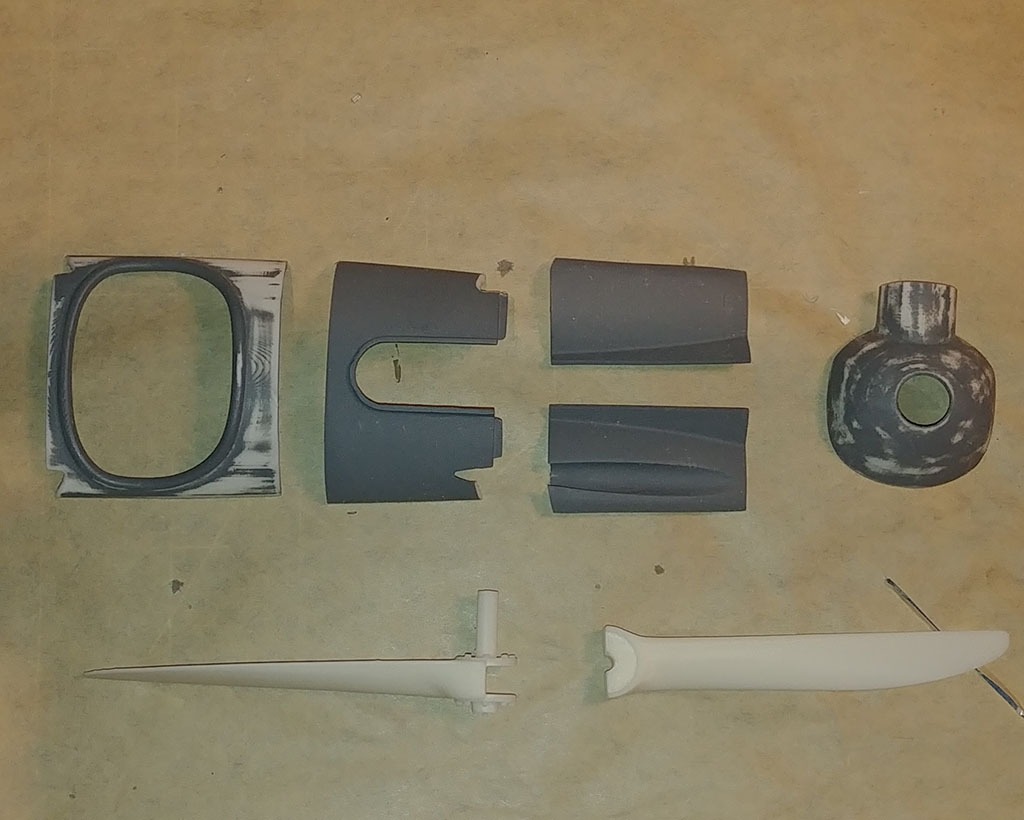
Still working slowly on the Rumpler. Here are pictures of fresh prints. Combings and engine cowlings are printed on the FDM 3D printer using a material called Polysmooth, which prints like PLA plastic, but can be smoothed with isopropyl alcohol. They have been sprayed with Auto Sanding primer. Still need to wet sand the engine cowlings. The propeller was printed on my DLP 3D printer. It had to be printed in too parts because my print bed isn't large enough. |
| edtherenderman, Comment for image # 43312 | 09 Aug 21 08:08 |
| Brian, I didn't fish at Yellowstone. I went to Ennis MT on the Madison river. Sorry can't help you with fishing spots there. Model is going slow but sure. Trying to 3D print the engine covers with my new printer, so some things to learn about with the new material, but I think I got it solved this weekend. Also started working on the decals. The ones it the kit are shot. So, it is getting close to coming together now. |
| BriandKilby, Comment for image # 43312 | 06 Aug 21 20:54 |
| ed, did you say you have been fishing at yellowstone? if so, do you know of any good spots to fish? thanks, brian. like how the model is turning out! |
| bobgood, Comment for image # 43310 | 20 Jul 21 18:13 |
| Amazing! |
| edtherenderman, Comment for image # 43310 | 20 Jul 21 13:51 |
| @bsadonkill - Being both a plastic and balsa model builder, I've always like the detail you get with plastic, but like the ability to build unique aircraft that balsa provides. So best of both worlds to me.
@BriandKilby, I guess you could with a milling machine. But really, 3D printing is sort of that anyway, since I'm taking a 1.75mm thread of plastic on a spool, extruding it through a hot end, and building up the part layer by layer. So, transforming one shape into another. |
| BriandKilby, Comment for image # 43310 | 20 Jul 21 13:26 |
| looks good ed! could you make a plane from a solid block of 3d printing matter? sounds like it would be made from an atomic particles. lol. |
| Build Thread, Page :
1 [ 2 ] 3 4 5 6 (114 posts, 20 posts per page, 6 pages in total)
|
[ < Prev ] [ Next > ] |

