| Build Thread, Page :
<< 12 13 14 15 16 [ 17 ] 18 (351 posts, 20 posts per page, 18 pages in total)
|
[ < Prev ] [ Next > ] |
| Barnstormer, Comment for image # 5183 | 02 Dec 07 17:10 |
| Fly as in zipper. |
| John M Oshust, Comment for image # 5183 | 02 Dec 07 17:04 |
| I was thinking "cigar!" |
| Barnstormer, Comment for image # 5183 | 02 Dec 07 16:59 |
| When you associate Bill Clinton with Fly, Well, I wont go there. |
| Barnstormer, Comment for image # 5183 | 02 Dec 07 16:54 |
| Sorry I meant Barrel. |
| John M Oshust, Comment for image # 5183 | 02 Dec 07 16:54 |
| Did B Clinton fly this plane??? Barrel not cigar, though it has been called a stogie! |
| John M Oshust, Image # 5185 | 02 Dec 07 16:52 |
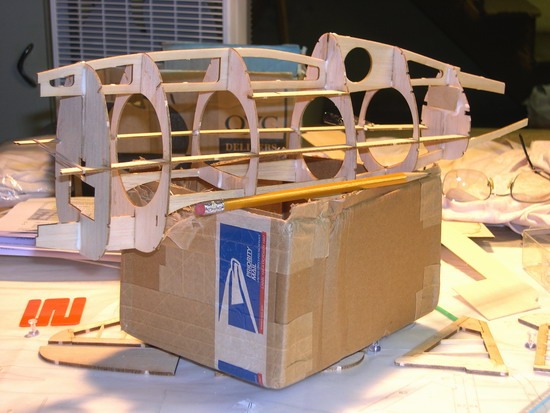
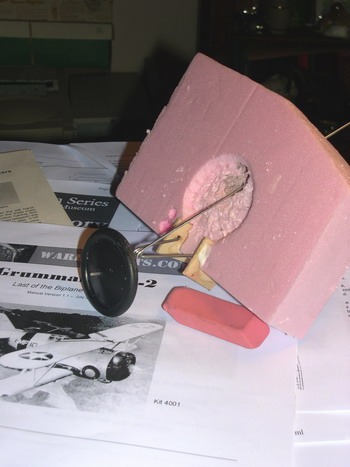
The "Barrel" takes shape. Great wood, adequet plans, exact instructions. Plan....build as instructed, then modify the fuse to suit my needs. |
| John M Oshust, Image # 5184 | 02 Dec 07 16:49 |
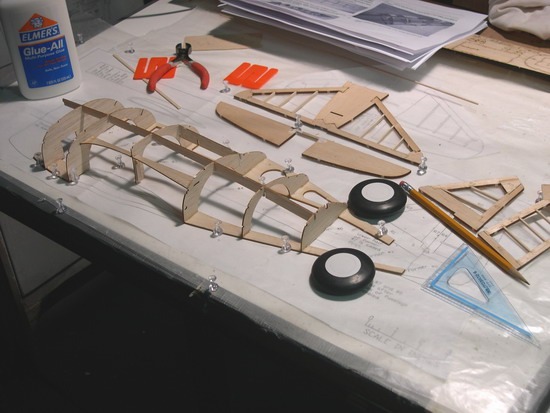
While away the wheels arrived. Moos, no buck but a large doe! Filled the freezer, I haven't learned to cook anlters anyway! |
| Barnstormer, Comment for image # 5183 | 02 Dec 07 16:48 |
| Nice to have you back John, looking forward to more updates on the cigar. |
| John M Oshust, Image # 5183 | 02 Dec 07 16:47 |
I have returned and am back in action! I missed some nice work while I chased "Bambi!" Great markings DD, great guns poppy! |
| jgood, Comment for image # 5097 | 21 Nov 07 11:12 |
| Hey John, definitely a good idea to make the electronics accessable. They're not on my Dr.1, but that was due to intense lightness being required! All my other aircraft have removable servos / receivers / ESC's, etc.
My servo's generally go in the fuse, above (or underneath) the wing (which is generally removable). I usually have balsa cross members in the fuse that they rest between, and use the supplied tiny self tapping screws to screw the servos into the balsa members. I really like the HS-55 sub micro servos, but there are great even smaller ones available from companies like bluebird now (check out www.bphobbies.com for all these supplies...).
My favourite way of doing removable wings is with a combination of small dowels and tiny rare-earth magnets, or nylon screws.
Receivers / ESC's are generally held using velcro or double sided tape. One thing to worry about is heat with the ESC's - they can get pretty hot, and do nasty things like cut the motor if they get too hot. It's a good idea to have a good air flow over them, so in the cowl can be a good place for them.
What motor / ESC (speed controller) / battery are you planning on? How will you actuate your control surfaces? I like the pull/pull threaded method of doing them, it's super light. |
| John M Oshust, Comment for image # 5106 | 19 Nov 07 07:50 |
| hjlittman exactly where the design came from! Old plans |
| John M Oshust, Comment for image # 5106 | 19 Nov 07 07:48 |
| poppy...prototype.. the wire into the fuse will be either a tube in a tube or wire that slides on itself. The top of this mechanism is attached to a pivot. |
| poppy, Comment for image # 5106 | 19 Nov 07 05:32 |
| That is an interesting solution. Didn't the long strut to the upper fuselage break inward as it folded up? |
| hjlittman, Comment for image # 5106 | 18 Nov 07 23:12 |
| It seems to me that I saw a scan of plans for a Grumman FF from a model magazine from the mid 1930's that had the landing gear linkage done so you could display the model gear down and fly it gear up. I'll check my files and see if I have a copy of that one.
|
| Barnstormer, Comment for image # 5106 | 18 Nov 07 15:00 |
| This is going to be very interesting. |
| John M Oshust, Image # 5107 | 18 Nov 07 11:15 |
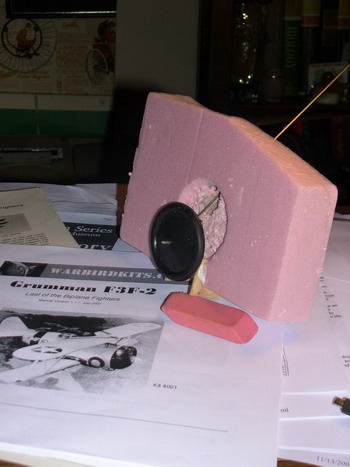
Wheels up...refining the mechanism and fitting it to the plane will be no walk in the park but it is possible! |
| John M Oshust, Image # 5106 | 18 Nov 07 11:13 |
poppy LG prototype...wheels down |
| John M Oshust, Comment for image # 5095 | 17 Nov 07 23:11 |
| Steve...I tried..the program that coverts pdf files took 45 min to dwnld...I am on dial up...It did not run. I dwnloaded a short version. It converts everthing but pdf. Thanks |
| John M Oshust, Comment for image # 5095 | 17 Nov 07 22:02 |
| I think that is what I did trimmed to fit and pasted the "tile" together....things get lost in the realm of electrons! |
| SteveM, Comment for image # 5095 | 17 Nov 07 21:36 |
| The idea is that when you have a drawing/picture that is larger than your paper you can either scale it down to the size of your paper or break it into "tile" pieces and print the pieces onto several sheets of paper but at full scale. Then just trim off the margins and tape the sheets together.
Take a look at this thread and see if any of the methods will work for you. http://www.rcgroups.com/forums/showthread.php?t=455470
I believe Acroread can print tiles, but these suggestions might be easier.
You may also find these pictures very interesting. http://www.rcgroups.com/forums/attachment.php?attachmentid=143684 There are probably 200 pictures regarding your kit. |
| Build Thread, Page :
<< 12 13 14 15 16 [ 17 ] 18 (351 posts, 20 posts per page, 18 pages in total)
|
[ < Prev ] [ Next > ] |
