| Build Thread, Page :
1 2 [ 3 ] 4 5 (92 posts, 20 posts per page, 5 pages in total)
|
[ < Prev ] [ Next > ] |
| edtherenderman, Image # 41435 | 14 Oct 19 09:03 |
|
| edtherenderman, Image # 41434 | 14 Oct 19 09:03 |
|
| edtherenderman, Image # 41433 | 14 Oct 19 09:02 |
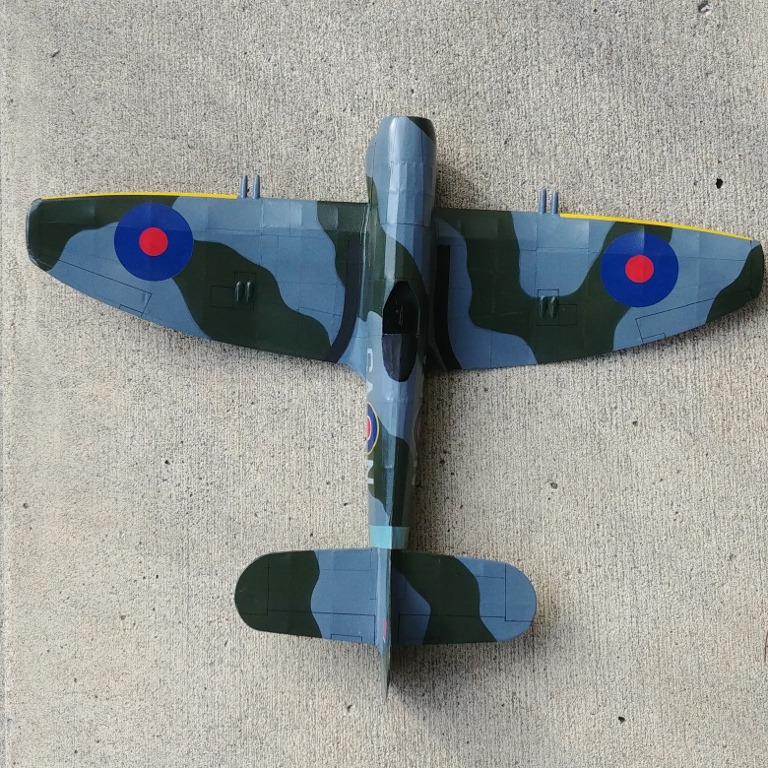
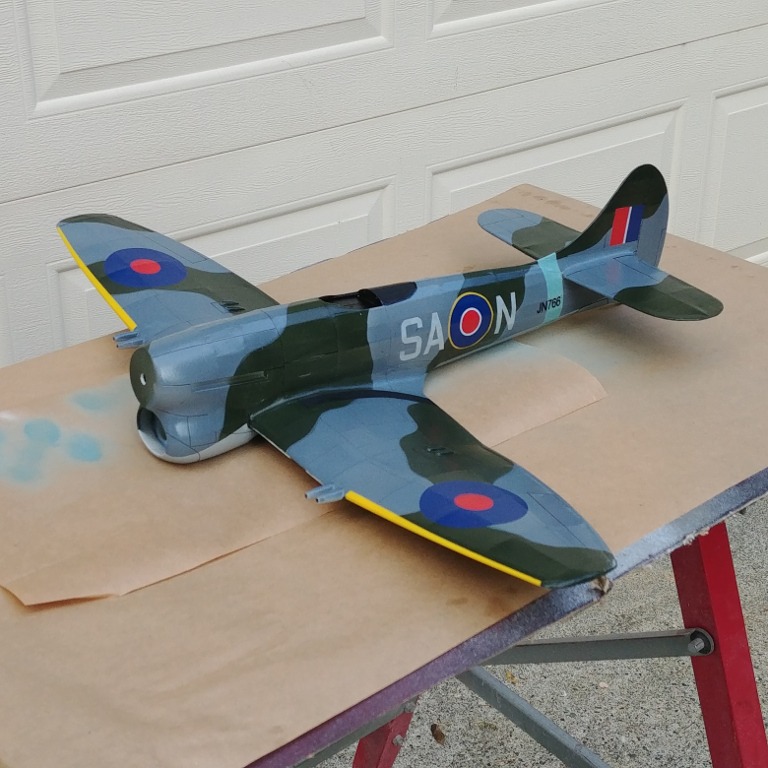
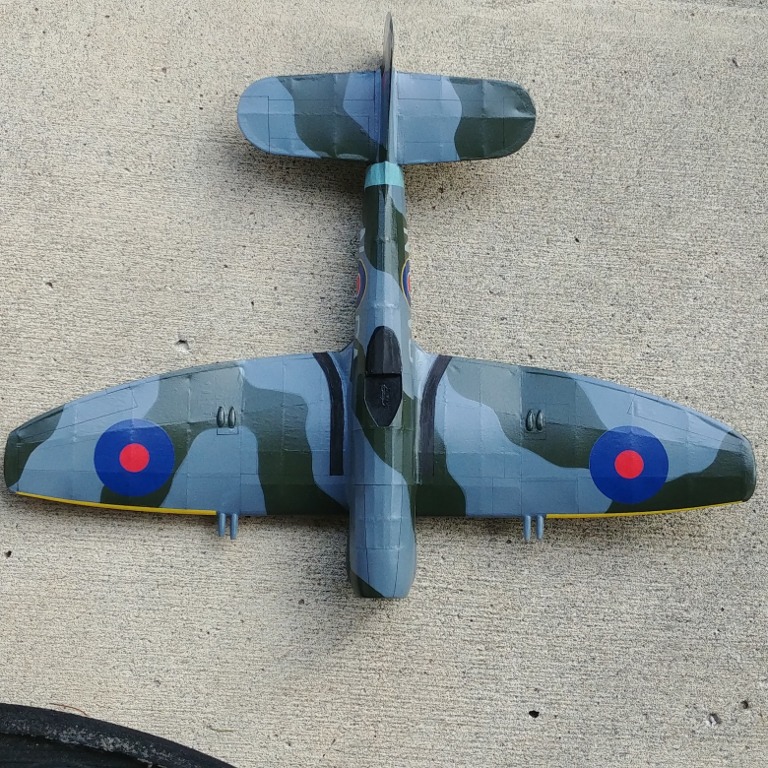
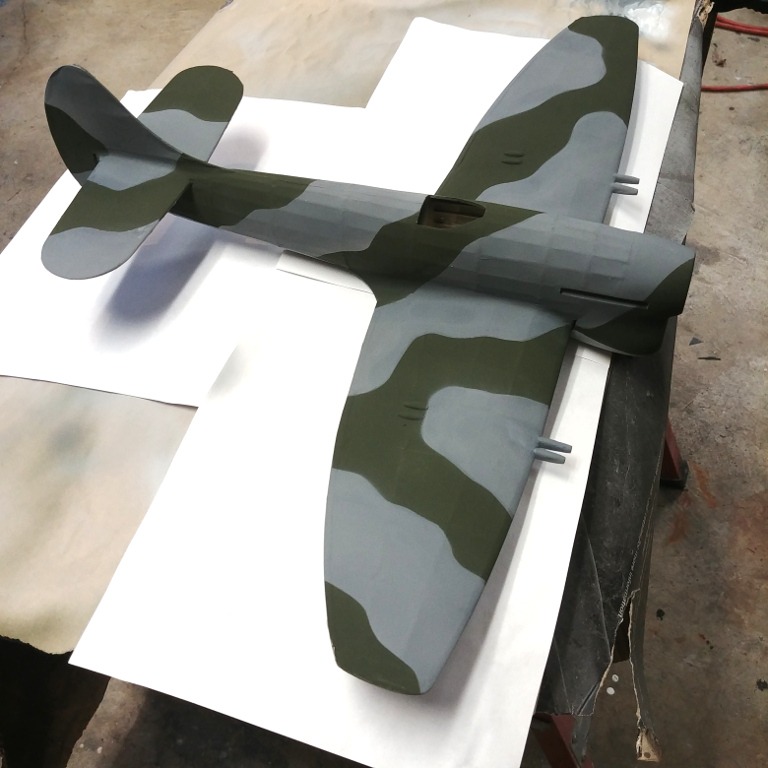
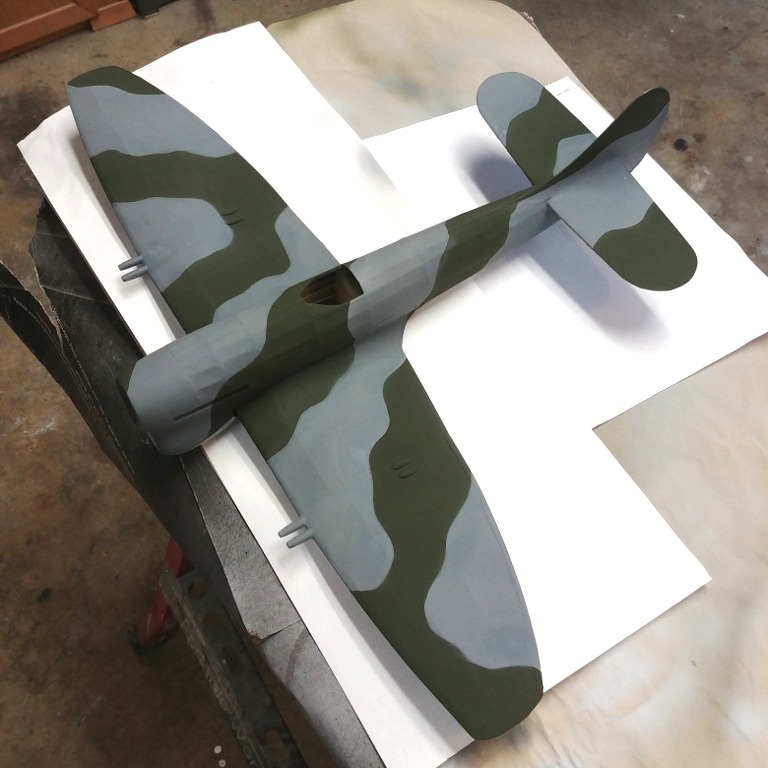
I haven’t posted much recently on the Tempest. Nice summer weather in the Pacific NW has kept me outside most of the summer, but now that things are turning wet again, back to inside hobbies! Since I last posted, I finished painting the Identification Stipes, decals, and panel lines. The decals were a pain. I tried to use the decals in the kit but they were just too then and old. So I created my own decals in PhotoShop and printed them out on waterslide inkjet paper. Much better results! When I put decals down, I spray the surface with gloss to give it a good surface to adhere to, then overspray with flat. I tried using Tamiya clear for the overspray and it really messed up the finish. Not sure if it reacted with the paint below, or something else, but it was a mess. So reading how many of you finish your models, I decided to overspray the top and sides (left the bottom flat) with a Krylon Satin finish. It’s an interesting effect. I’m not sure I like it as much on a stick and tissue model because it accentuates all he stringers. But I can see this being really good looking on a model that have been filled in. I’m going to leave it like this for now. Panel lines were done with black or gray colored felt tip drafting pens. Usually 0.3 or 0.1. I created templates from paper for the Gear doors, elevator, ailerons, rudder and flaps so that they are consistent. Next is to finish the propeller (I’ll post that journey soon!), attaching the canopy, and weathering. |
| Rapid 1, Comment for image # 41234 | 17 Aug 19 13:22 |
| Just a comment does anyone know of any top quality full laser cut free flight kits of the Focke Wulf FW 190
|
| Skyediamonds1985, Comment for image # 41311 | 16 Aug 19 19:31 |
| Ed,
That's incredible work. The covering is absolutely perfect. Rarely does anyone see a tissue-covered model that's wrinkle free. Very nice!! |
| edtherenderman, Comment for image # 41234 | 16 Aug 19 14:33 |
| You and me both. I'm surprised I can still think after 50+ plastic model airplanes and sailing ships and balsa aircraft!
I've never tried the white glue method. Maybe someone else has an opinion?
And Welcome to the hobby! I find it really rewarding to take a box of sticks and turn it into something that looks like a real airplane! Looking at your hanger, it looks like you already jumped into scratch building! Outerzone definitely has the selection. I've about 20 plans queued up now! The hard decision is which is next! |
| edbecky, Comment for image # 41234 | 16 Aug 19 11:37 |
| New at this hobby so I'm looking for the best way. I've read that Elmers glue cut with water 50/50 is one way and that's what I've been doing. My question is, will the EZE dope yield that much better results that I should switch over. Laughed hard at Don's comment about inhaling that stuff as a kid. Between that and the plastic glue I used on Revell models I stayed high before I even knew what high was. Yes, that does explain a lot. |
| edtherenderman, Comment for image # 41234 | 16 Aug 19 08:22 |
| I've found over time that spending a lot of effort in pre-sanding parts before fitting them, and ensuring that you get good close joints helps a lot in final prep time. On this model, I didn't do any wood filler, but I have in the past. Generally I use lightweight wall Spackle that you can pick up at most hardware stores. Very light, drys quick and sands easier than the surrounding wood.
On the Sea Fury that I posted here, I used EZE Dope to pre-fill the wood. Brushed it on, let it dry, then a light sanding. There are probably a million ways to do this! I'm sure there are other ideas on the forum! |
| Rapid 1, Comment for image # 41234 | 15 Aug 19 15:13 |
| Hi thanks for the information when prepping do you use a light balsa wood filler before covering the model |
| edtherenderman, Comment for image # 41234 | 15 Aug 19 12:47 |
| Rapid 1, I've never used a glue stick! Never even thought of that! I use the same technique I used with the older fuel proof dopes, I dampen the tissue, place it over the model frame, and then apply EZE Dope on top of the tissue/frame. The EZE Dope penetrates the tissue I'm using, which is pretty porous. The EZE Dope drys so quickly that it is set before the tissue drys out and tightens, so I get a good, tight fit. I then go over the tissue with the thinned EZE Dope to fill in the pours.
This may not work as well with tissue that is not as porous as the material I use.
I've had no problem overlapping tissue and having it hold with the EZE Dope. I generally do my models with many pieces of tissue instead of trying to apply one larger sheet. I've also had to fix things, like holes I made in the model while handling, and have never had a problem. You may want to experiment to see what works best for you. |
| Rapid 1, Comment for image # 41234 | 15 Aug 19 12:07 |
| Hello every one
Beautifully built models posted on this site question before applying EZE dope is the UHU stick still the best method to apply the tissue to frame, if you are going to use EZE dope, if this is the case after applying the glue stick, do you still need to apply the tissue on damp then applying the EZE dope ? Can you still apply small pieces of tissue to the model after the EZE dope drys asking as I was interested in using the marking layout in cut out tissue on model in stead of painting .
|
| heywooood, Comment for image # 41234 | 13 Aug 19 07:06 |
| Nice work - those paper fairings look just right which is no easy task.
Beauty! |
| edtherenderman, Comment for image # 41234 | 12 Aug 19 14:09 |
| Thanks scigs30! I'm going to give this a try. I was worried about thinning it out that much, but if you are having good results, I'll give it a shot! |
| scigs30, Comment for image # 41234 | 12 Aug 19 11:24 |
| She looks great, and yes Eze Dope can be a little tricky I have used on multiple models. My recommendation, thin it 3 parts water to 1 part eze dope. This will help with dry time and "globbiness" Also when you shrink the tissue, shrink with diluted Eze Dope water mixture of 5 percent Eze Dope to water, really helps when you start brushing on Eze Dope. |
| rgood, Comment for image # 41234 | 12 Aug 19 10:58 |
| This is a very rare bird on VA - excellent work! |
| Don C, Comment for image # 41310 | 12 Aug 19 10:10 |
| Looks good. Nice color scheme.
|
| edtherenderman, Comment for image # 41311 | 12 Aug 19 09:02 |
| Also, I did tear the bottom of the starboard stabilizer when removing the masking tape! So I have some repair work to do! |
| edtherenderman, Image # 41311 | 12 Aug 19 08:58 |
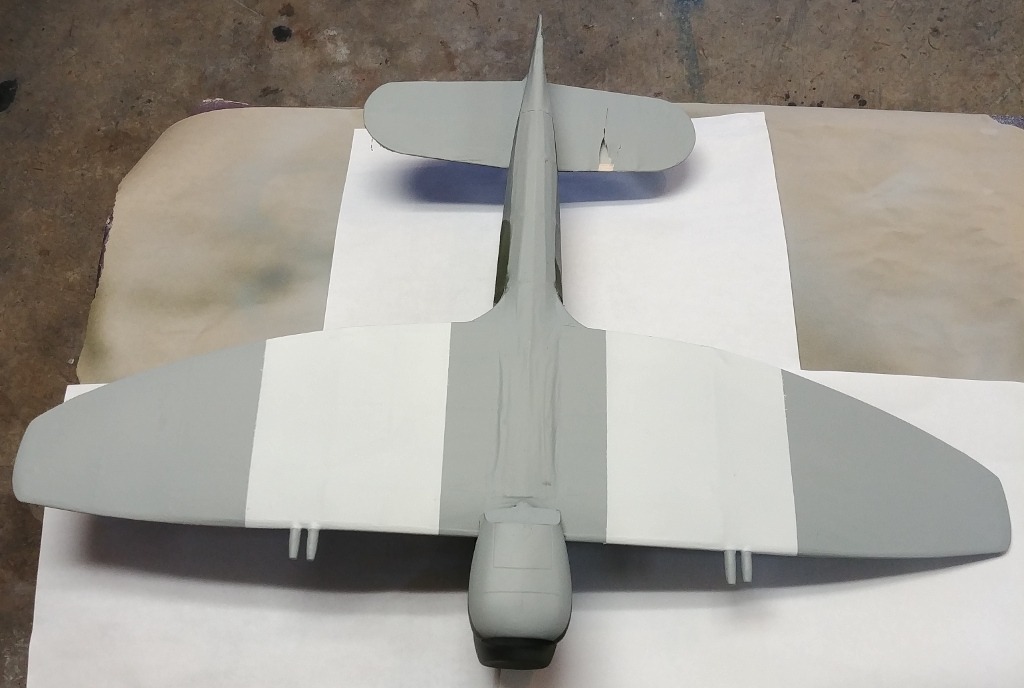
Also put the base coat of Testers flat white latex enamel for the identification strips. This isn’t a D-Day aircraft. Starting in summer of 1944, to make this aircraft (also Typhoons) easier for ground defenses to identify, white and black strips where painted on the bottoms of the wings in a white, black white, black, white pattern. |
| edtherenderman, Image # 41310 | 12 Aug 19 08:50 |
Starboard view |
| edtherenderman, Image # 41309 | 12 Aug 19 08:49 |
Port side view |
| Build Thread, Page :
1 2 [ 3 ] 4 5 (92 posts, 20 posts per page, 5 pages in total)
|
[ < Prev ] [ Next > ] |
