| Build Thread, Page :
1 2 3 [ 4 ] 5 (92 posts, 20 posts per page, 5 pages in total)
|
[ < Prev ] [ Next > ] |
| edtherenderman, Image # 41308 | 12 Aug 19 08:49 |
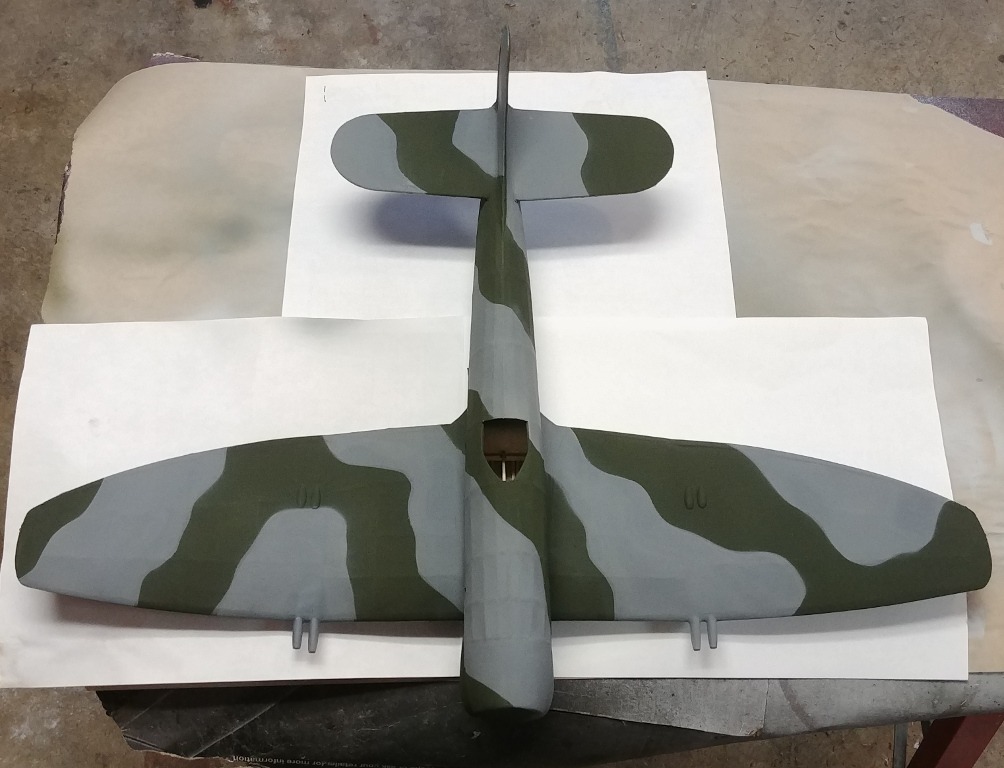
I then applied the J.A. Green after masking with blue tape. After pulling the tape, I found that I didn’t quite get all the gray on the model that I should have, so I went back and created tracing paper masks and resprayed the gray. Lesson learned here…paint the entire mode with the base color! It’s not light I’m flying this plane and need to save weight! I did get one advantage from this in that it created a soft edge between the two colors, which looks more realistic (to my eye) than the very hard edge of tape. I plan to “weather” this paint some, so I’m not worried about the inconsistent results as much as I would if this was just out of the paint barn. |
| edtherenderman, Image # 41307 | 12 Aug 19 08:44 |
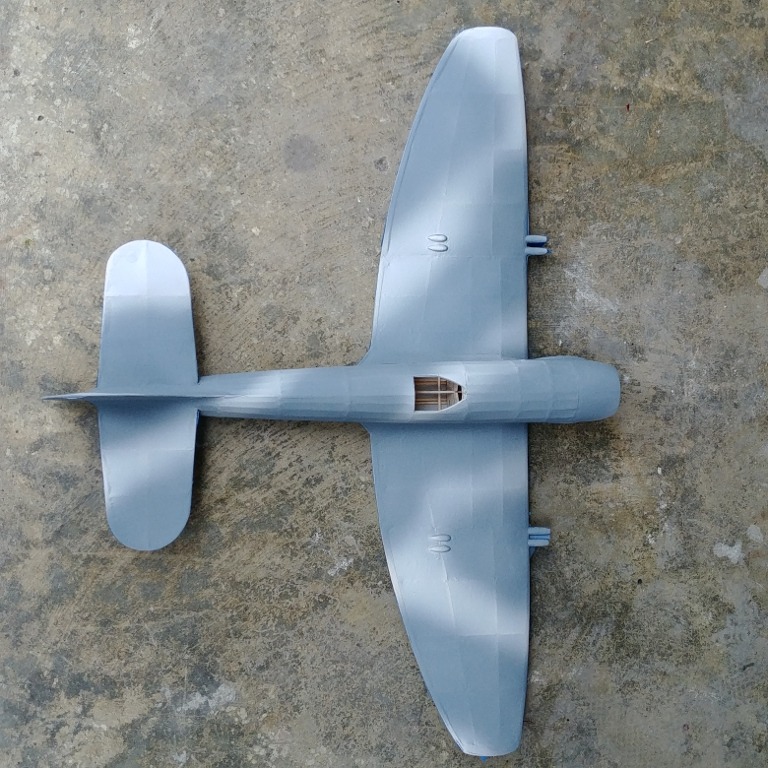
I found this site (http://www.hawkertempest.se/index.php/indetail/colours) that has the colors and the Federal Stock numbers for the Tempest. After going to my local Hobby store, I picked up some Tamiya Light Sea Gray (XF-25) and J.A. Green (XF-13) which appeared to be the closest matches. Probably not spot on, but will do for this application. I penciled in the outline of the camo and then I applied the Sea Gray over the top of Vallejo Base Gray primer. |
| Don C, Comment for image # 41234 | 03 Aug 19 09:48 |
| Thanks for the info on EZE dope. I've been wondering about how it works. Inhaled a lot of that butyrate when I was a kid. Probably explains a lot. |
| edtherenderman, Comment for image # 41234 | 01 Aug 19 14:55 |
| Also, I hope I didn't make this sound complicated. The build is very straight foreword. The wood in my kit was very good except for a few very soft stringers that I needed to replace. The only tricky part was me making it more difficult with the 3D pieces. |
| edtherenderman, Comment for image # 41234 | 01 Aug 19 14:50 |
| @Lukebozek1. When I built models years ago, I used to use the Hot Fuel proof dopes (like Pactra Hot Fuel Proof), so that was what I was used to using. When I got back into this, I bought the EZE Dope from Deluxe Materials. It's water based and about as thick as thin white glue. It goes on very easy and shrinks the tissue drum tight. I do apply the tissue slightly damp, so that is helping also. I put a second coat that I thin 2:1 with water to fill in pores. That's about all you need. It does dry fast and can get a bit globby, so make sure you keep moving and don't put too much on at a time. Clean up is really easy, soap and water, and no brain cell killing fumes!
|
| lukebozek1, Comment for image # 41234 | 01 Aug 19 14:18 |
| How does that EZE Dope compare with the stuff we use now? How many coats do you use? |
| lukebozek1, Comment for image # 41229 | 01 Aug 19 14:08 |
| This is in my closet. I was going through the four pages of details and saw the line "Because of the complexity of this build..." and said I can hold off on this one a bit. But other than a 3D printer might have to dust it off and start again. |
| rgood, Comment for image # 41229 | 01 Aug 19 13:40 |
| I agree HW! First class work there, excellent. |
| Don C, Comment for image # 41234 | 01 Aug 19 09:13 |
| Very nice work. |
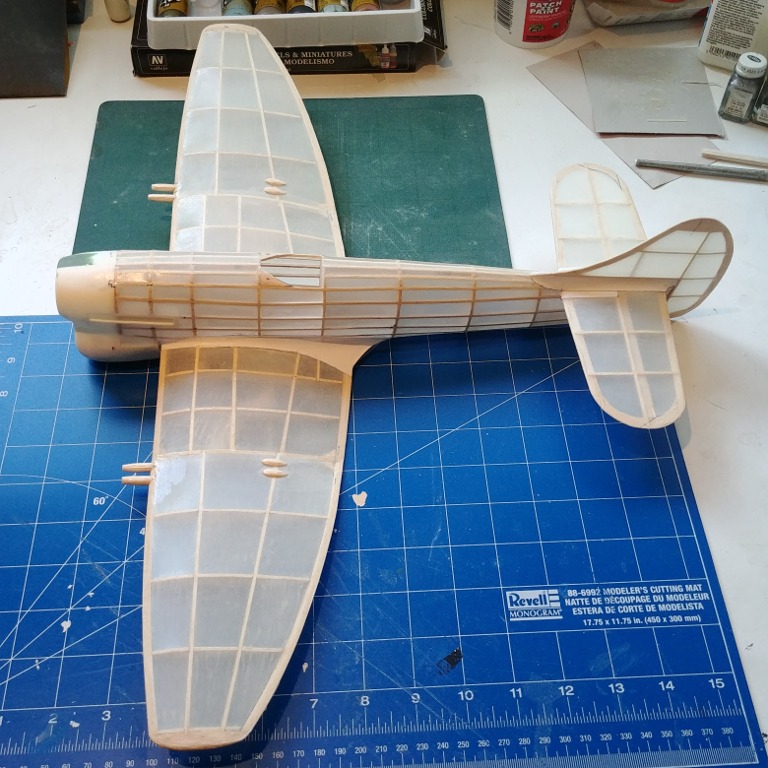
| heywooood, Comment for image # 41229 | 31 Jul 19 19:17 |
| This is nice work! The framing, covering and assembly are all very well done. Fillets too |
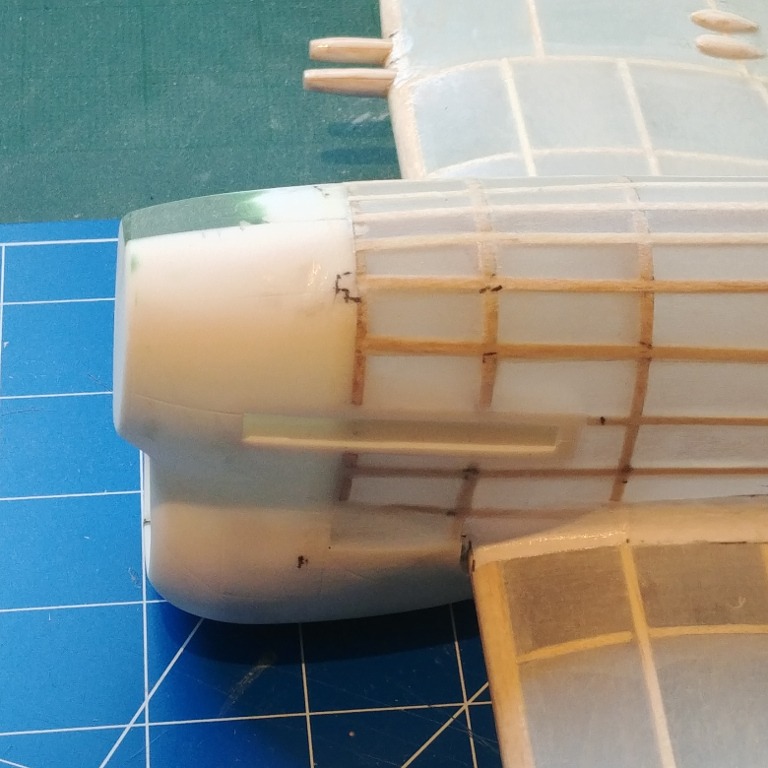
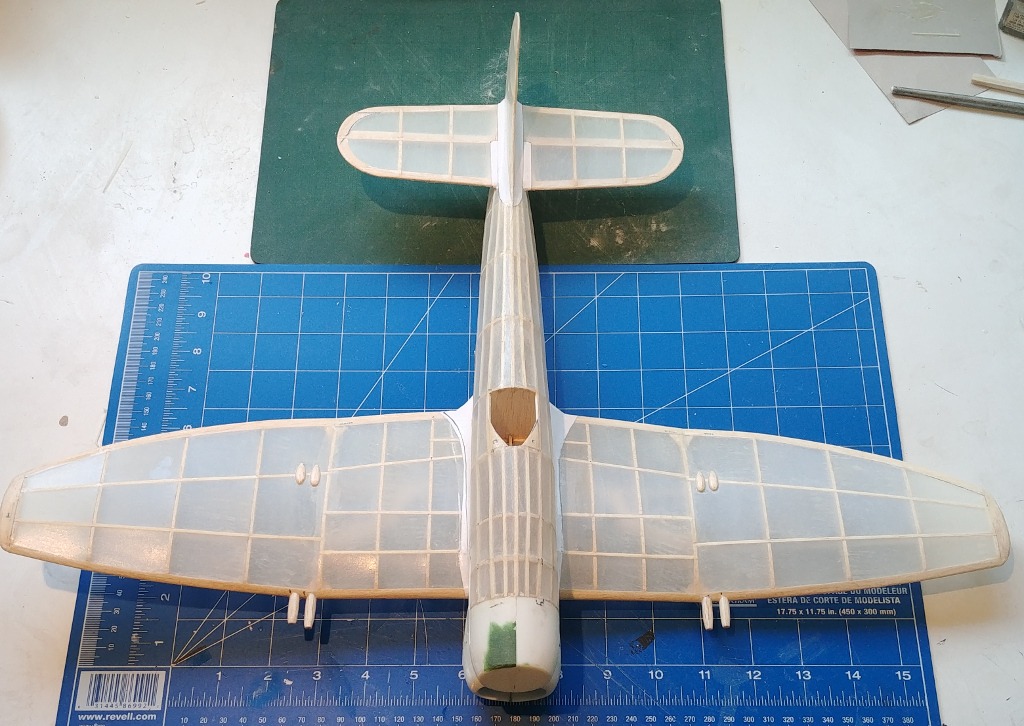
| edtherenderman, Image # 41234 | 31 Jul 19 15:37 |
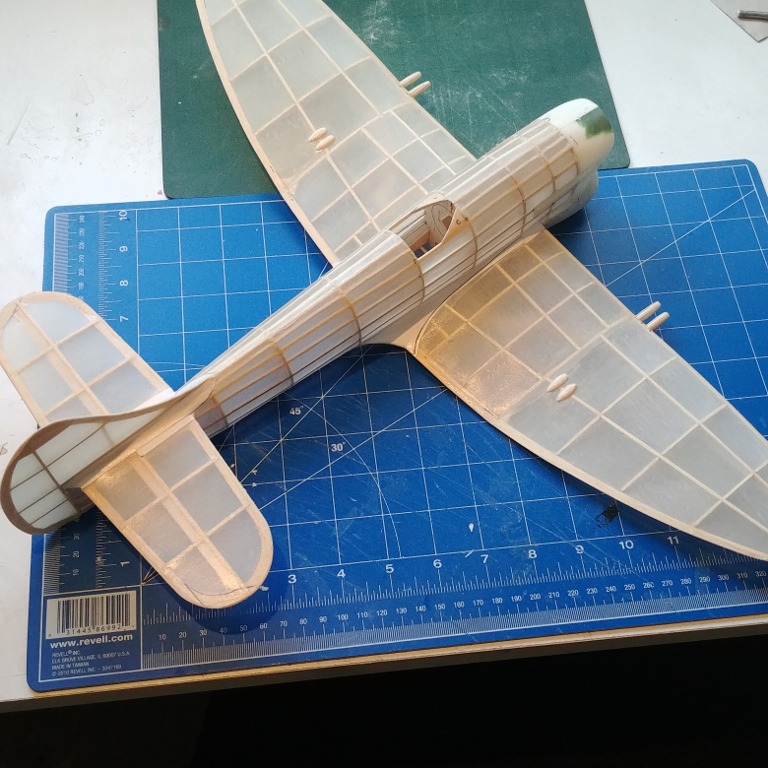
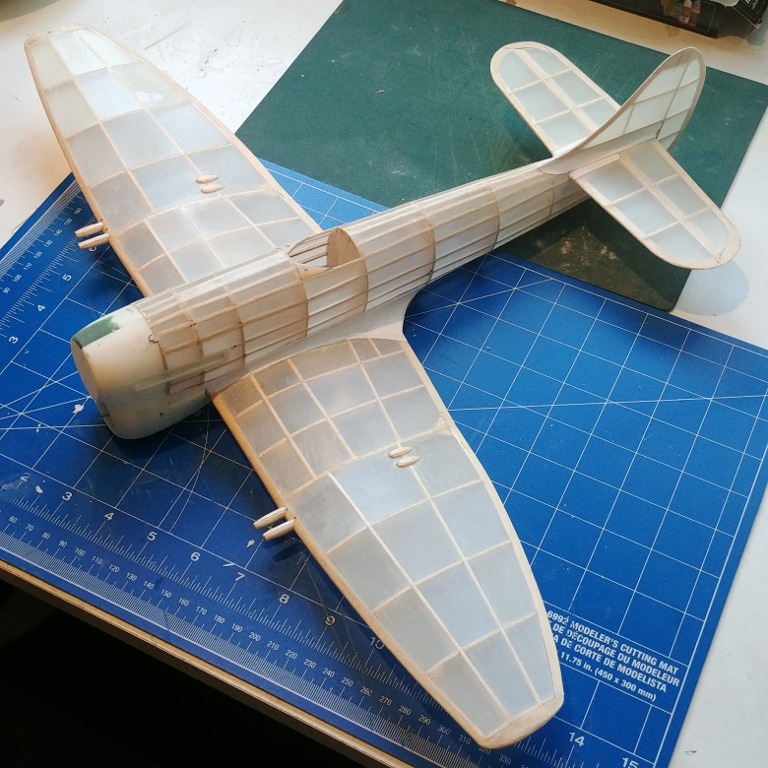
Note that fairings have been added. This was done with laser jet printer paper, attached with and covered by eze dope. |
| edtherenderman, Image # 41233 | 31 Jul 19 15:35 |
|
| edtherenderman, Image # 41232 | 31 Jul 19 15:34 |
|
| edtherenderman, Image # 41231 | 31 Jul 19 15:34 |
|
| edtherenderman, Image # 41230 | 31 Jul 19 15:33 |
|
| edtherenderman, Image # 41229 | 31 Jul 19 15:32 |
|
| edtherenderman, Image # 41228 | 31 Jul 19 15:32 |
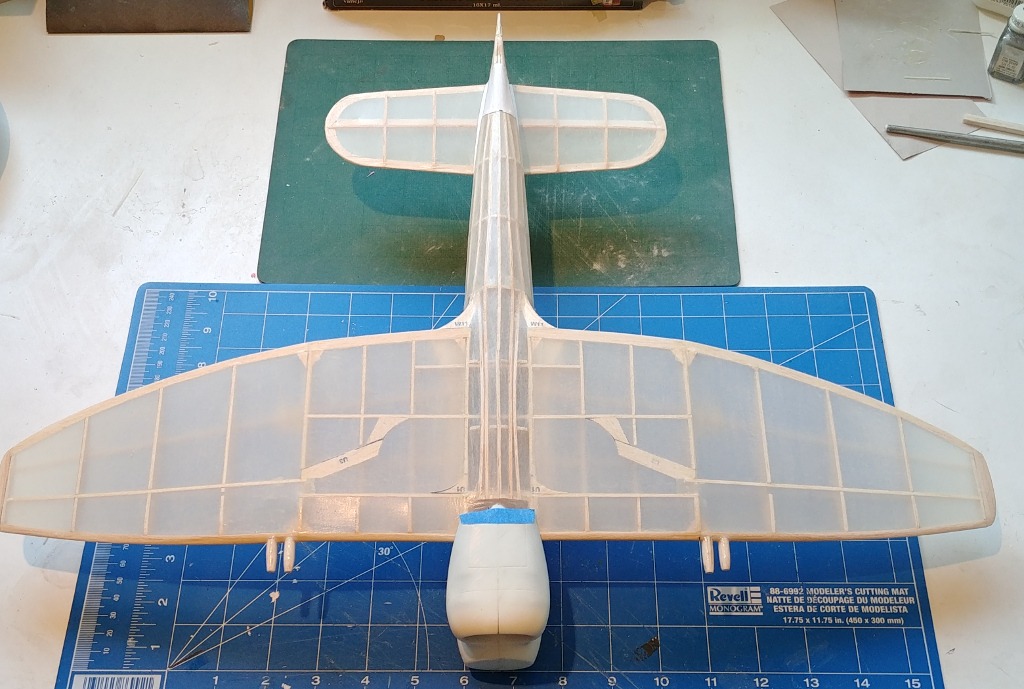
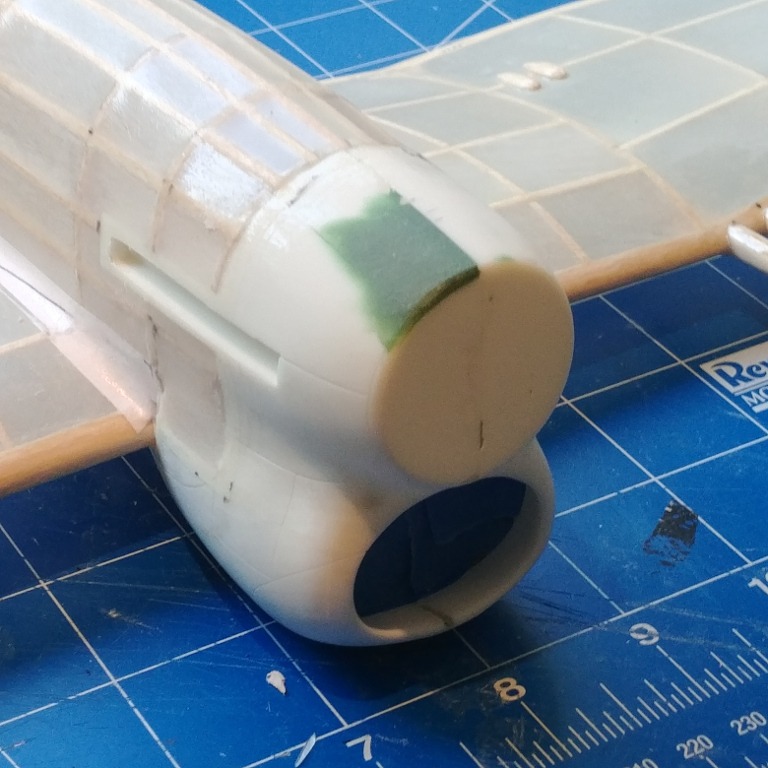
Note: Blue masking tape is to cover the radiator intake and exhaust as I was prepping to paint right before I took these pictures. |
| edtherenderman, Image # 41227 | 31 Jul 19 15:30 |
After cutting off the nose and radiator I originally built of balsa, I fitted the new printed pieces and replaced the tissue covering. Note that there is some green filler on the printed pieces. Because of shrinkage, the parts did not fit together a closely as I wanted, so some filling was necessary. |
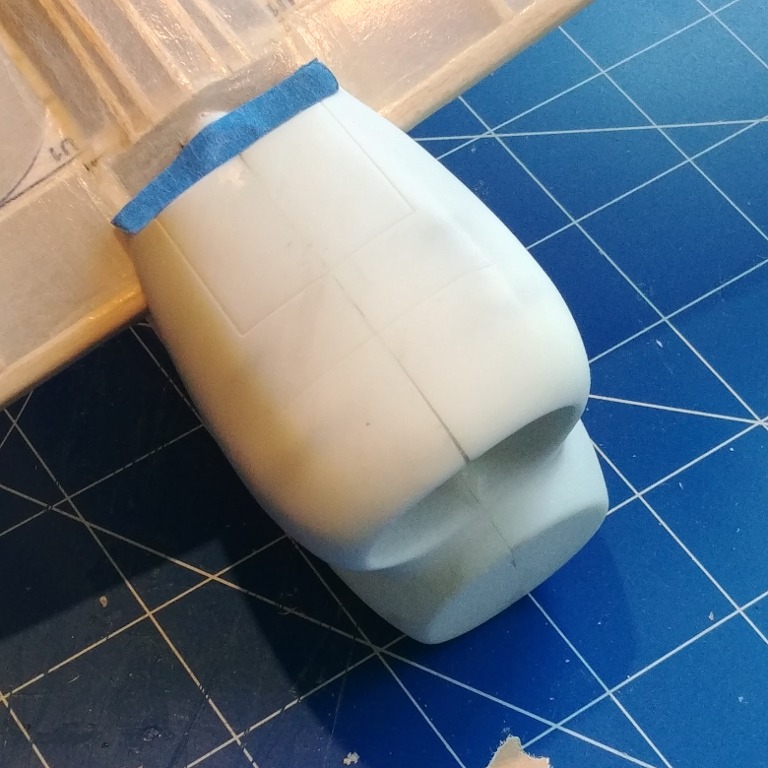
| edtherenderman, Image # 41226 | 31 Jul 19 15:27 |
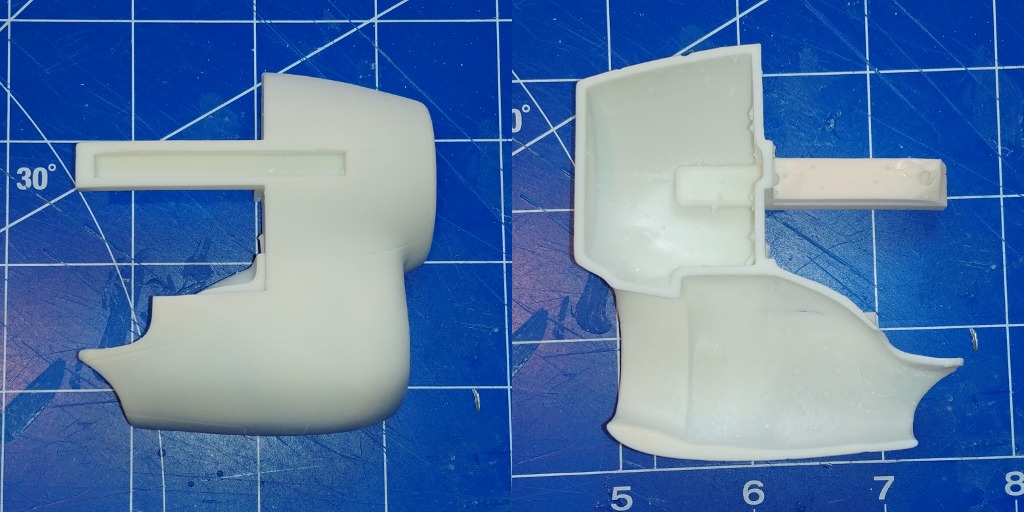
Here is where I changed my mind. I own a couple of 3D printers, and am very good at modeling in 3D software, so I decided to see if I could merge the two. Using as many reference images as I could find, I modeled the nose, radiator and exhausts in my software, then printed them out at very high resolution. This picture is of the cowling inside and out, but I also modeled and printed the radiator, air separator and air ducting to the carbs. |
| edtherenderman, Image # 41225 | 31 Jul 19 15:24 |

|
| Build Thread, Page :
1 2 3 [ 4 ] 5 (92 posts, 20 posts per page, 5 pages in total)
|
[ < Prev ] [ Next > ] |
