| Build Thread, Page :
1 2 3 [ 4 ] 5 (86 posts, 20 posts per page, 5 pages in total)
|
[ < Prev ] [ Next > ] |
| edtherenderman, Image # 43728 | 28 Jan 22 08:30 |

flap up. |
| edtherenderman, Image # 43727 | 28 Jan 22 08:29 |
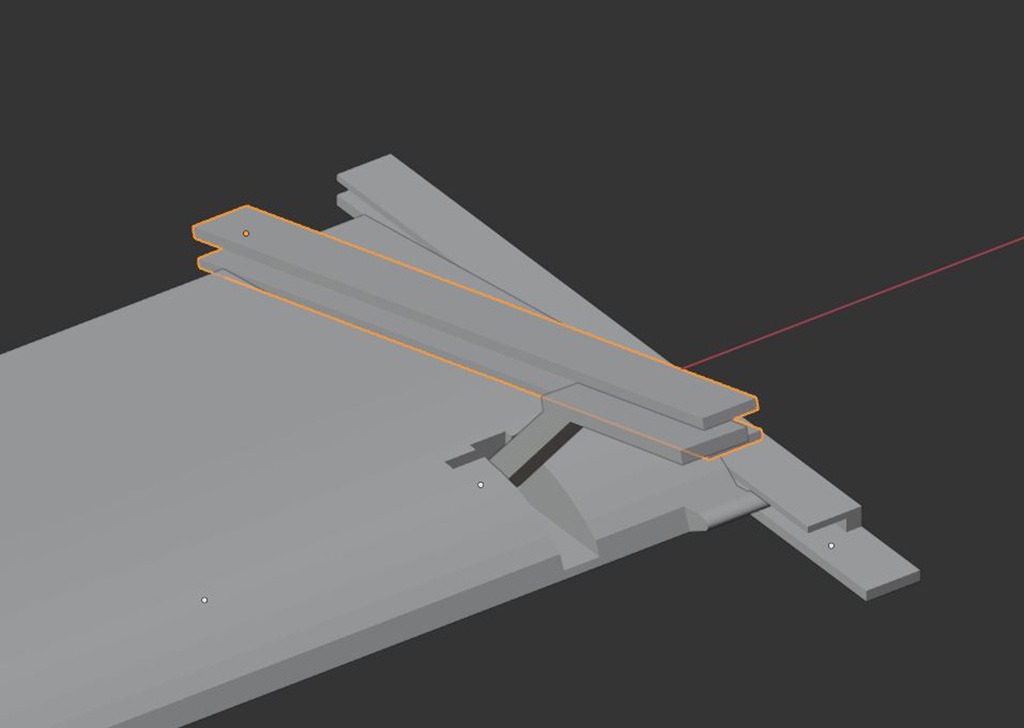
Presenting the design for the fowler flaps. I looked on line for how they work on real aircraft and studied what available pictures I could find for the Whirlwind and came up this. There are two rails, one that runs along bottom of the wing, and one along the top. The flap has a pivot point in the leading edge that runs along the bottom rail. There is a bracket that is set into the flap about 1/3 of the way back from the trailing edge that has a pivot point in the flap and runs along the upper rail. As the flap extends back, the closing distance between the two rails forces the flap down. |
| bobgood, Comment for image # 43725 | 25 Jan 22 18:28 |
| Your doing a first class piece of work here Ed - looking super!
|
| bsadonkill, Comment for image # 43724 | 24 Jan 22 07:27 |
| Nice job. I'm not great at carving myself. I'm more ruff out and sand guy. But, it is more traditional. |
| BriandKilby, Comment for image # 43723 | 24 Jan 22 07:14 |
| like the british heavy fighters, whirlwind and beaufighters. |
| edtherenderman, Image # 43725 | 23 Jan 22 20:04 |

Port side wing. Standard construction. I tried to use the 110lb Card Stock to cover the outer panel of the wing, but did not like how it was laying down, so switched back to 1/32” balsa sheet. I think the balsa gives a little more room for flex and can deal with the slight irregularities in the ribs. I’ve not covered the inner section because I’m thinking of putting working Fowler Flap on the model. These are what the original aircraft had. Still thinking about it because it will require a major modification to both engine nacelles and 3D printing the flaps and hardware. |
| edtherenderman, Image # 43724 | 23 Jan 22 20:00 |
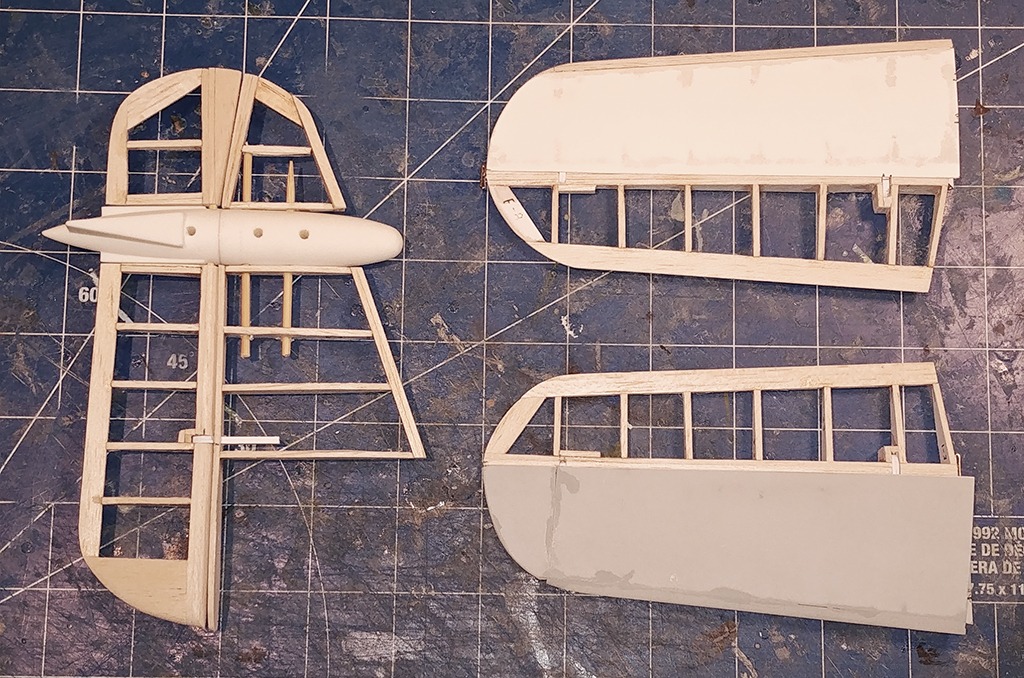
Empennage! The fin, rudder, horizontal stab, elevator and center section that they all connect to. The center section on the original model was to be carved from balsa block, but I 3D printed it instead. Using bamboo skewers to attach all parts. Elevator and bottom rudder hinge is made using .40 mm styrene shaped to fit into slots cut in leading edges with pins that will slot into the trailing edges of the fin and Horizontal Stab. Horizontal Stabs are covered in 110 lb card stock CAed in place. |
| edtherenderman, Image # 43723 | 23 Jan 22 19:54 |
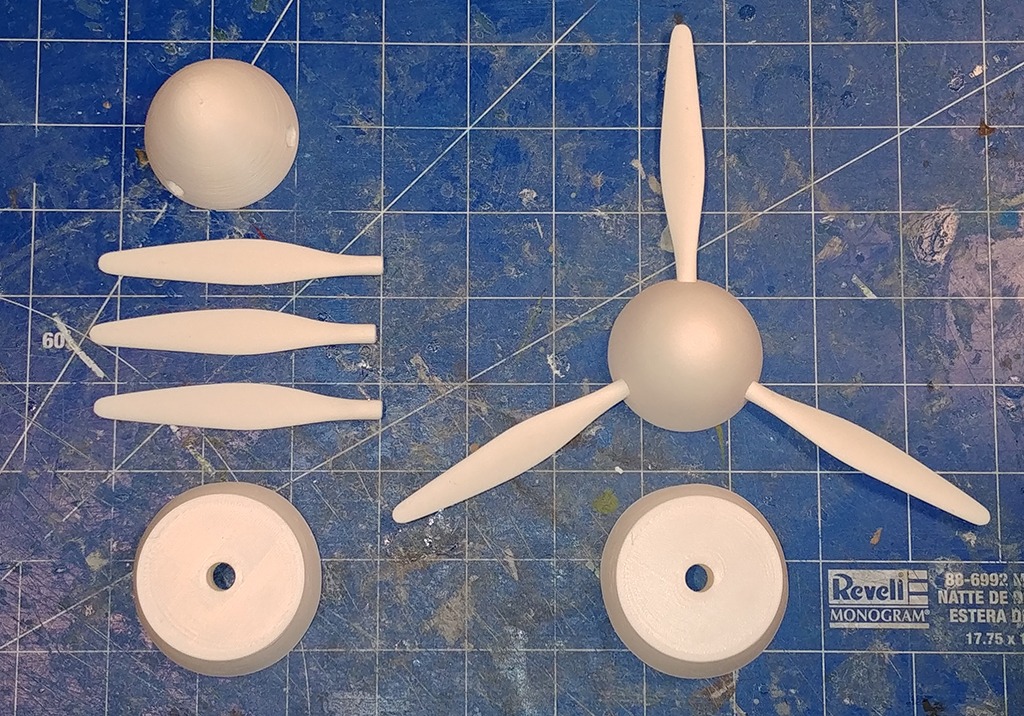
Work continues on the Whirlwind. 3D printed the nacelle parts including the front, spinners and propeller blades, three right rotation, three left rotation. |
| edtherenderman, Image # 43707 | 11 Jan 22 22:11 |
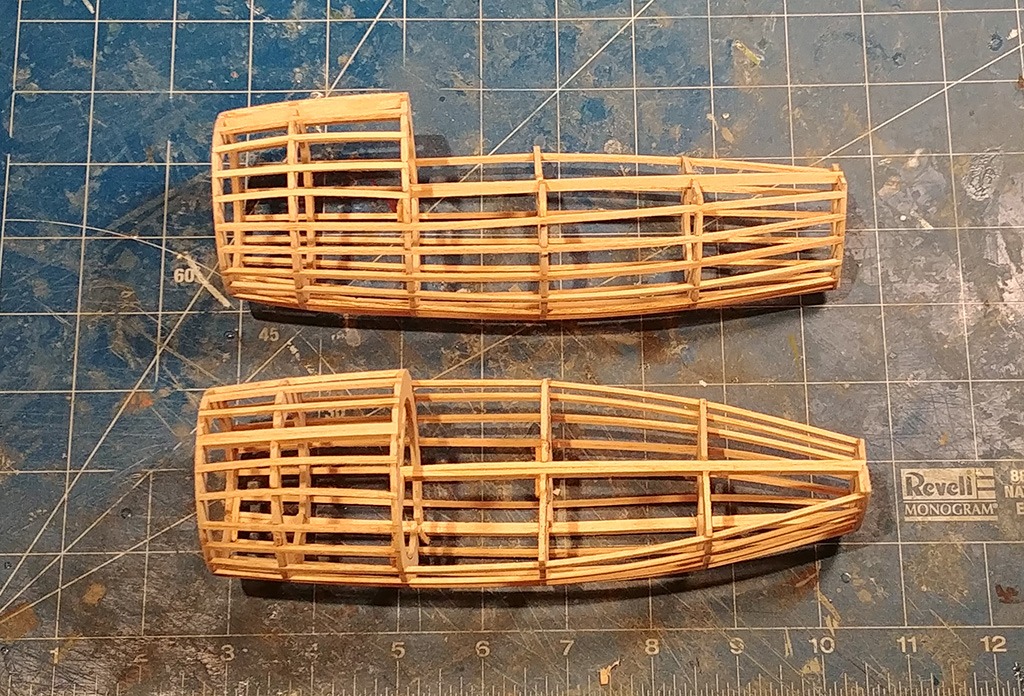
Two engine nacelles framed. |
| BriandKilby, Comment for image # 43703 | 11 Jan 22 09:33 |
| off to a good start, ed! could make it into a u-boat, also. :) |
| edtherenderman, Comment for image # 43703 | 10 Jan 22 10:50 |
| Yah, it's a big one! 33.5" wingspan! I had to get a new building board! There is going to be a a lot of infill on this one with a fuse and 2 engine nacelles! I'm going to sheet the wings,fin and horizontal stab. |
| bobgood, Comment for image # 43703 | 10 Jan 22 10:31 |
| A large model that - 21.5 fuselarge! |
| bobgood, Comment for image # 43703 | 10 Jan 22 10:30 |
| I like the Westland Whirlwind Ed. A beauty from the UK! |
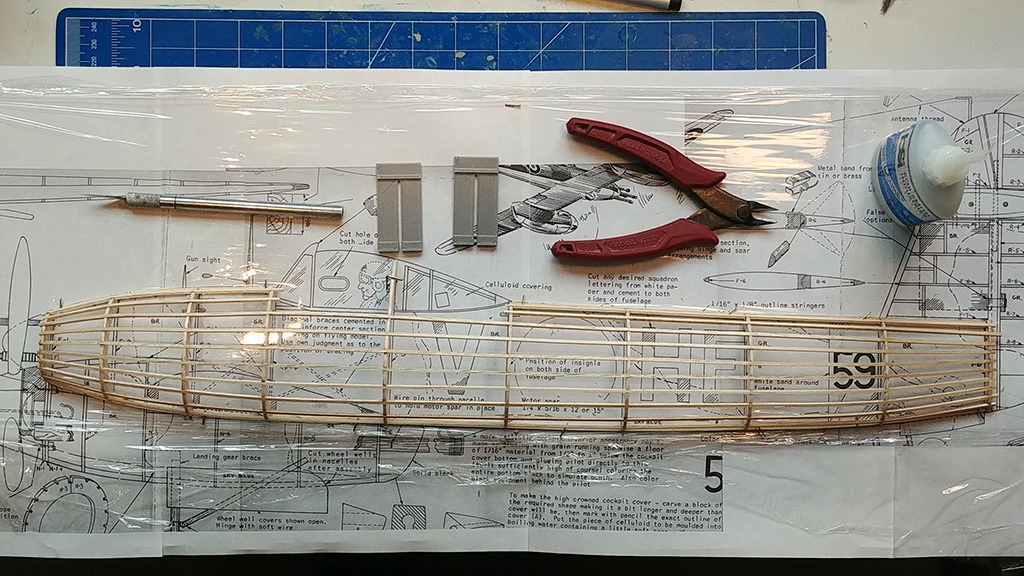
| edtherenderman, Image # 43703 | 10 Jan 22 08:08 |
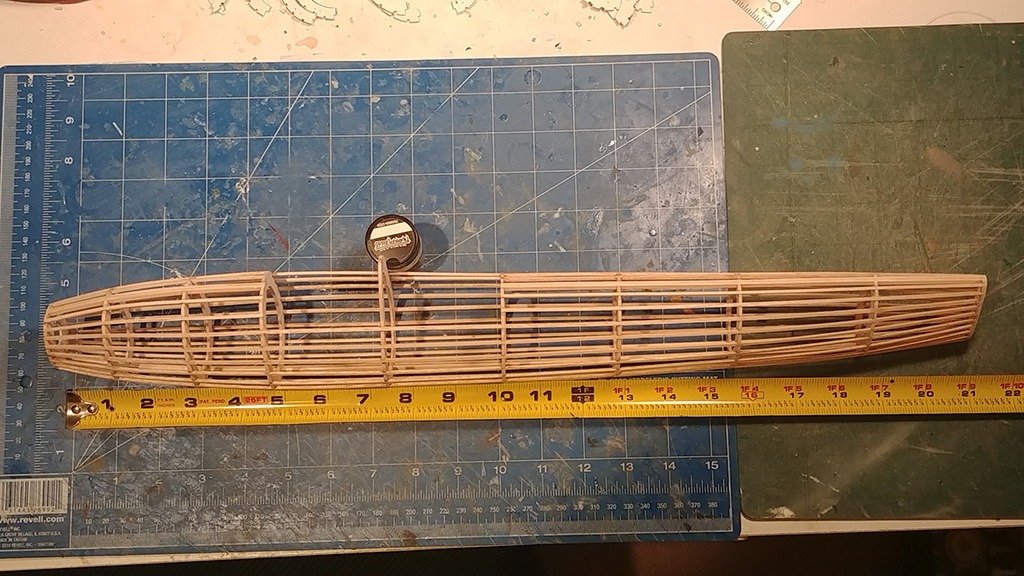
Two sides joined. I don’t think I’ve built a model that you built both halves on the plans and joined them later. I like it! Makes it easier to get a straight fuse. I did notice that the former placement was slightly off though. I don’t know if that is because of the way I scanned in the plans, or just an inherent problem with them. Lesson learned…Measure out both sides and correct the plans if necessary. @ James, saw some pictures of your Ercoupe on the Blancolirio Channel on YouTube yesterday! |
| edtherenderman, Image # 43702 | 10 Jan 22 08:01 |
Started building the Whirlwind. Here is the port side still on the plans. |
| bsadonkill, Comment for image # 43467 | 04 Jan 22 23:06 |
| Never had one of their kits. I have built some from plans I bought online. Some of their plans are very detailed like using the actual number of wing ribs. Some have interior details. I will be following your progress. |
| Don C, Comment for image # 43467 | 03 Jan 22 13:12 |
| I've done that a few times. I don't like ruining an old kit either. |
| edtherenderman, Comment for image # 43467 | 03 Jan 22 10:46 |
| The Bugatti is almost done and while I'm waiting for paint to dry, started prepping for the Whirlwind! I decided I'm not going to cut up this print wood. It's over 70 years old and it just doesn't feel right destroying this kit. So I scanned all the wood an brought it into Photoshop to make stick on templates. I also inventoried all the sticks and stringers so I can pick them up at my local hobby shop. Finally, I scanned the building sections of the plans, which I will print out and use for building instead of using the plans with the kit. Getting excited to start a new model. This one should be fun. |
| bobgood, Comment for image # 43471 | 28 Sep 21 21:50 |
| Loved the Whirlwind shape! |
| BriandKilby, Comment for image # 43469 | 28 Sep 21 19:18 |
| a good looking plane! |
| Build Thread, Page :
1 2 3 [ 4 ] 5 (86 posts, 20 posts per page, 5 pages in total)
|
[ < Prev ] [ Next > ] |
