| Build Thread, Page :
[ 1 ] 2 (21 posts, 20 posts per page, 2 pages in total)
|
[ Next > ] |
| wingspanner, Comment for image # 7521 | 03 Apr 08 12:13 |
| Cheers Steve, much appreciated |
| SteveM, Image # 7521 | 02 Apr 08 21:04 |
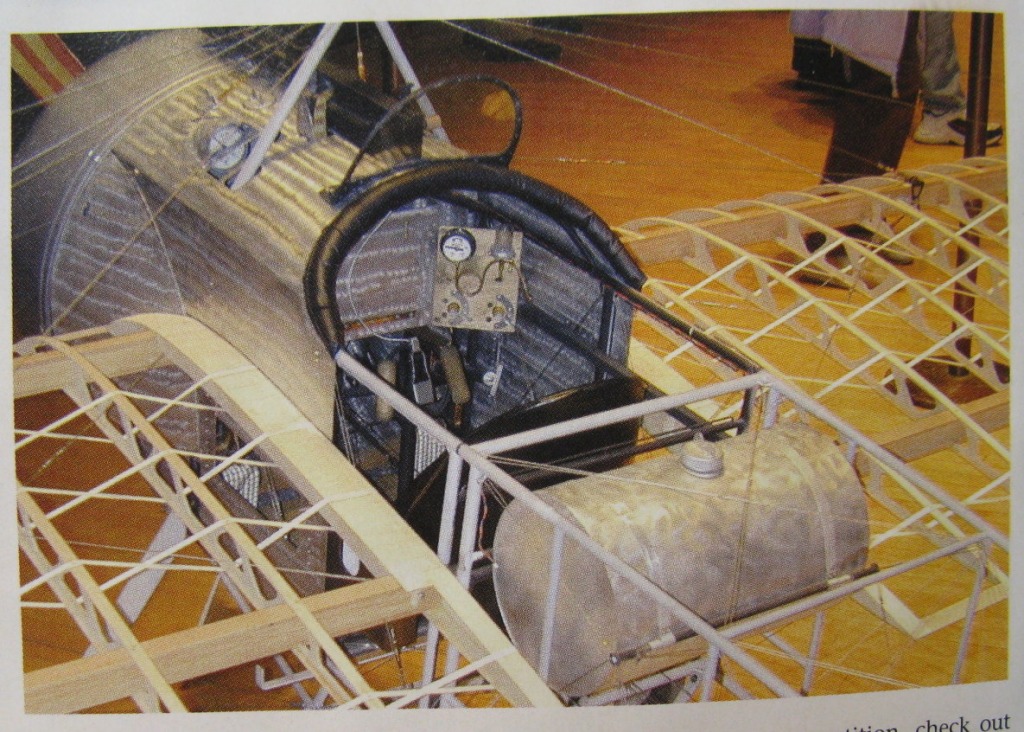
50% scale E.III Eindecker |
| SteveM, Comment for image # 6673 | 21 Feb 08 15:28 |
| As promised, I have typed up a guide on how to mold and cast parts like this and added it to my collection of guides. |
| SteveM, Comment for image # 6673 | 20 Feb 08 13:03 |
| The original part weighs 5.9 grams, the resin copy is 6.2 grams. Thats a 5% weight increase. |
| jgood, Comment for image # 6673 | 20 Feb 08 12:58 |
| Looks good. Any difference in weight? |
| SteveM, Image # 6673 | 20 Feb 08 12:29 |
I ended up having to remake the mold half that had air bubble issues. After a coat of paint you wouldn't know which was the original. |
| SteveM, Comment for image # 6666 | 19 Feb 08 22:13 |
| The left half was made with the cowl suspended while I poured rubber into the area under it. As the rubber level rose air got trapped. The most obvious is the jelly-bean shaped hole next to the cylinder. The one that is difficult to see are the two circles down in the bottom of the mold are not solid as air bubbles were stuck in the holes on the front of the cowl. You can't really see, but a plethora of tiny bubbles rests just under the surface of the rubber. Had there not been a cowl in the way they would have been able to escape to the surface.
Moral of the story - I should have poured the left mold so the rubber was on top so gravity could help me. Klean Klay to the rescue! |
| SteveM, Image # 6666 | 19 Feb 08 22:07 |
The mold halves. The one on the right came out great but the one on the left has air bubble issues. |
| SteveM, Comment for image # 6663 | 19 Feb 08 20:06 |
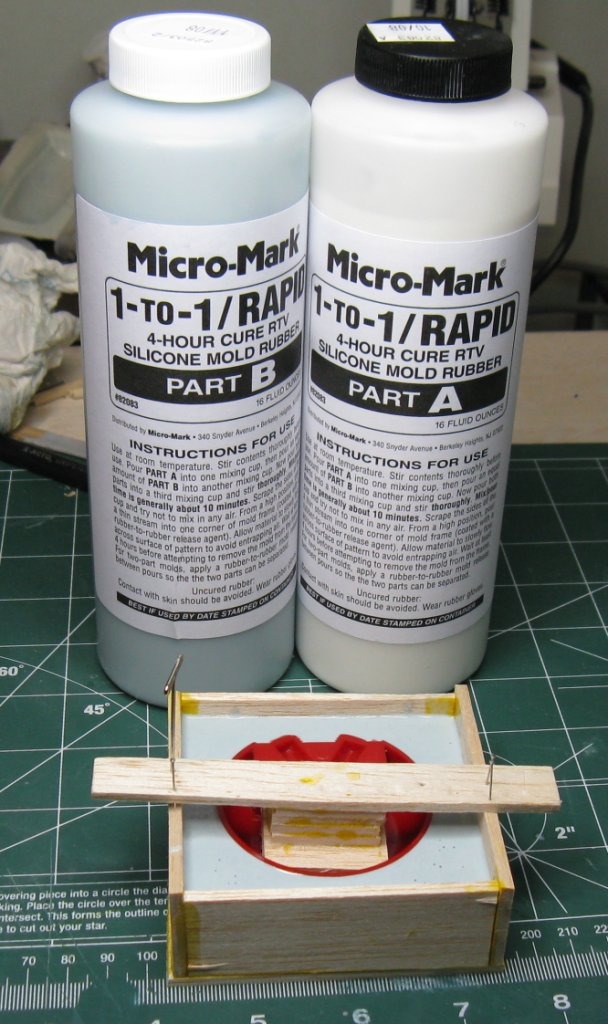
| Stir the liquid rubber slowly, pour in a very thin stream and allow it to puddle up and flow over the part, and then tap the mold on the table to encourage bubbles to rise. We'll find out in 2 hours how I did on not trapping air bubbles. |
| moostang51, Comment for image # 6663 | 19 Feb 08 18:50 |
| "It's alive....it's alive....How do you assure yourself of no trapped air bubbles. Haven't made a mold like this butI did do plaster moulding replicas for my brothers 160 year old Victorian house and am just curious. |
| SteveM, Image # 6663 | 19 Feb 08 18:06 |

In about 4 hours (7pm PST) the top half will be cured and I can start casting some resin. Rubber mold cost is about $6, not too bad but don't go crazy with it. |
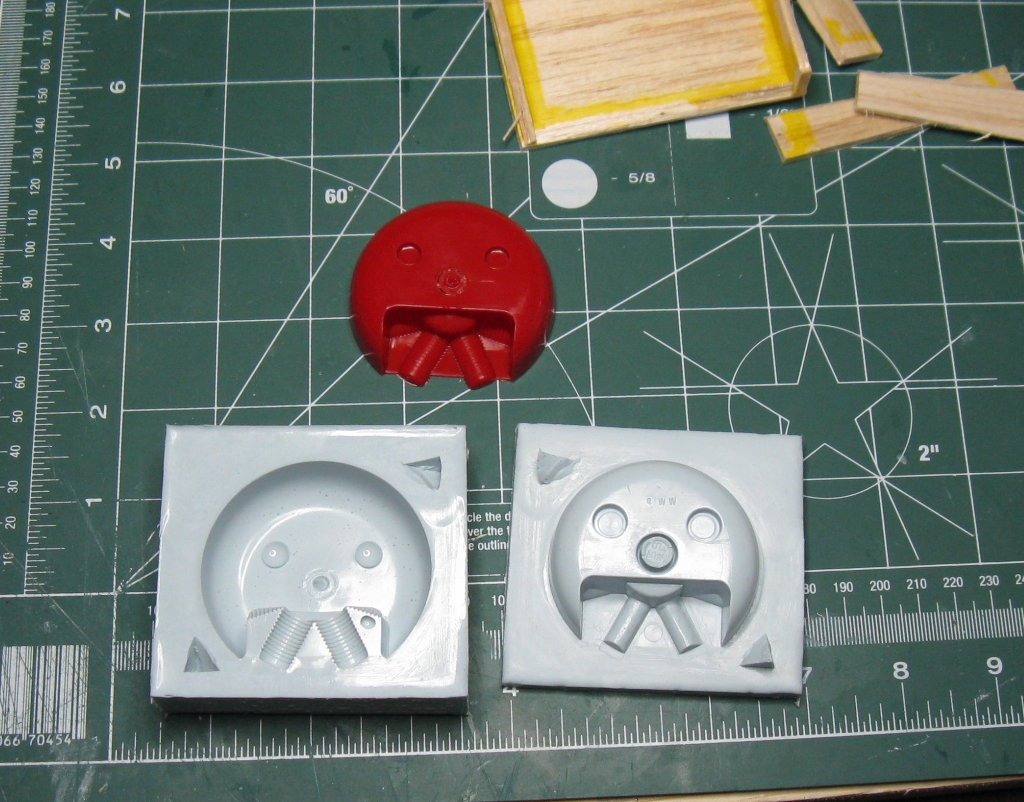
| SteveM, Image # 6662 | 19 Feb 08 18:04 |

Alignment lugs carved out and rubber-to-rubber release agent applied. Don't worry, I'll add this whole process to my web page on duplicating plastic parts. |
| Creosotewind, Comment for image # 6654 | 19 Feb 08 14:17 |
| I thought those Fokkers were flying Messerschmitts. |
| SteveM, Comment for image # 6654 | 19 Feb 08 14:13 |
| Sheet metal, hammer, and dollies? About all I could do to help is find a way to turn a mold into a plastic shell. |
| John M Oshust, Comment for image # 6654 | 19 Feb 08 14:06 |
| Steve, I am looking for something to use as a cowl on the "Rat". 6.75 inches in diameter....anyone have any ideas?? |
| SteveM, Image # 6654 | 19 Feb 08 13:55 |
Waiting for the first half of the mold to cure. Do any other Fokkers out there need a cowl besides DD and myself? |
| SteveM, Comment for image # 6508 | 10 Feb 08 18:07 |
| It is also far back in my queue and I don't have the CR-600 yet. I'm thinking of trying a complete rubber mold then injecting the resin, making sure that no air bubbles get caught up in the fins. I'll charge you what you charge everyone else. |
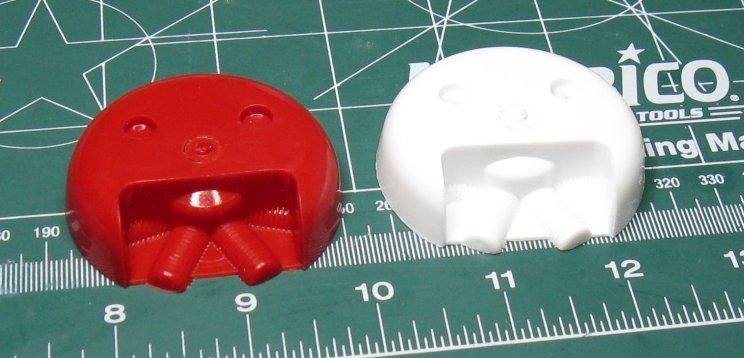
| David Duckett, Comment for image # 6508 | 10 Feb 08 17:50 |
| That's much better than the one I have and that's plenty of detail for me. I won't be building this for awhile but I would certainly appreciate the help and I'll be happy to pay for the time and effort. |
| SteveM, Image # 6509 | 10 Feb 08 17:26 |
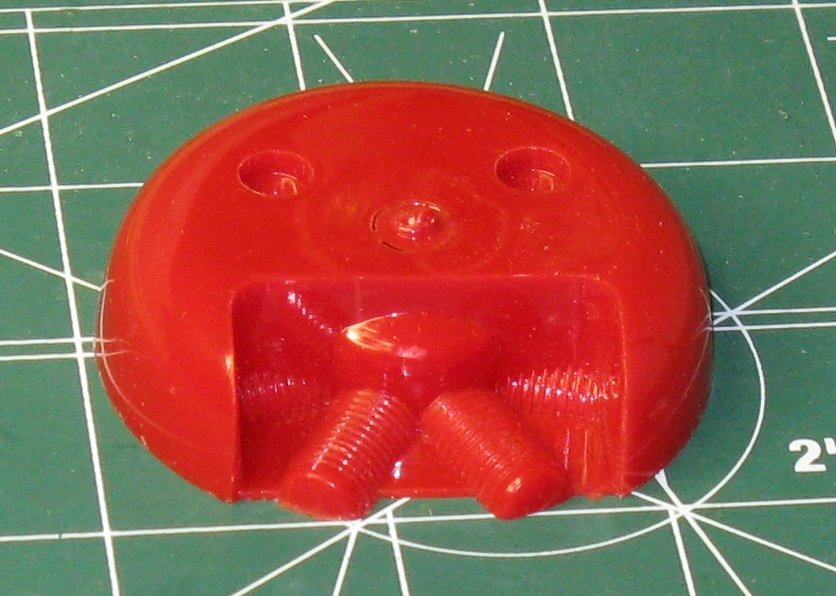
The back. Notice that it is not vacuum formed and the "WW9" printing indicates that this is an original kit cowl. |
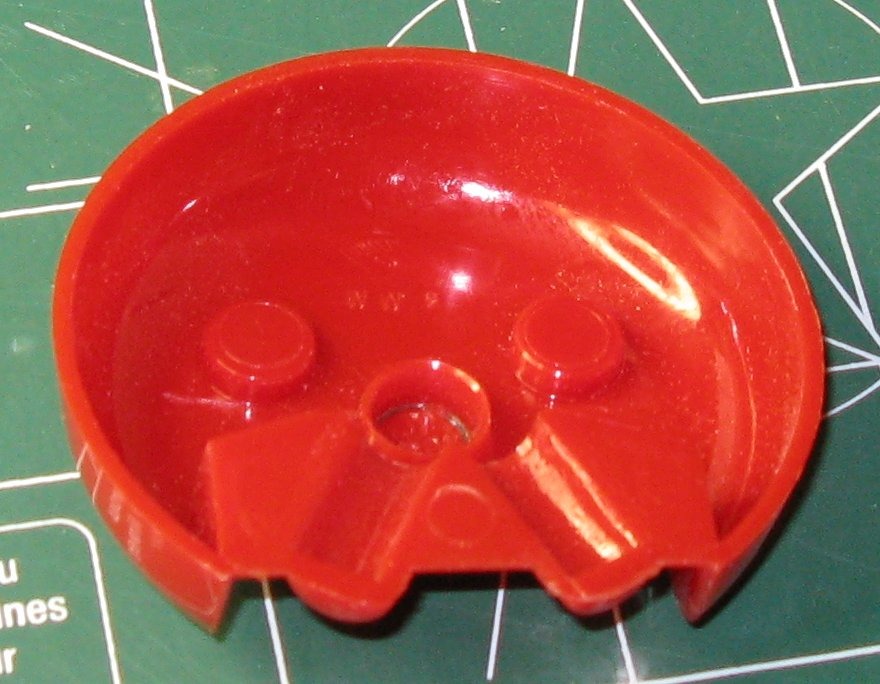
| SteveM, Image # 6508 | 10 Feb 08 17:25 |
David, this cowl has more detail, but is it enough? If it is, I can make one for you and one for me, possibly from CR-600. |
| Build Thread, Page :
[ 1 ] 2 (21 posts, 20 posts per page, 2 pages in total)
|
[ Next > ] |
