| Build Thread, Page :
[ 1 ] (11 posts, 20 posts per page, 1 pages in total)
|
|
| hjlittman, Comment for image # 40422 | 10 Aug 18 21:24 |
| I forgot to take the drag tabs that I use to tighten the turn for indoor flying off the left wing tips. Hitting the edge of a clockwise turning thermal they acted like Gurney flaps and caused a barrel roll to the right. If I had taken them off the left thrust would have pulled it in. We're flying a 17 gram model with 70 square inches of wing area here. The thermals are a lot stronger than the air conditioner turbulence in the gym! Oh yes, I forgot to mention that not enough WWI models showed up for that part of the contest...only flew the Embryo. |
| Don C, Comment for image # 40422 | 22 Jul 18 09:58 |
| Congratulations. Not building fliers, I don't understand how trim would make it go into a thermal rather than being flipped out of it. |
| hjlittman, Comment for image # 40422 | 21 Jul 18 23:10 |
| Finished third. Discovered that my Wright Amount of Wrong while successful indoors needs very different trim flying outdoors. If it hits a thermal head on it climbs like crazy as I intended it. However, if it clips a thermal on the side, instead of circling in it does a rather spectacular barrel roll out of it. Needs more testing. |
| Don C, Comment for image # 40422 | 21 Jul 18 19:15 |
| Looks like a good fit. What happened at the contest?
|
| hjlittman, Image # 40422 | 21 Jul 18 16:00 |

I traced Former 1 onto a single piece of 1/16" sheet, cut it out and glued it into the back of the plastic nose with the nose reinforcement spacers. Since the plastic nose is meant to go over Former 1 that makes the fuselage 1/16" longer, but who's going to notice? Then I made a simple box key using the opening that existed in Former 1. The top and bottom of the hole is curved so I simply made the top and bottom of the box to match the curves. The key is quite snug and is perfectly aligned but I'm still going to add a couple of neodymium magnets to hold it in place. I hate loose nose blocks. |
| biplane guy, Comment for image # 40380 | 16 Jul 18 12:24 |
| My next build after I finish the Sopwith Camel will be an SE5a so I'm watching closely. Thanks for the tip. The laser-cut kits are a welcomed improvement, aren't they? |
| Skyediamonds1985, Comment for image # 40380 | 13 Jul 18 14:17 |
| Looks really good. Congratulations. |
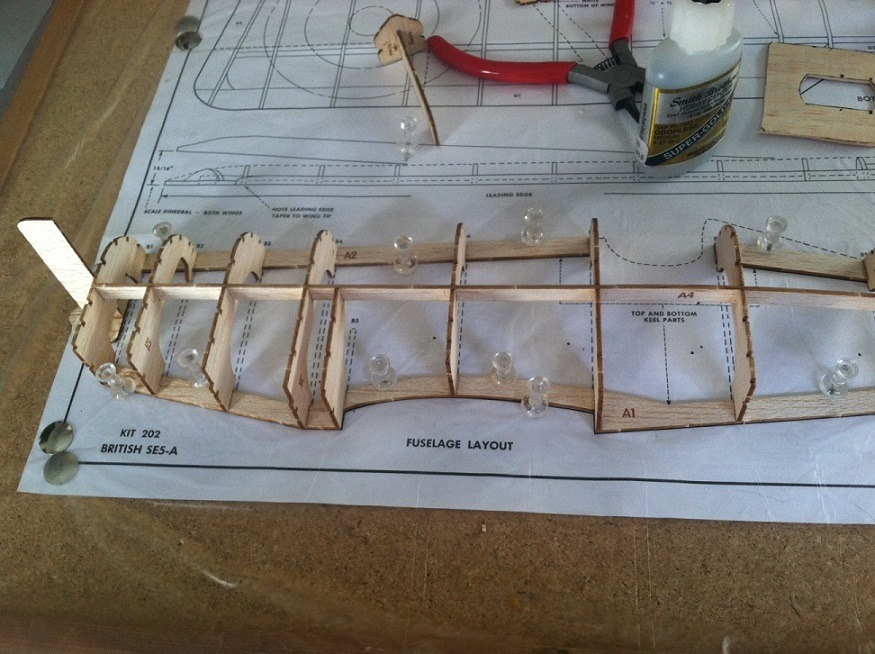
| hjlittman, Image # 40380 | 12 Jul 18 15:29 |
I finshed the other side in 15 minutes and left for the dentist. Hint: half height formers are easier to install if you do it after the side keel in installed. More later today, Howard |
| hjlittman, Image # 40379 | 12 Jul 18 15:25 |
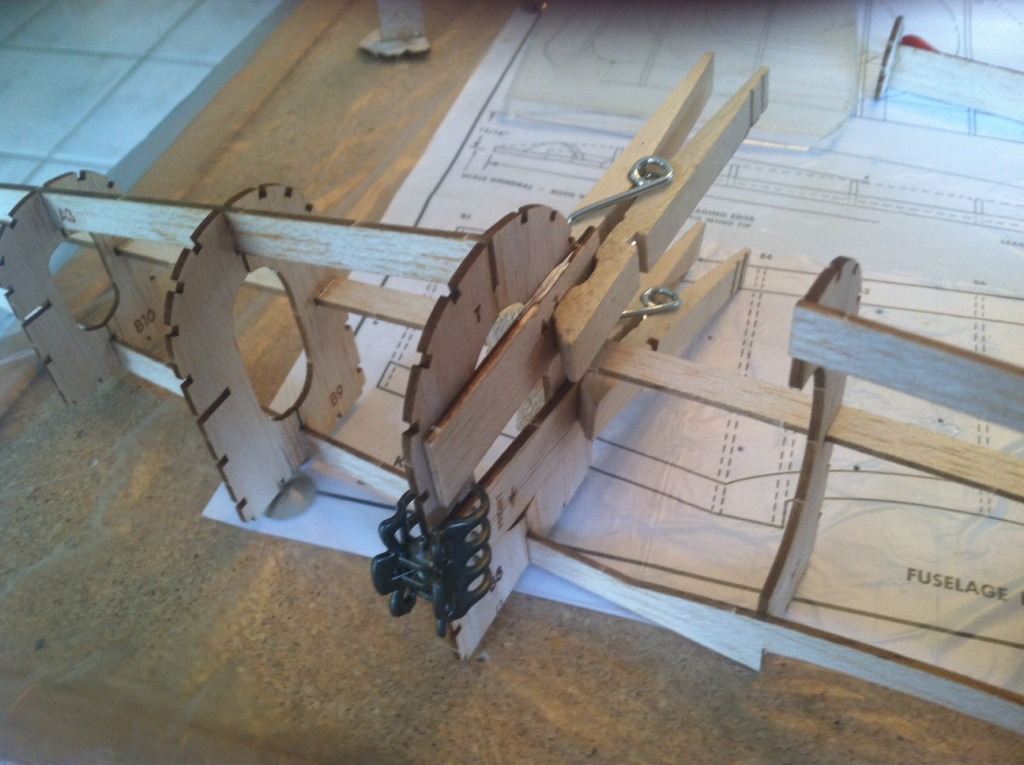
I had 15 minutes between coming home from dropping my wife at work and leaving for a dentist appointment so I decided to do the other side of the fuselage. I used some laminated blade tools from another kit as guides to make sure the other half of the formers were in alignment. They happened to be in my building supply carrier but crafter's Popsicle sticks work just as well. I clamped them to the already aligned former with clothes pins, laid the half former against the guides, used a small Scuncii hair clip to clamp it down and applied glue. I find that the little Scuncii hair clips make very useful low pressure clamps. |
| Don C, Comment for image # 40378 | 12 Jul 18 11:13 |
| Looks like you're going to be busy to make Sunday. |
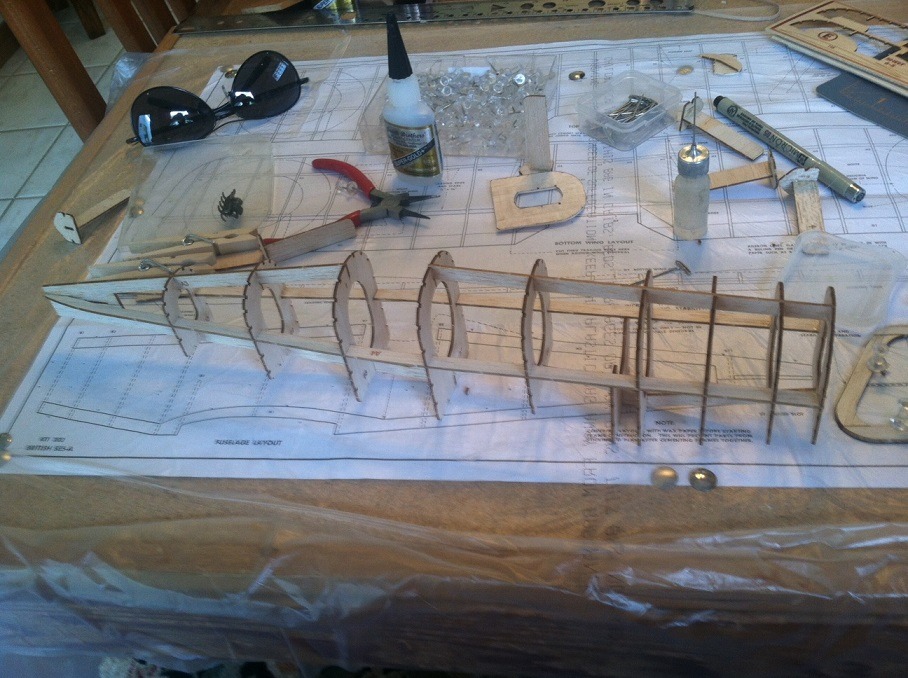
| hjlittman, Image # 40378 | 11 Jul 18 23:14 |
There is a local FAC contest (Squadron 69) this Sunday for WWI (Mass Launch), Embryo, and Half Wakefield. I have my own Embryo, and have no plans to build a Half Wakefield, but thought I had a qualifying WWI model. (Let me rephrase that comment about the Half Wakefield. I have several plans for them I just don't plan to build one.) Anyway, I found that my ancient WWI model was in no condition to be restored, let alone fly, so I decided to build a new one for the contest. I had a #202, SE5A, kit on the shelf so I decided to build that "box stock" (Will have removable nose block, more aggressive prop, reinforced landing gear, F.A.I. Tan rubber, and colored tissue but other than that stock.) for the contest. It's not the most competitive choice, they fly much better than one might think and, I've seen them do quite well in competition. I started it about a half hour before I had to leave to pick up my wife this evening. I was using a right angle tool left over from another kit for alignment, odorless CA glue, and kicker. The photo shows how far I got. |
| Build Thread, Page :
[ 1 ] (11 posts, 20 posts per page, 1 pages in total)
|
|
