| Build Thread, Page :
[ 1 ] 2 (38 posts, 20 posts per page, 2 pages in total)
|
[ Next > ] |
| Don C, Comment for image # 43250 | 13 Jun 21 13:25 |
| Yes, it is.
|
| bobgood, Comment for image # 43250 | 12 Jun 21 16:36 |
| Neat and clean work Mike. |
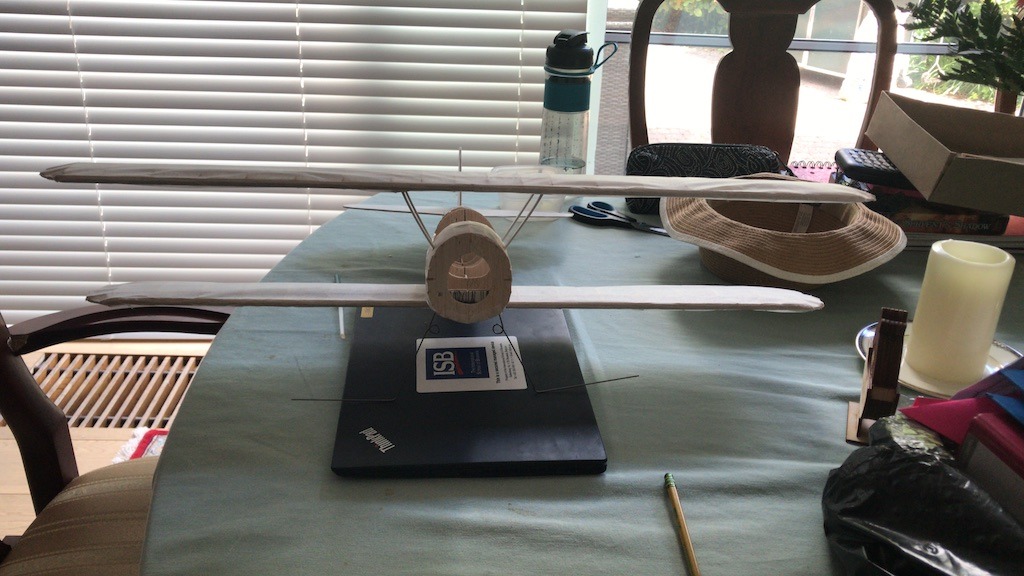
| NATOMike, Comment for image # 43250 | 12 Jun 21 14:09 |
| Slow and not a lot of time to make this |
| NATOMike, Image # 43250 | 12 Jun 21 14:08 |
slow and not a lot of time for male this |
| NATOMike, Image # 43249 | 12 Jun 21 14:04 |
Finished Balsa wood (except fuel tank) |
| BriandKilby, Comment for image # 42287 | 22 Jun 20 12:27 |
| thanks ed!. |
| edbecky, Comment for image # 42287 | 22 Jun 20 11:30 |
| Brian, I've read two different scenarios on why to use the Alcohol mixture. One stated it will quicken the drying procedure. The other said it prevents the model from warping by not shrinking it as much as straight water will. I've read this on the internet so it has to be true :-) All joking aside I've had pretty good results with the alcohol/water solution. |
| Don C, Comment for image # 42287 | 22 Jun 20 10:39 |
| Ed's right. Go ahead and shrink it. Don't soak it, just a light mist. I remember it was tough to get the wings right. Looks like you did well.
|
| BriandKilby, Comment for image # 42287 | 22 Jun 20 10:11 |
| ed, I usually spray the tissue with just water, how does the alcohol solution help? |
| edbecky, Comment for image # 42287 | 22 Jun 20 09:12 |
| Why not spray it with water just like it is, I use an old Windex spray bottle with a 20% alcohol to water solution. A little clay in the nose will take care of your tail heavy problem. |
| NATOMike, Image # 42287 | 21 Jun 20 10:31 |

Got it all together and then realised I had forgotten to shrink the tissue. The center of gravity is off (too tail heavy). Not sure I will be abel to get it to fly, but learned a lot about making this model. Tough build, but wings are easier than the SE5a. |
| NATOMike, Image # 42286 | 21 Jun 20 10:29 |
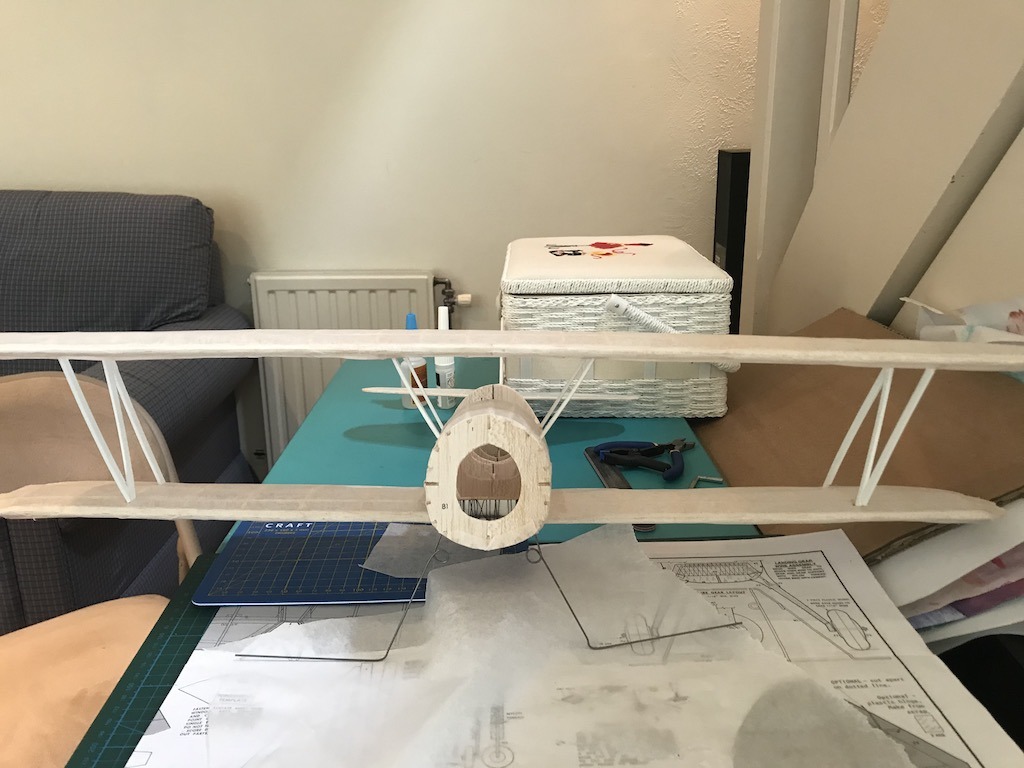
Got both outer struts on. With the one of the left I pieced together the struts properly. The ones of the right side (as seen from the front) are backwards. It was not obvious from the start, but once I saw the proper way it made sense. |
| NATOMike, Image # 42285 | 21 Jun 20 10:27 |
Attached the upper wing by starting with the inner struts, little hard without "slots " for the rear struts |
| Don C, Comment for image # 42271 | 19 Jun 20 10:27 |
| Looking good so far. Like Heywooood said, just take your time. |
| heywooood, Comment for image # 42271 | 18 Jun 20 21:51 |
| your work looks very good here - take your time and break the model down into small individual tasks..then just work each task to completion to your best ability. This is how I keep from being overwhelmed anyway. When I get discouraged or need time to work something out I take a walk or go for a bike ride. You've got this. |
| heywooood, Comment for image # 42270 | 18 Jun 20 21:46 |
| Hi Mike - nice work on the Stearman!
For what it's worth I only use sandpaper on a small block to shape my wings - just like Don. Never touch it with anything else. Starting with 80 grit and holding the block at the same angle as the tops of the ribs where they meet the LE and sanding from the center of the wing to the tip. First the tops then the bottom of the wing LE are sanded. Also you want to run the block the full length of the wing occasionally to keep everything even. Keep checking the LE for dips or flat spots and address those as you find them. DONT sand too deep - less is more but accuracy makes a better model |
| NATOMike, Comment for image # 42270 | 18 Jun 20 13:37 |
| Hi Don C--good advice on looking at other builds. I worked out okay for my taste, but this build has been hard. I like the challenge, but I feel as if I am always missing something.
|
| NATOMike, Comment for image # 42072 | 18 Jun 20 13:35 |
| Sorry...Should read "Had" not "hard"
|
| Don C, Comment for image # 42270 | 15 Jun 20 14:47 |
| Sandpaper works just fine. You'd probably have to sand it smooth after using a knife anyway. I use a small wood block a couple of inches wide and 4-5 long. It helps keep the line straight. It's looking good. If you run into a problem, look at some of the other builds. It helped me a lot . |
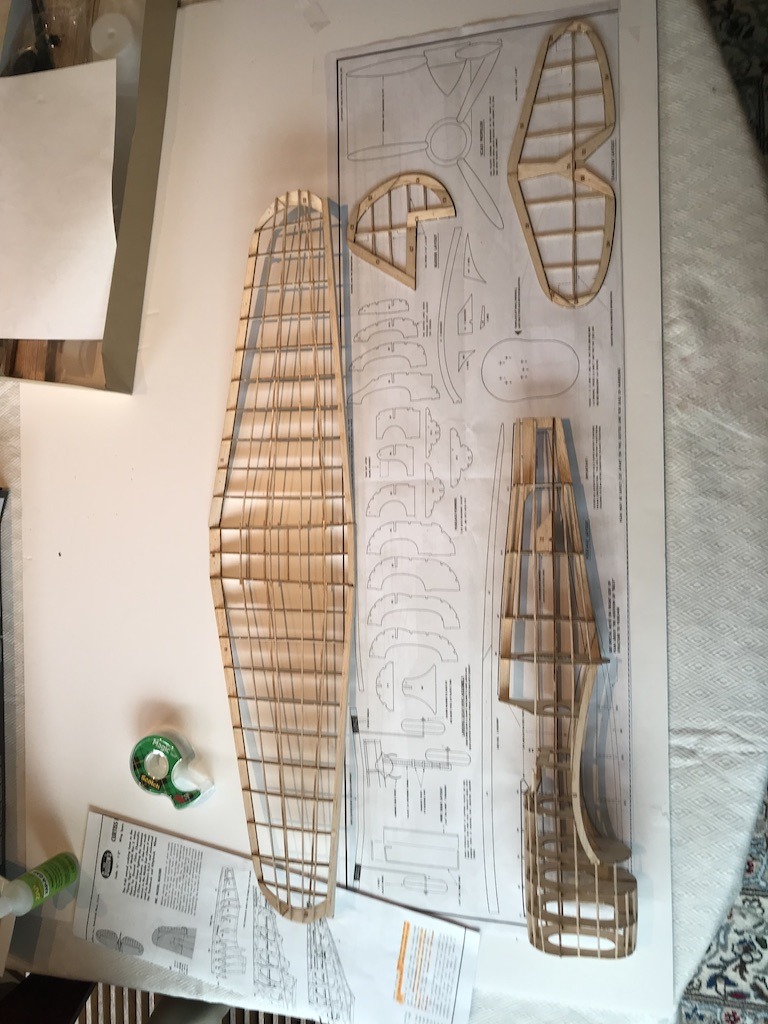
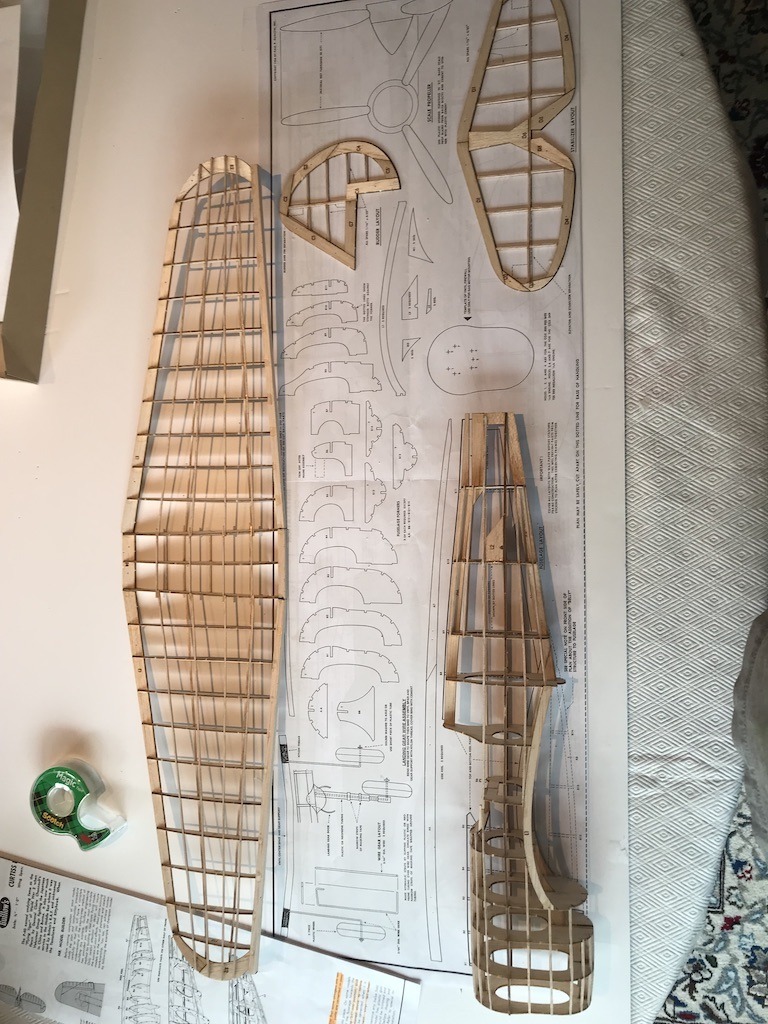
| NATOMike, Image # 42273 | 15 Jun 20 12:44 |
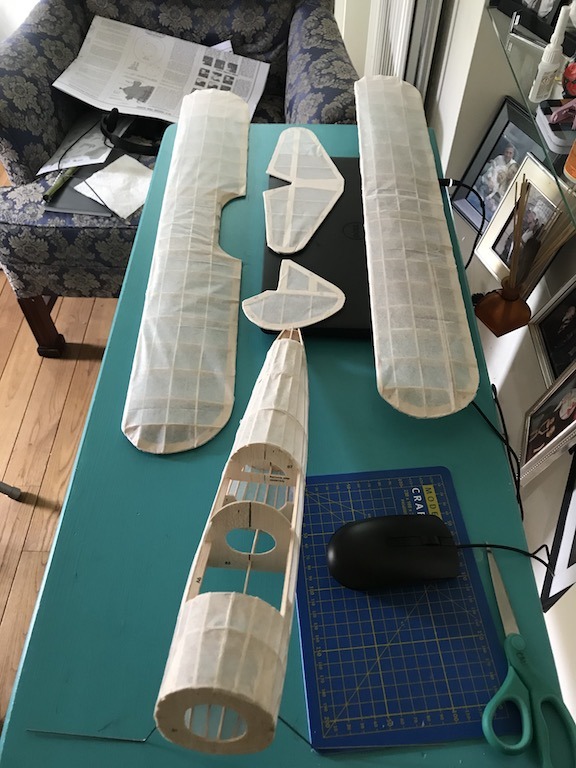
Finished covering with tissue. I discovered that the B5 pieces were so long I could not place the lower wing underneath the fuselage. Spent some time sanding it down. I am beginning to assemble the parts, but I am not sure the nose cone will go on easily to make it flyable. I can already sense the CG and the CM are way off. |
| Build Thread, Page :
[ 1 ] 2 (38 posts, 20 posts per page, 2 pages in total)
|
[ Next > ] |
