|
Main Menu
User Login
View By Aircraft
Users Aircraft
|
| Build Thread, Page :
[ 1 ] 2 (22 posts, 20 posts per page, 2 pages in total)
|
[ Next > ] |
| Xanadu, Comment for image # 23759 | 13 Oct 11 21:53 | | Really nice looking kit! Did a great job on it. |
| fstengel, Comment for image # 23759 | 13 Oct 11 13:02 | | I only use the front propeller. I have had trouble trimming the aircraft. It flies quite well, but I had to put a lot of downthrust: a shim of about 1-1.5mm on the top of the noseplug. Honestly I have seen better flyers. |
| Dale1416, Comment for image # 23759 | 13 Oct 11 10:43 | | Thanks guys for your comments. Your question fstengel .... my Skymaster won't be getting any air time. Since you also made the Dumas Skymaster, what kind of flyer was it? Dumas didn't supply the different pitch propellers required for the push-pull configuration. |
| poppy, Comment for image # 23759 | 12 Oct 11 12:57 | | Nice crisp work. Just gorgeous!! |
| frwyflyer, Comment for image # 23759 | 12 Oct 11 07:47 | | Yes, I agree VERY NICE!! |
| fstengel, Comment for image # 23759 | 12 Oct 11 03:15 | | Nice build. Does it fly? |
| Dale1416, Image # 23759 | 11 Oct 11 22:44 | 
Dumas kit 211, 17 1/2" wingspan, Skymaster kit, came out in 1997. Realized it was out of production, when I recently tried to order it from Dumas. However, available from Penn Valley Hobby Center, Lansdale, PA 19446, for $18.23 plus shipping. This company is a small operation that buys up old and out of production kits. |
| Dale1416, Image # 23758 | 11 Oct 11 22:44 | 
Upon opening the kit, I found the vacuum formed parts to be almost unacceptable and would have called Dumas for replacement. |
| Dale1416, Image # 23757 | 11 Oct 11 22:43 | 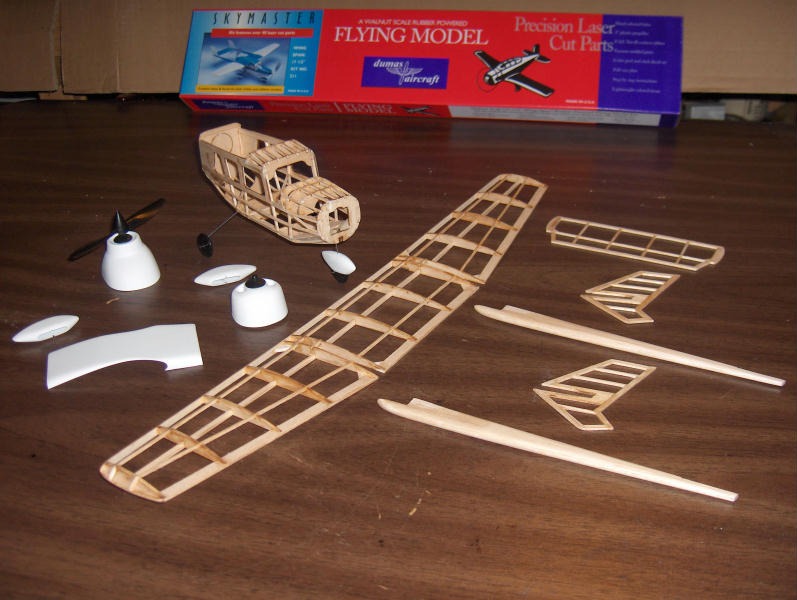
Balsa materials were of good quality and engineering of the kit was very good. I did add a former to the bottom of the fuselage and another spar to the top of the wing. |
| Dale1416, Image # 23756 | 11 Oct 11 22:43 | 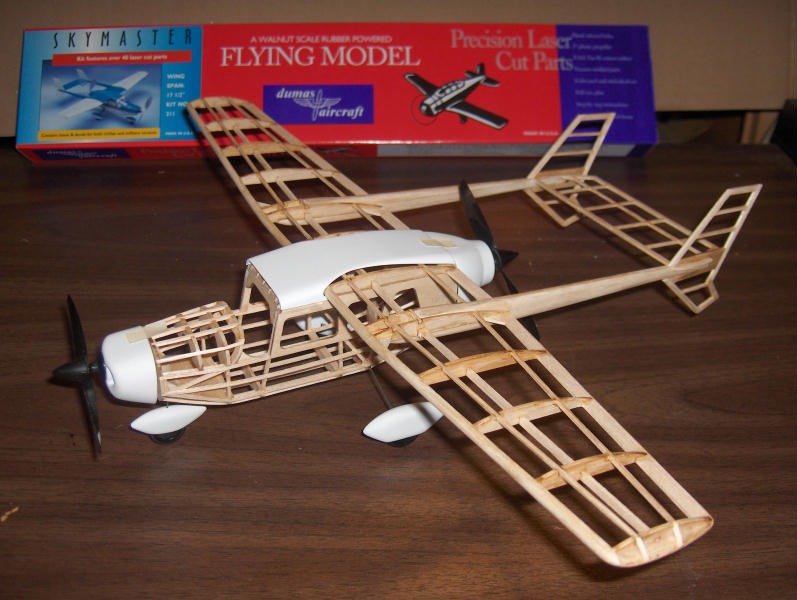
Trial assembly of components. Clay was added to the nose for correct stance. |
| Dale1416, Image # 23755 | 11 Oct 11 22:43 | 
|
| Dale1416, Image # 23754 | 11 Oct 11 22:42 | 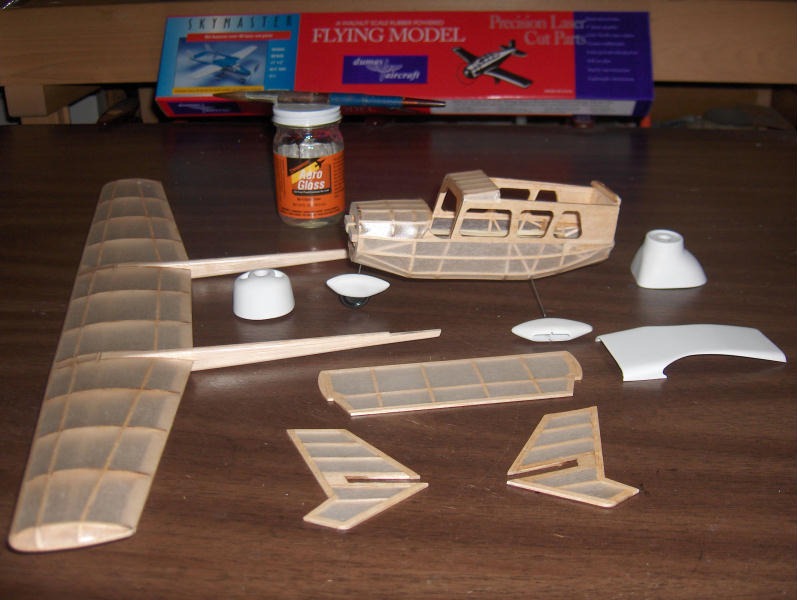
Covering completed using clear dope and dry tissue. After shrinking the tissue, two coats of clear dope were applied. |
| Dale1416, Image # 23753 | 11 Oct 11 22:42 | 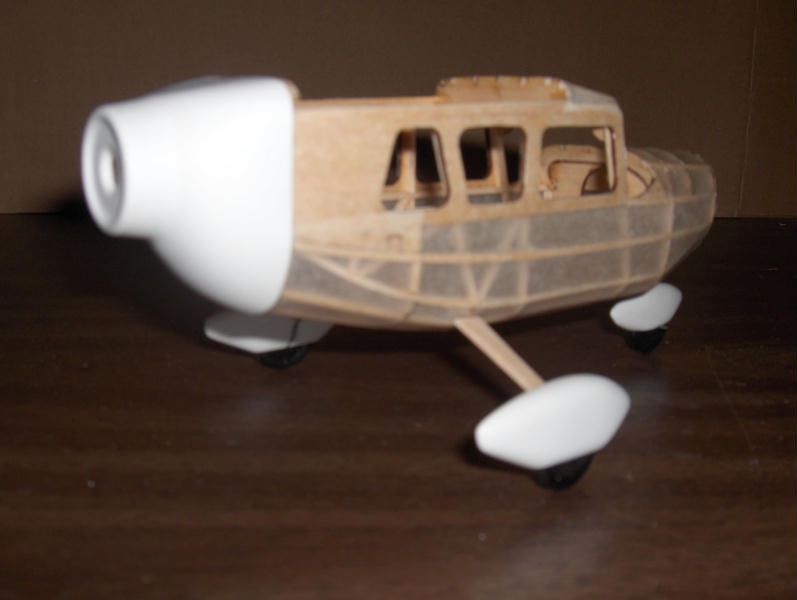
To aide in splicing tissue on the fuselage, small gaps were filled in with 1/16 sq. stringer stock. Working on the Skymaster fuselage reminded me more of building a jet car, not a plane. |
| Dale1416, Image # 23752 | 11 Oct 11 22:42 | 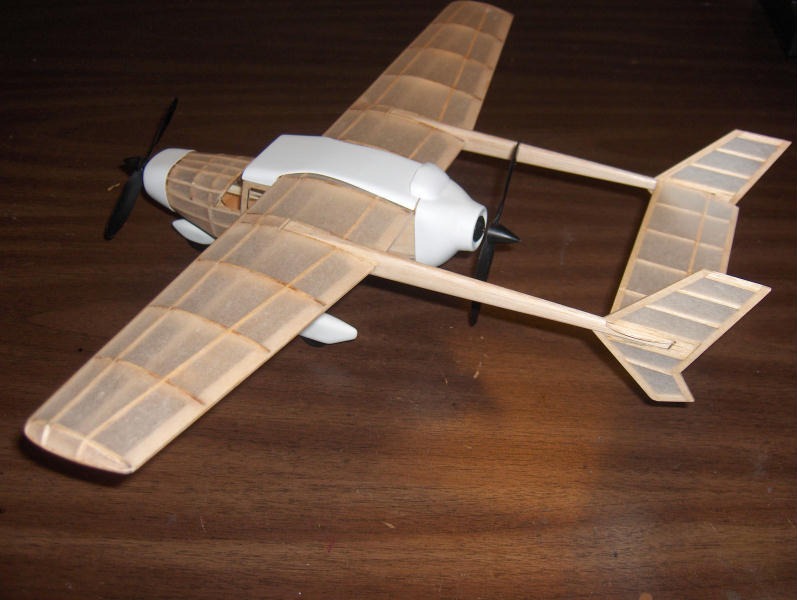
After looking at pictures of real Skymasters, I noticed that the Dumas kit did not include an air scoop for the rear engine, so I fabricated one from a vacuum formed cut-off scrap. Adding this air scoop helped to hide the defect in the vacuum formed rear engine cowl. |
| Dale1416, Image # 23751 | 11 Oct 11 22:41 | 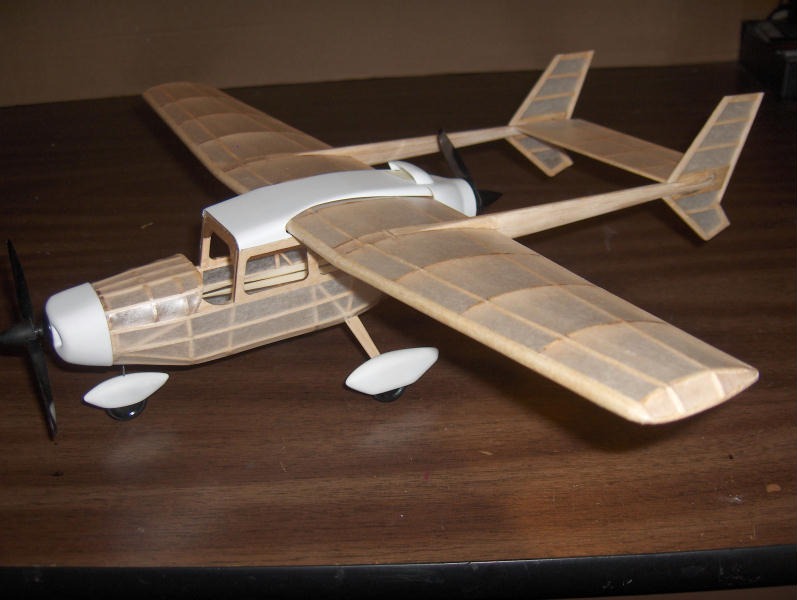
Ready for painting. Parkzone ultra micro Cub propellers with spinners were used in place of kit propellers. |
| Dale1416, Image # 23750 | 11 Oct 11 22:41 | 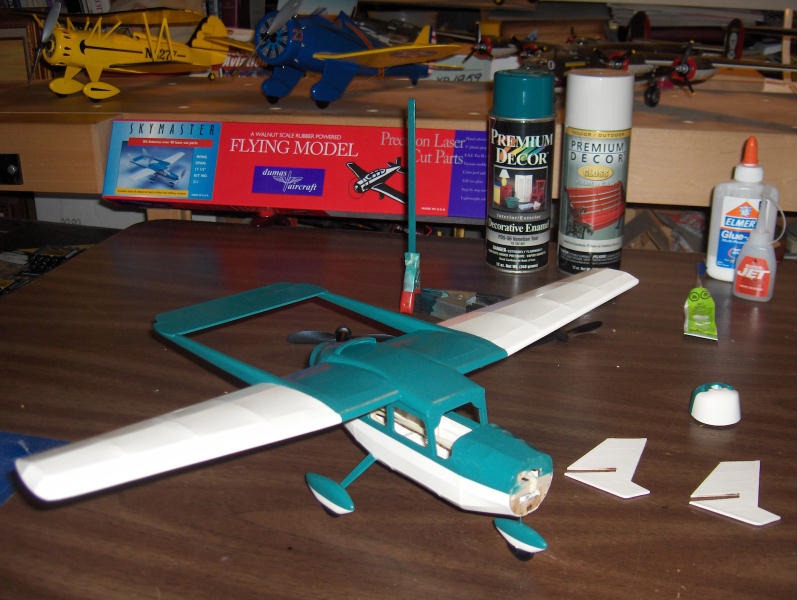
After careful masking, the Skymaster was painted Venetian Teal and off-white. |
| Dale1416, Image # 23749 | 11 Oct 11 22:40 | 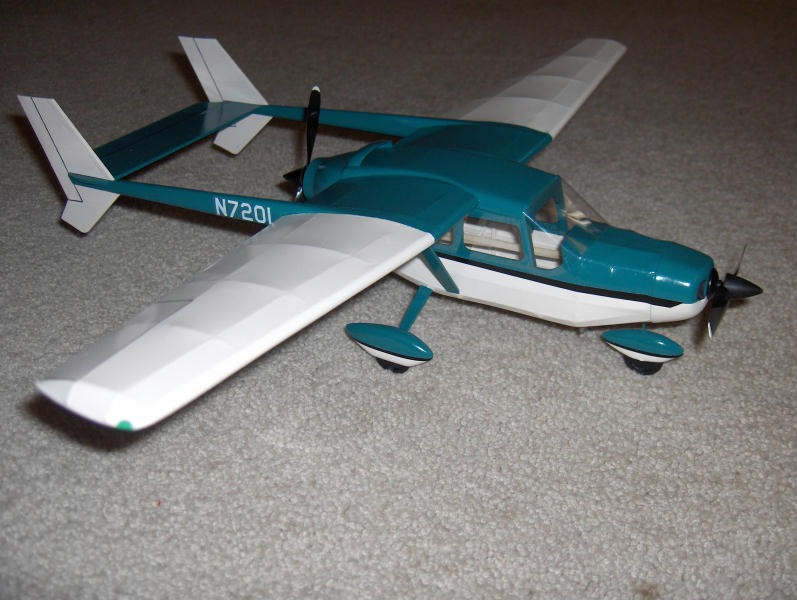
Completed Skymaster with partial use of peel and stick decals. Added details not included in the kit are instrument panel, exhaust pipes, and navigation lights. |
| Dale1416, Image # 23748 | 11 Oct 11 22:40 | 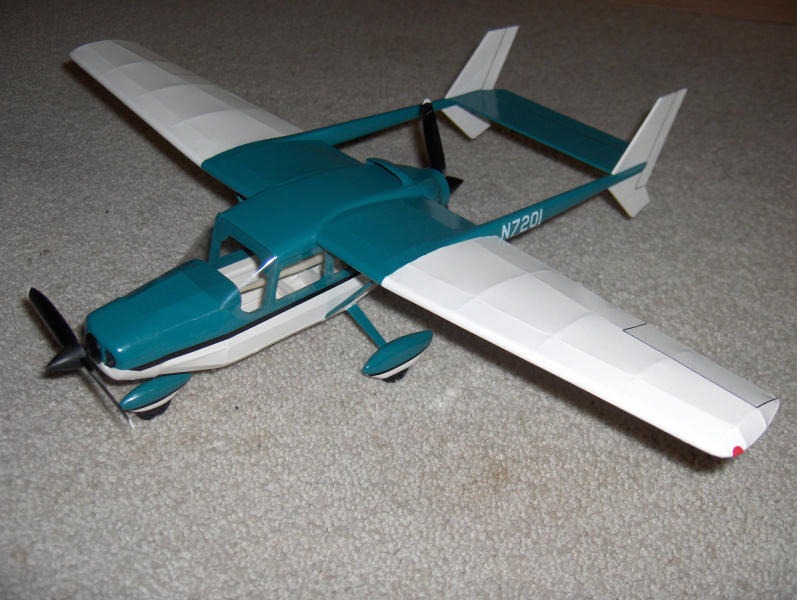
|
| Dale1416, Image # 23747 | 11 Oct 11 22:40 | 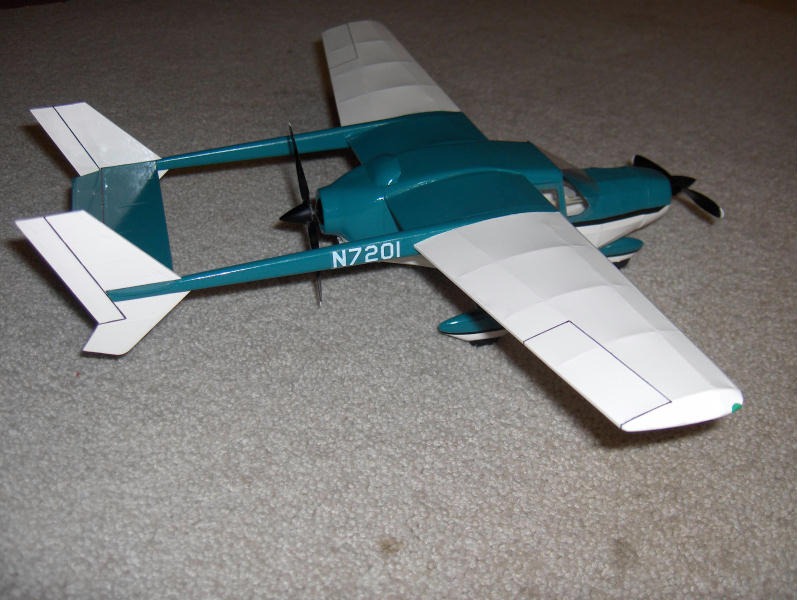
|
| Dale1416, Image # 23746 | 11 Oct 11 22:39 | 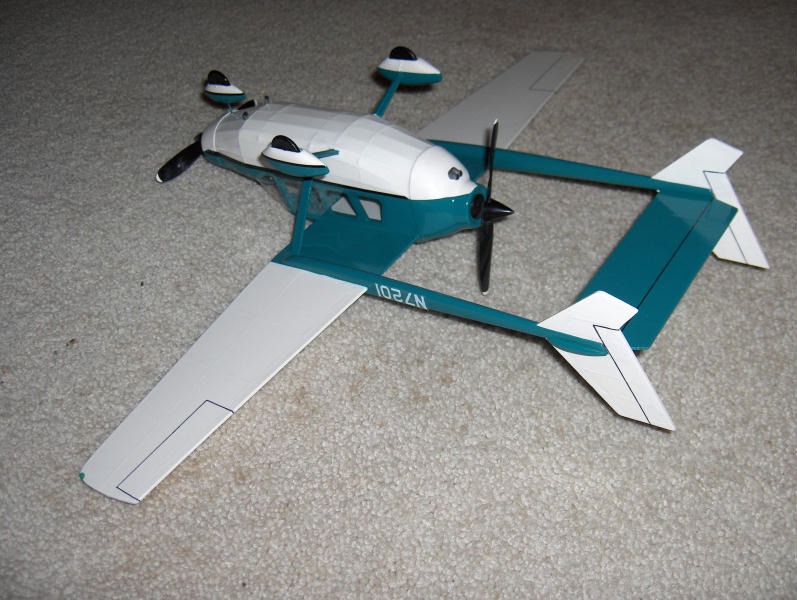
|
| Build Thread, Page :
[ 1 ] 2 (22 posts, 20 posts per page, 2 pages in total)
|
[ Next > ] |
|
