| Hangar |
Aircraft |
Category |
Date |
Preview |
| rayl | Scratch Built Consolidated XF-92A | Build | 21-Jan-15 11:00 | 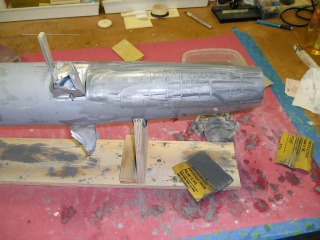 | | Views : 453 | | Fill/prime, fill/prime, ad infintium. Went to the newly opened Hobby Lobby in town and got some Tamiya "Mr. Surfacer" for the really little voids; worked pretty good. Final wet sanding in progress now. I went up to 1000 grit as the final step. |
| rayl | Scratch Built Consolidated XF-92A | Build | 18-Jan-15 10:18 | 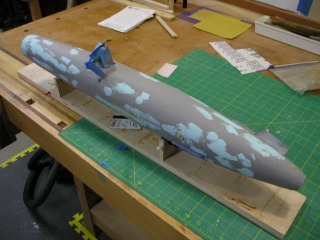 | | Views : 565 | | The great speckled bird! Two things happened: (1) My planking powress is lacking: many voids between the planks to fill. (2) I suffered some sort of incomparability issue between the intial finish and the high-fill primer, resulting in may "Crazed" areas. This is going to take a while as the primer surface has to nearly perfect if I am to lay on a aluminum finish coat. Catchya later! |
|
| Hangar |
Aircraft |
Category |
Date |
Preview |
| rayl | Scratch Built Consolidated XF-92A | Build | 18-Jan-15 10:12 |  | | Views : 485 | | Finished all of the fuse planking. Installed 1/64" ply main L/G well inserts. I did this to simulate the thin edges of the wheel wells. I have three layers of sandinig sealer on the fuse now so the next step will be to lay on some automotive type high-fill primer. |
| rayl | Scratch Built Consolidated XF-92A | Build | 18-Jan-15 10:04 | 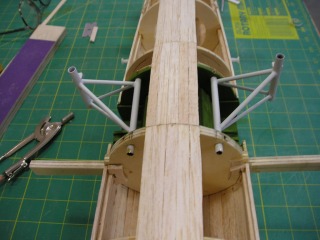 | | Views : 493 | | The main L/G firmly mounted into it's plywood bulkheads. I used a "Wixey" digital angle gauge to make sure the fuse was level (laterally) then set a bar across the L/G strutts to insure that they were level before supergluing them into place. I then drilled 3/32" cross pin holes through the main member and inserted music wire into those holes. The L/G shouldn't move at all. |
|
