| Hangar |
Aircraft |
Category |
Date |
Preview |
| edtherenderman | Easy Built Taube | Flying | 02-Jan-20 12:24 | 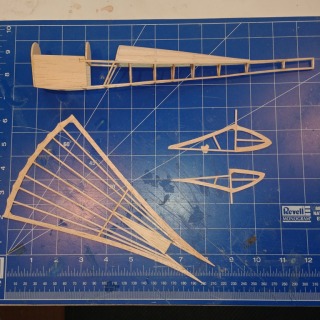 | | Views : 240 | | Here are the fuse and empennage created using traditional model techniques. |
| edtherenderman | Easy Built Taube | Build | 02-Jan-20 12:23 | 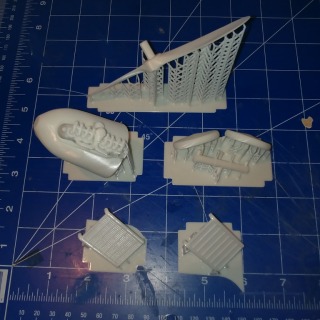 | | Views : 248 | | I also created many of the detail parts, like the engine, propeller, radiators and wheels using 3D modeling techniques. This time I used Blender and ZBrush to create the parts, and printed them out using my DLP printer. The DLP can print at .05 mm resolution, so much finer details. |
|
| Hangar |
Aircraft |
Category |
Date |
Preview |
| edtherenderman | Easy Built Taube | Build | 02-Jan-20 12:23 | 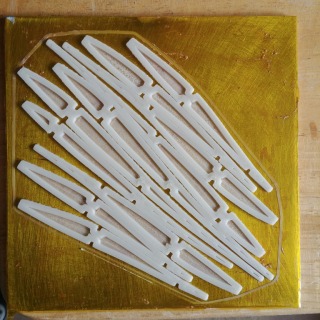 | | Views : 250 | | Started work on this Rumpler Taube (https://outerzone.co.uk/plan_details.asp?ID=11223). I’m trying several different techniques with this. First, I wanted to triple the number of ribs in the wings to more closely represent the real number of ribs in the wings. However, I didn’t want to cut that many ribs out of balsa, so I modeled the ribs in Blender, and printed them out on my 3D FDM (Fused Filament Fabrication). This picture is a bunch of the ribs after printing, but still attached to the print bed. The bed if 5” x 5”. It took a couple of attempts to get the right thickness of the ribs, and to get the hollowing correct. But that’s the magic of 3D printing, you can prototype relatively quickly and adjust as needed. The disadvantage of 3D printing is that the parts are heavier, being of plastic instead of balsa, and the FDM printer will only print to .3 mm resolution. |
|
