| Hangar |
Aircraft |
Category |
Date |
Preview |
| Skyediamonds1985 | Guillows 1903 Wright Flyer | Build | 26-Jun-15 22:47 | 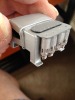 |
| Views : 919 |
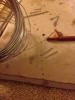
| Just prior to gluing the cylinders I wrapped each with a thin slice of silkspan to give them a textured look. Also took a small 10mm (I think) dia, wire for the oil line. And used a couple of small slices of tape for the connection at the oil line as shown on the real engine. |
| Skyediamonds1985 | Guillows 1903 Wright Flyer | Build | 26-Jun-15 22:43 | 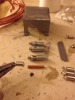 |
| Views : 853 |
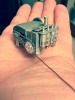
| Sorry about the confusion on classifying the aircraft. Still new at this posting. I purchased small springs from arts and crafts store and cut small sections of copper wire for each cylinder. |
| Skyediamonds1985 | Guillows 1903 Wright Flyer | Build | 26-Jun-15 22:41 | 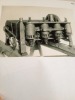 |
| Views : 1032 |
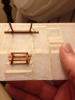
| This is one of many photos I managed to obtain that left the engine in its natural metallic finish as opposed to painted black. I opted to take this route to show the detailing. |
| Skyediamonds1985 | Herr Engineering Ryan ST-A | Parked | 26-Jun-15 22:37 | 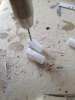 |
| Views : 741 |
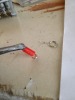
| Rather than simply marking the cooling holes, I decided to allow my OCD (just a small part, mind you) run a bit wild and used a pine vise to drill out the holes. |
| Skyediamonds1985 | Herr Engineering Ryan ST-A | Build | 26-Jun-15 22:34 | 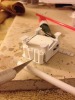 |
| Views : 843 |
| Using tubular plastic purchased at a local hobby store (only 35 miles from where I live) to cut up the cylinders for the engine. All sizes were from careful use of the retinae supplemented with glass protection (eyeballs), resulted in pretty close tolerances.. |
| Skyediamonds1985 | Herr Engineering Ryan ST-A | Build | 26-Jun-15 22:25 | 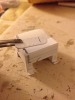 |
| Views : 774 |
| Now gluing the plastic card onto the top of the engine. |