| Hangar |
Aircraft |
Category |
Date |
Preview |
| Skyediamonds1985 | Guillows 1903 Wright Flyer | Build | 26-Jun-15 22:41 | 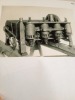 |
| Views : 1036 |
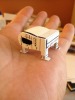
| This is one of many photos I managed to obtain that left the engine in its natural metallic finish as opposed to painted black. I opted to take this route to show the detailing. |
| Skyediamonds1985 | Herr Engineering Ryan ST-A | Parked | 26-Jun-15 22:37 | 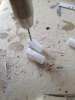 |
| Views : 744 |
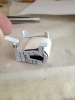
| Rather than simply marking the cooling holes, I decided to allow my OCD (just a small part, mind you) run a bit wild and used a pine vise to drill out the holes. |
| Skyediamonds1985 | Herr Engineering Ryan ST-A | Build | 26-Jun-15 22:34 | 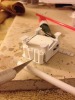 |
| Views : 846 |
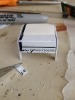
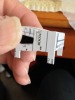
| Using tubular plastic purchased at a local hobby store (only 35 miles from where I live) to cut up the cylinders for the engine. All sizes were from careful use of the retinae supplemented with glass protection (eyeballs), resulted in pretty close tolerances.. |
| Skyediamonds1985 | Herr Engineering Ryan ST-A | Build | 26-Jun-15 22:25 | 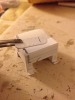 |
| Views : 778 |
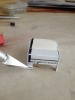
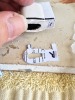
| Now gluing the plastic card onto the top of the engine. |
| Skyediamonds1985 | Herr Engineering Ryan ST-A | Build | 26-Jun-15 22:23 | 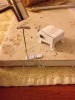 |
| Views : 828 |
| Where was I? Oh yeah. Building the Wright Bros' engine. Here to make the flat plate on top of the engine. Used a T pin to push out the rivets on the other side. |
| Skyediamonds1985 | Guillows 1903 Wright Flyer | Parked | 26-Jun-15 00:22 | 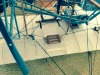 |
| Views : 965 |
| The Wright Bros. had the rigging interconnected such that the wing warping rigging from the pilot's cradle to the wings were also directed to a couple of bellcranks that connected to the rudder. |