| Hangar |
Aircraft |
Category |
Date |
Preview |
| rayl | Scratch Built Consolidated XF-92A | Build | 25-Jan-15 16:12 | 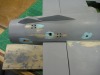 |
| Views : 528 |
| In the groove today. Neil Young playing on the box and a little Chivas (might explain being mellow). Doing fiddly stuff like making all of the vent holes and scoops/dumps in the after-burner section and the tail bumper. So, the next thing will probably be to finish the landing gear, which for some reason, I just don't want to get invovled in. |
| rayl | Scratch Built Consolidated XF-92A | Build | 21-Jan-15 11:10 | 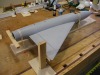 |
| Views : 554 |
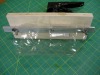
| All primed and ready to move on. Attaching the Stbd wing here. Checked the incidence with the "Wixey" meter and made a jig to keep the wingtips in line. |
| rayl | Scratch Built Consolidated XF-92A | Build | 21-Jan-15 11:06 | 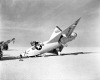 |
| Views : 552 |
| 'Nuff said. |
| rayl | Scratch Built Consolidated XF-92A | Build | 21-Jan-15 11:05 | 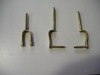 |
| Views : 496 |
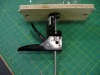
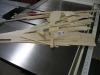
| While I was waiting for the primer to dry, I fabricated the rest of the brass items for the main and nose gear. From the pictures of the real thing, the landing gear was quite "chintzy". No wonder that a gear failure was the ultimate cause of the plane's demise. |
| rayl | Scratch Built Consolidated XF-92A | Build | 21-Jan-15 11:00 | 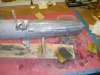 |
| Views : 467 |
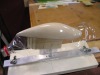
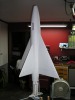
| Fill/prime, fill/prime, ad infintium. Went to the newly opened Hobby Lobby in town and got some Tamiya "Mr. Surfacer" for the really little voids; worked pretty good. Final wet sanding in progress now. I went up to 1000 grit as the final step. |
| rayl | Scratch Built Consolidated XF-92A | Build | 18-Jan-15 10:18 | 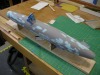 |
| Views : 577 |
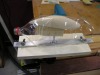
| The great speckled bird! Two things happened: (1) My planking powress is lacking: many voids between the planks to fill. (2) I suffered some sort of incomparability issue between the intial finish and the high-fill primer, resulting in may "Crazed" areas. This is going to take a while as the primer surface has to nearly perfect if I am to lay on a aluminum finish coat. Catchya later! |