|
Main Menu
User Login
View By Aircraft
Top Ten Aircraft :
(numbers in brackets represent number of images online)
Top Six Manufacturers :
|
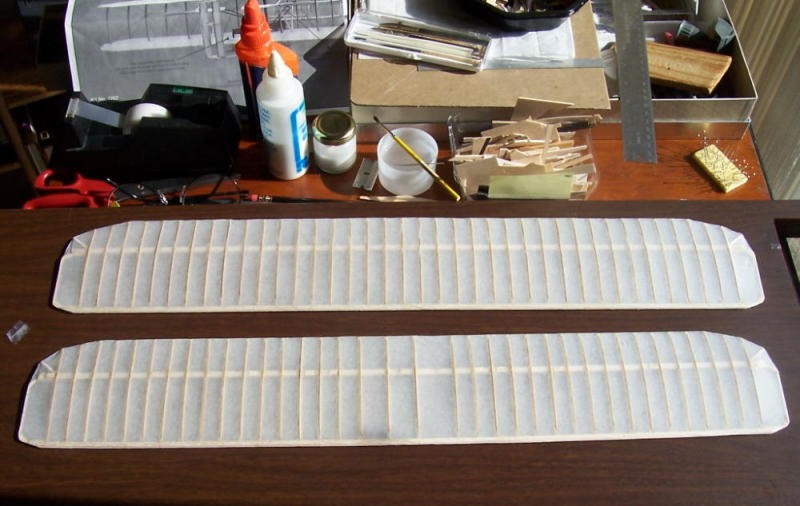
Guillows 1903 Wright Flyer by simpleflyer. Viewed 1386 times.
Build Thread
|
|

|
| Image Comments |
| simpleflyer | 31-Aug-08 23:12 | | Better pic of completed wings, ready for struts. |
| Barnstormer | 01-Sep-08 12:58 | | Looks Great, do you cover wet or dry? |
| simpleflyer | 01-Sep-08 14:09 | | Thanks, Barnstormer. We covered with dry kit supplied tissue. Using 50/50 mix of water and white glue per the instructions. We followed DD's hint of laying the wing inverted and taping the ends of the tissue snugly over the center of the wing surface. Then we applied the glue/water mix thru the paper starting at the back spar and middle of the wing and worked out to the edges in all directions. When the bottom half was done, we removed the wing from the board and folded the paper over the trailing edge. The we began painting starting at the center moving toward the leading edge and toward the wing tips. litte at a time sligly tugging on the paper to keep it taut. All the while, only painting thru the paper over the wood parts of the wing. Also wet the trailing edge well and pinch the paper over the thread per the instructtions. When the wing is dry, pin it down and very gently spritz it with a fine mist of water and let it dry. Do each side one at a time. The wing should be nice and taut after this. Pin the wing down and then quickly brush an even coat of glue/water between the wing ribs. We found that brushing along the span of the wing, tip to tip, resulted in less of a chance of the damp paper sagging and meeting the other surface and sticking to it. Only place where we had this happen was at the rear of the wide bay on the bottom wing and it is most evident on the bottom side so it will not be very noticeable in the completed model. Check the Wright build in David Duckett's Hangar, he has excellent pictures of the process. Al |
| John M Oshust | 01-Sep-08 15:00 | | Nice work...Purrrfect! |
| poppy | 02-Sep-08 06:33 | | These are perfect! |
| David Duckett | 02-Sep-08 09:48 | | Two comments: I built it strictly per instructions and this is much better. This is the one and only thing I ever covered dry and I was surprised when it actually worked. |
|
|
Please sign in to comment on this image.
|
|
|

