| Build Thread, Page :
1 [ 2 ] (38 posts, 20 posts per page, 2 pages in total)
|
[ < Prev ] |
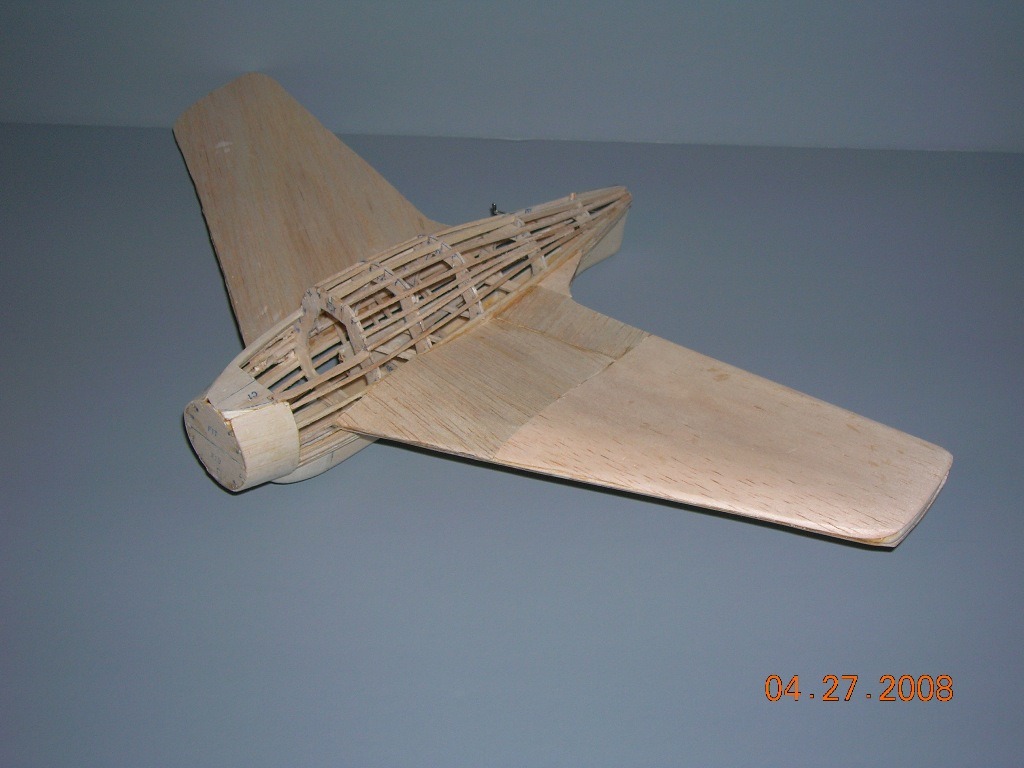
| jerry campbell, Image # 8047 | 27 Apr 08 15:37 |
The first mistake I made was to use 1/32 X 4" sheets which forced me to cover the top port wing in sections. Fortunately the Hobbyland store had a good suply of 1/32 X 6". |
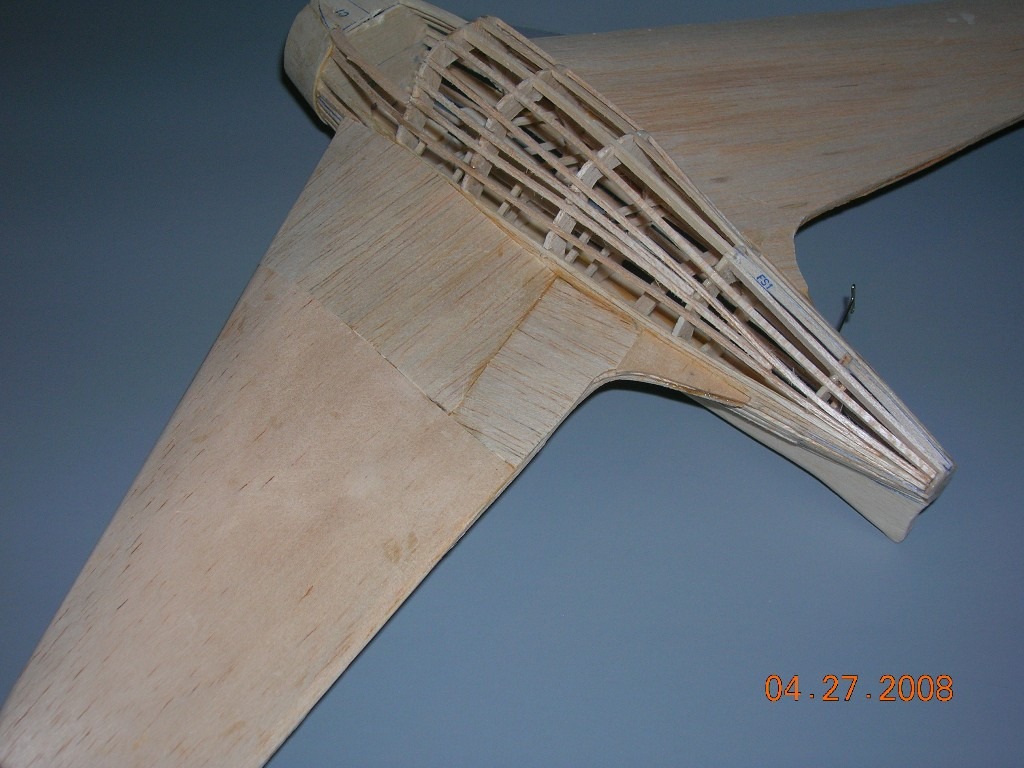
| jerry campbell, Image # 8046 | 27 Apr 08 15:28 |
Beginning to oover for the first time with wood, and I'm finding it is more difficult and time consuming than I expected. |
| Creosotewind, Comment for image # 7963 | 25 Apr 08 13:29 |
| I wonder if that helps these free flight rockets do a lazy loop to return to their (hopefully) original location. There are some videos of this plane and others on the internet. Fun to watch. Hope Dave and I didn't give you too much of a scare. |
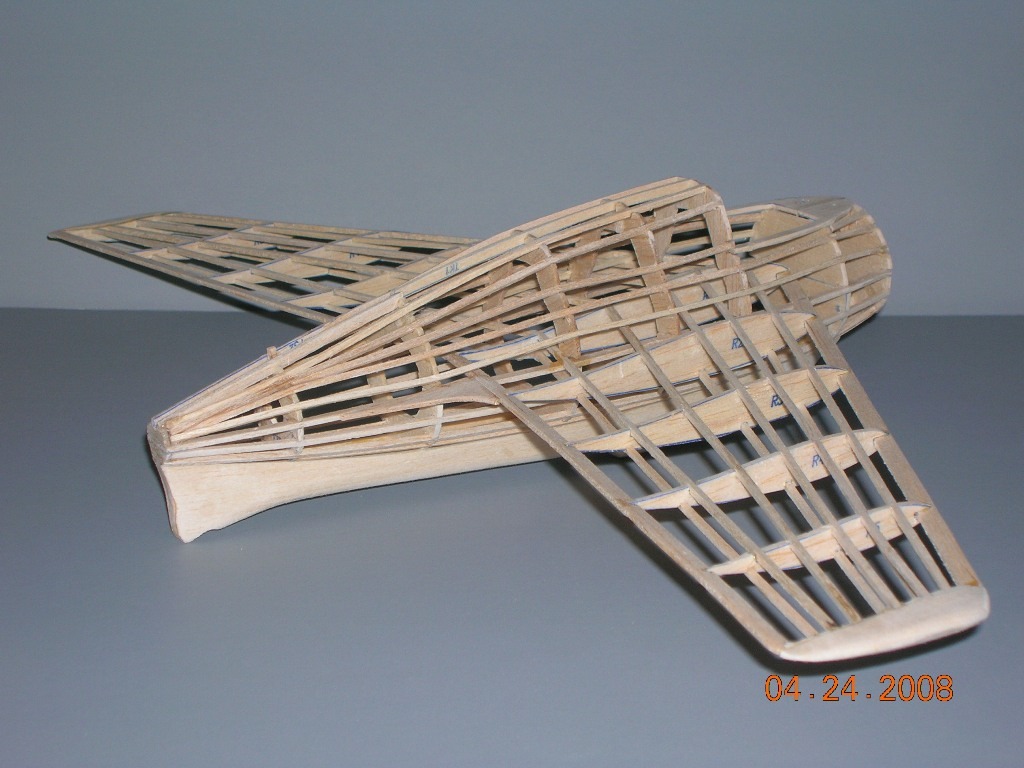
| jerry campbell, Image # 8002 | 24 Apr 08 20:43 |
|
| jerry campbell, Image # 8000 | 24 Apr 08 20:42 |
A number of extra stringers have been added for strength |
| jerry campbell, Comment for image # 7963 | 24 Apr 08 20:26 |
| I know it looks like it should be the bottom airfoil, however the instructions calls for the airfoil as you see it, they even have a side view of the wing that shows the photo to be correct. I rechecked the instructions and plans. I believe it is called "wash" by those who fly these things, I am yet fly one but some day..... |
| Creosotewind, Comment for image # 7963 | 24 Apr 08 18:17 |
| I think you are right, David. |
| David Duckett, Comment for image # 7963 | 24 Apr 08 15:53 |
| To me, it seems this airfoil should be on the bottom. ?? |
| Creosotewind, Comment for image # 7963 | 24 Apr 08 15:39 |
| This is a way cool kit of a pretty awesome rocket. Any idea of the scale? |
| Creosotewind, Comment for image # 7906 | 24 Apr 08 15:38 |
| The half pilot looks like Han Solo in Empire Strikes Back. |
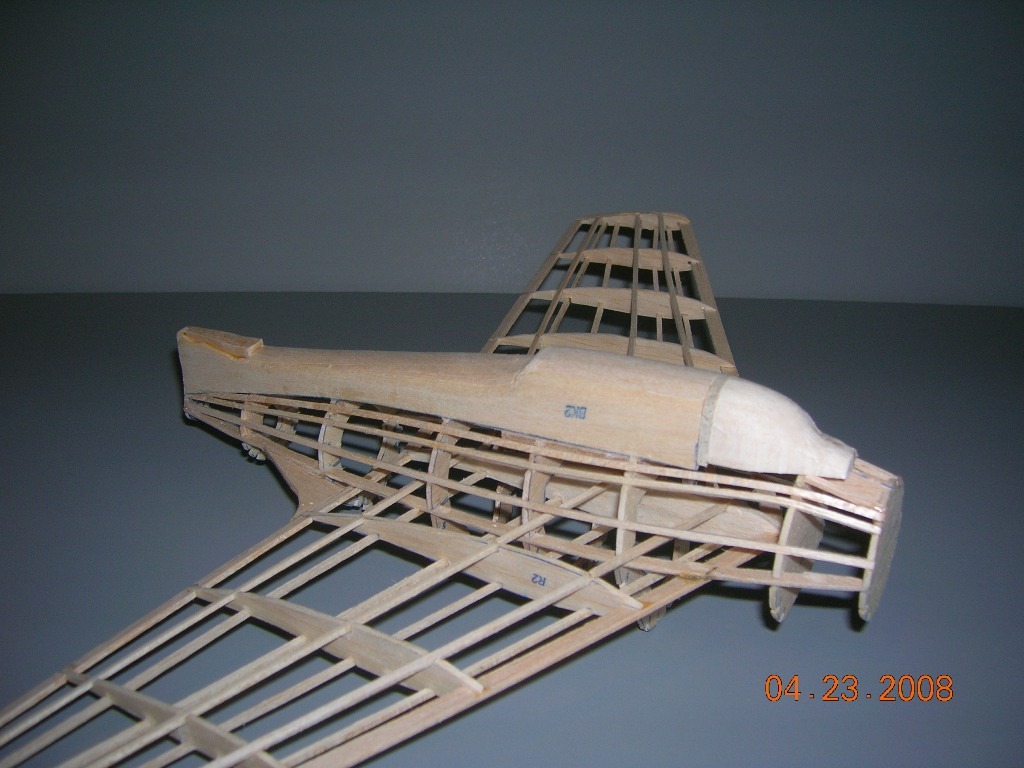
| jerry campbell, Image # 7964 | 23 Apr 08 13:30 |
|
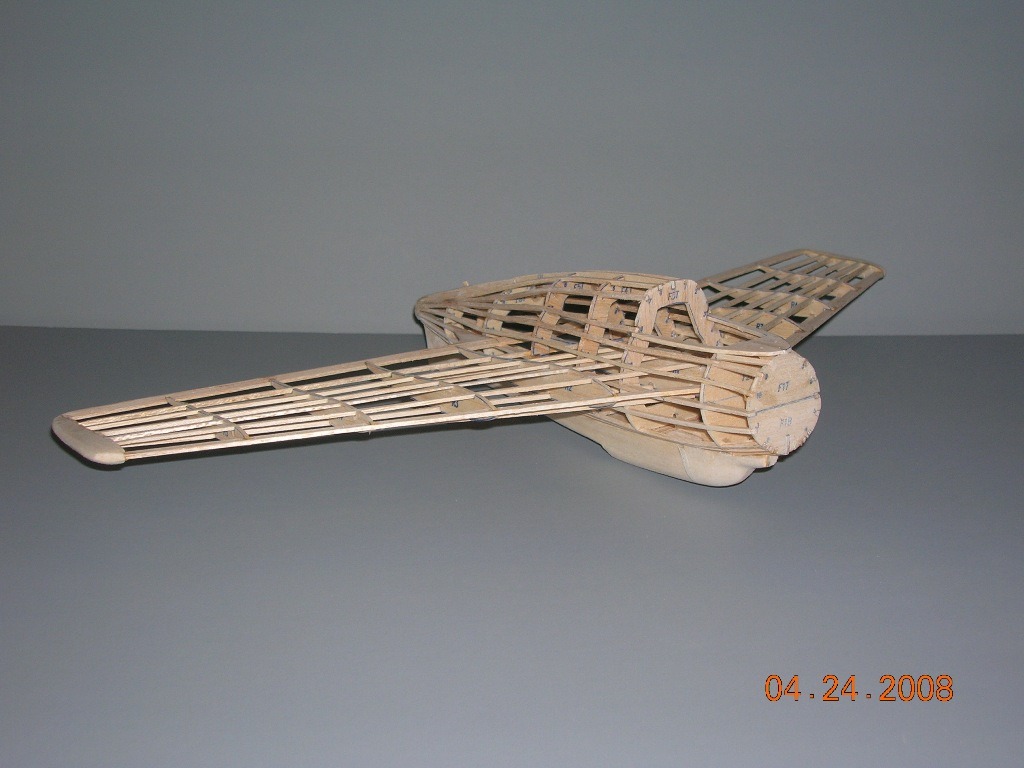
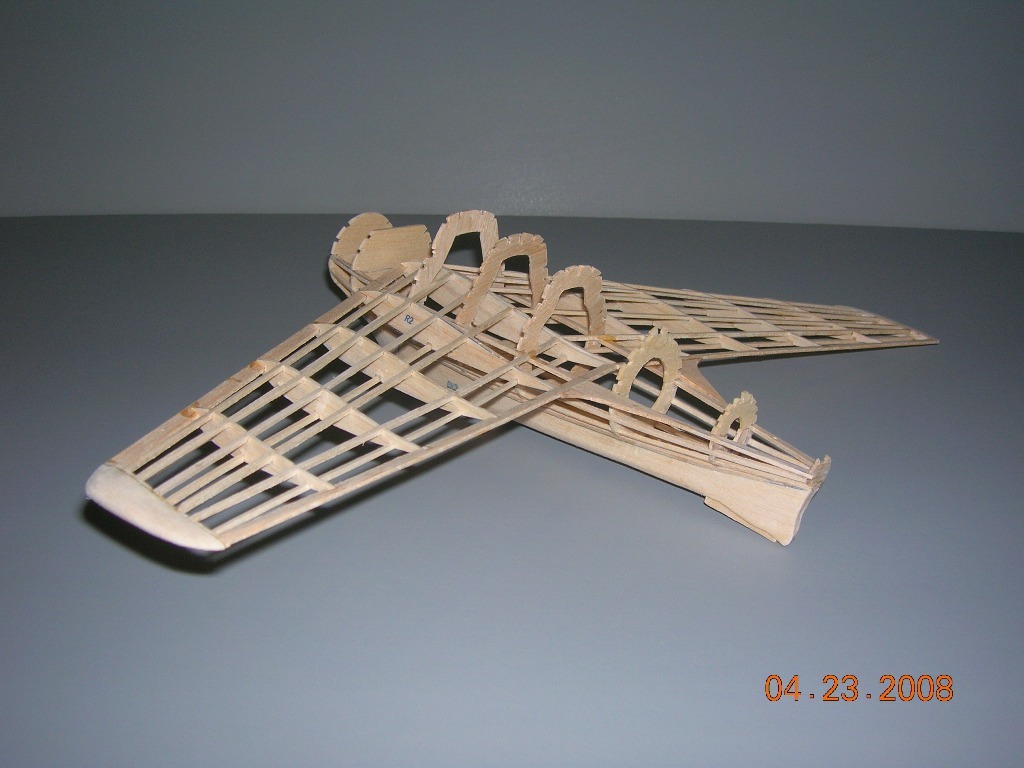
| jerry campbell, Image # 7963 | 23 Apr 08 13:27 |
Extra stringers have been added and the upper fuselage formers are added. |
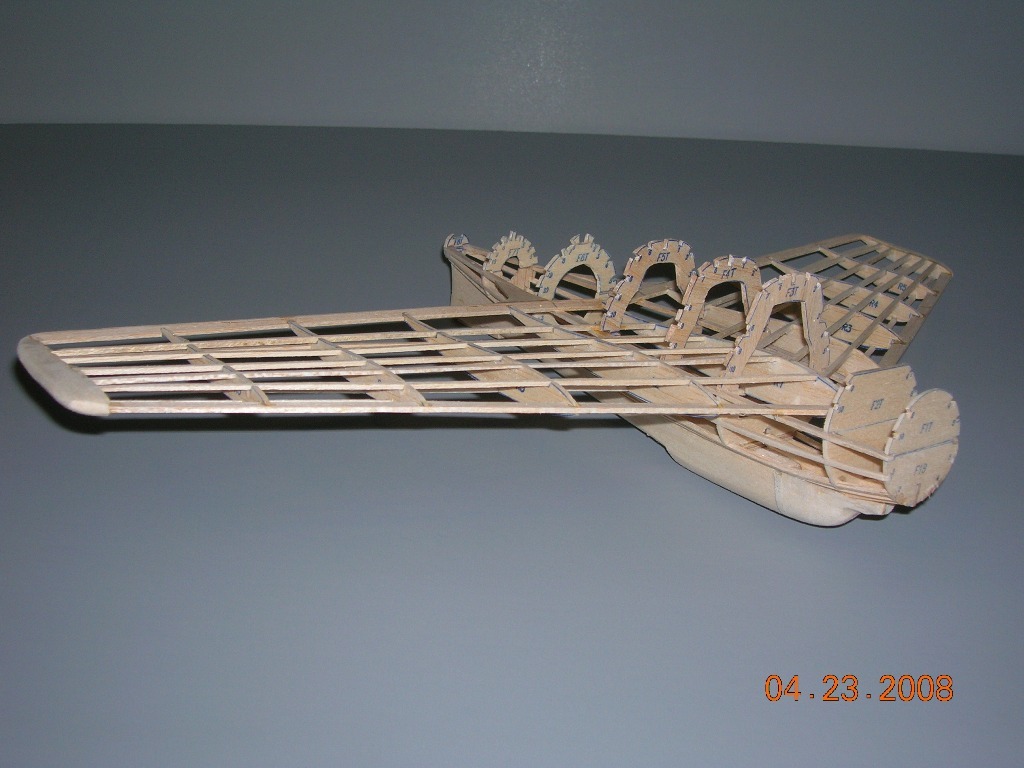
| jerry campbell, Image # 7962 | 23 Apr 08 13:24 |
The lower fuselage done and the blocks shaped, the wings are added and the sanding begins. |
| jerry campbell, Comment for image # 7907 | 21 Apr 08 21:34 |
| In checking various photos of Me 163Bs on the web it seems like it had no diehedral, and since I'm not building to fly I will build without diehedral. |
| jerry campbell, Image # 7907 | 21 Apr 08 11:29 |
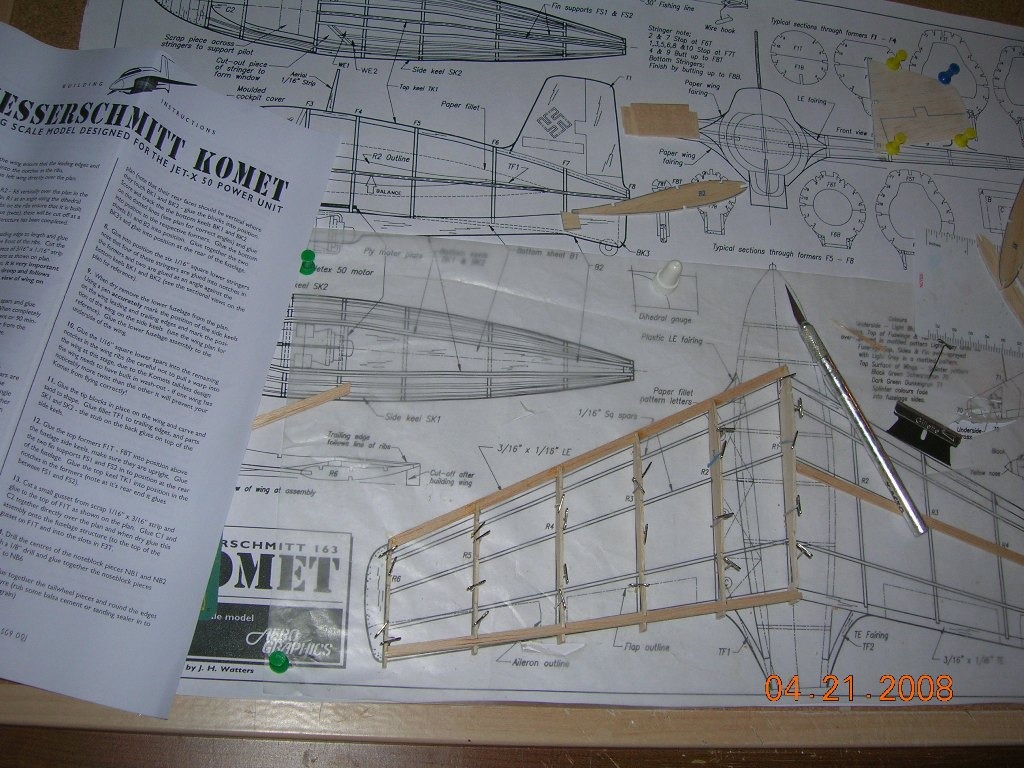
Building begins with the wings. The kit is designed to fly with jetex or rapier motors and has built in wash in the wings but should not cause much problem for none flying display models, especially when they are hanging. |
| jerry campbell, Image # 7906 | 21 Apr 08 11:24 |
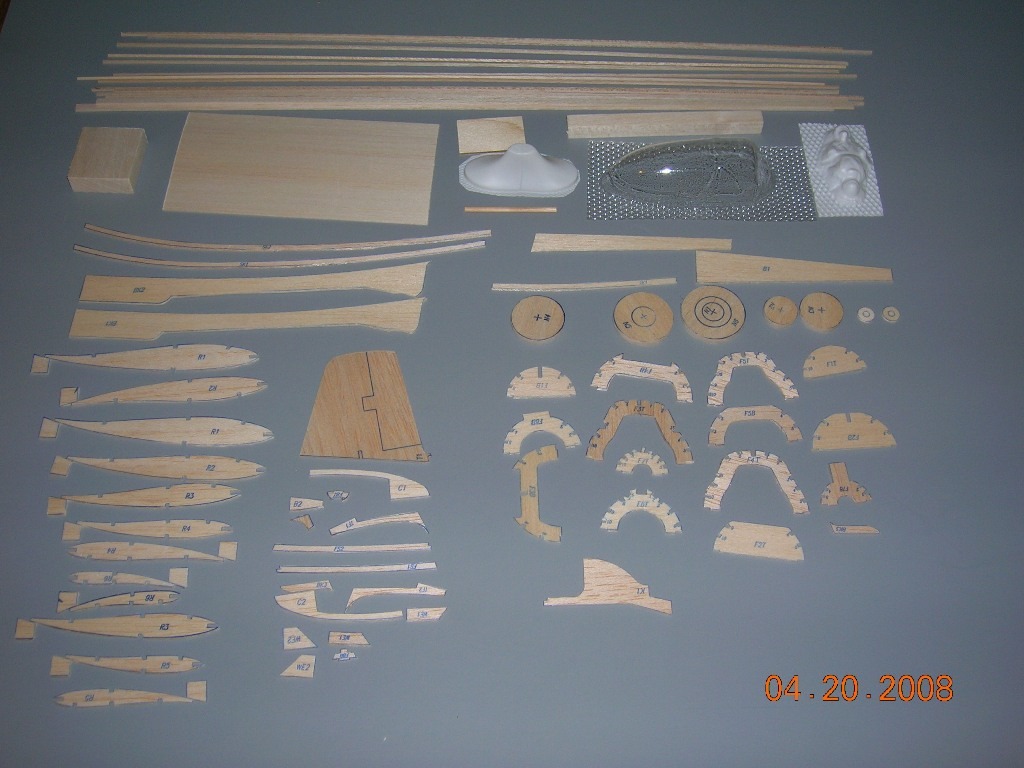
The print wood is excellent quality balsa and took less than two hours to cut. A vac canopy and half pilot are provided. The waterslide decals are inadequate, fortunately I have extras from other kits (plastic) as well as after market decals (plastic). |
| jerry campbell, Image # 7905 | 21 Apr 08 11:16 |
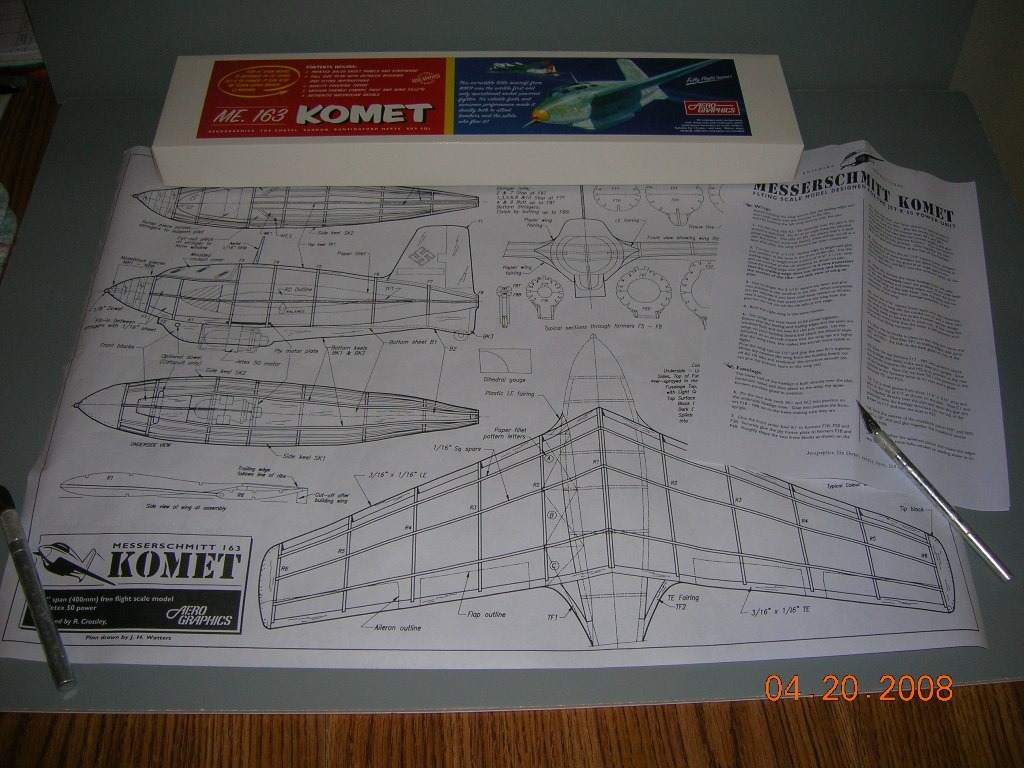
The plans are well layed out and a full set of building instructions are provided. |
| jerry campbell, Image # 7904 | 21 Apr 08 11:12 |

My choice for my nexxt project is the AeroGraphics 17" Messerschmitt Me 16B Komet. I've always liked German aircraft because of thier colorschemes especially the mottled camouflage. |
| Build Thread, Page :
1 [ 2 ] (38 posts, 20 posts per page, 2 pages in total)
|
[ < Prev ] |
