| Build Thread, Page :
<< 36 37 38 39 40 41 42 43 (851 posts, 20 posts per page, 43 pages in total)
|
[ < Prev ] [ Next > ] |
| John M Oshust, Comment for image # 34949 | 12 Nov 15 22:05 |
| Best wishes for success. Tough row to hoe! Lots of stitching, not much space! Best wishes, show us the way ! |
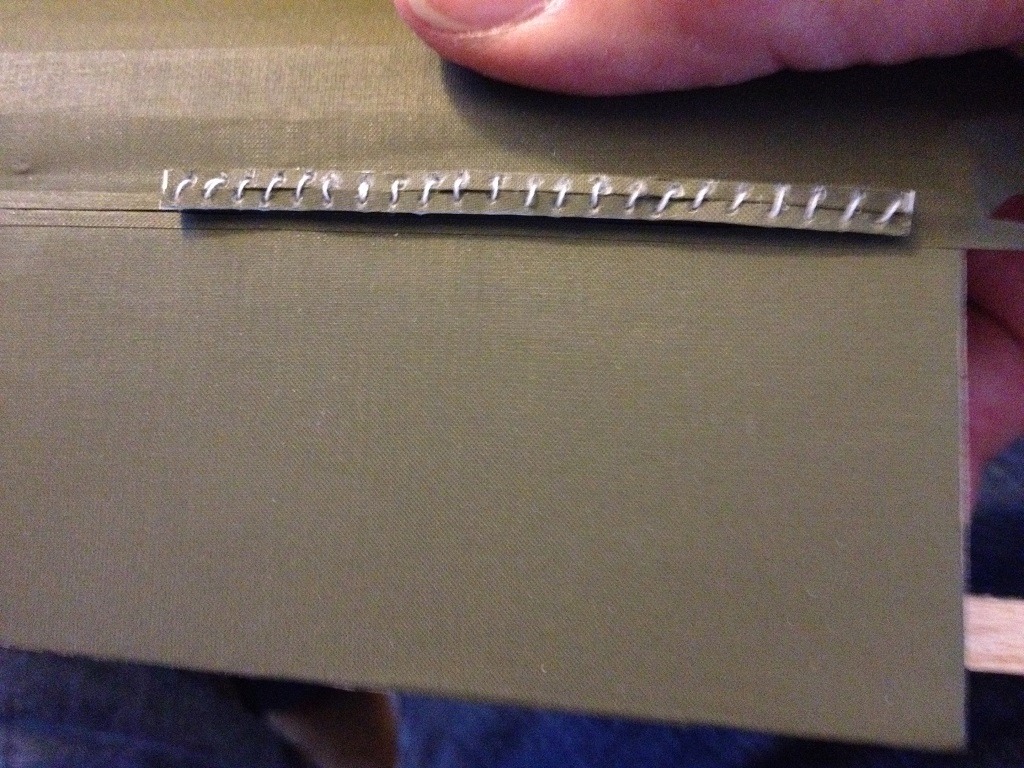
| Skyediamonds1985, Image # 34950 | 12 Nov 15 21:33 |

Sorry guys, still learning how to upload images. I used a pin vice to drill the covering and wood backing to help me thread the stitching. It was at this point, since I knew I was stitching directly onto the fuselage, that I will leave the entire bottom of the fuselage uncovered to allow me access to the interior for the stitching. Once everything is done, II will cover the bottom of the fuselage and seal everything inside. That's it for now. Thanks guys . sky |
| Skyediamonds1985, Image # 34949 | 12 Nov 15 21:29 |

a pin vice to help me penetrate the wood. During the actual covering and finishing of the fuselage, I'll leave the entire bottom of the fuselage uncov |
| Skyediamonds1985, Image # 34948 | 12 Nov 15 21:25 |
You can easily see gluing the whole thing wasn't the solution..... Only one option left, just simply stitch the Solarte4x and thread directly to (and thru the wood too) fuselage. |
| Skyediamonds1985, Image # 34947 | 12 Nov 15 21:22 |

Problem with the sticky paper was that after threading the Solartex film, when I tried to pull it off, the threads came apart. Only option was to try to simply leave the threads and covering on the paper and glue to whole thing to the fuselage. |
| Skyediamonds1985, Image # 34946 | 12 Nov 15 21:19 |

Here is a really good example of what was happening as I tried to loop the needle back through the paper and covering. You can easily see how the previous threads were pulled apart and distorted. So, I figured the next best thing would be to use sticky paper to help hold things down. |
| John M Oshust, Comment for image # 34944 | 12 Nov 15 20:50 |
| Wonderful labor intensive. Bravo! |
| Skyediamonds1985, Image # 34945 | 12 Nov 15 20:50 |

I initially laid out some strips of Solartex on a piece of paper and tried to stitch them together. Thinking that I could simply glue on the results to the fuselage. As it turned out, each time I threaded the needle, the covering would move around or the thread would distort and stretch. If you zoom up, you can easily see the inconsistency of the stitching. |
| Skyediamonds1985, Image # 34944 | 12 Nov 15 20:45 |

Well, to make a long story of my trials and tribulations short, I think I've got it. This stitching was done on my "faux" sample fuselage to practice my craft. I encourage you to zoom up and you can see the slight imperfections as a result of my learning. I'll show you just a couple of extra pictures of some of my mistakes that finally led up to where I am now. |
| Skyediamonds1985, Image # 34943 | 12 Nov 15 20:38 |

In my last "installment" I left it where I managed to have the fuselage constructed and covered in a manner to resemble the real aircraft's horizontal split by the pronounced stitching |
| Skyediamonds1985, Comment for image # 34890 | 06 Nov 15 14:57 |
| Meku, Thank you. I have always admired your beautiful S.E.5 model, and your comments are always welcomed. This is my very first attempt at using the heat shrink covering. I used Solartex, available through Balsa USA. I'll be starting on the fuselage today. |
| meku, Comment for image # 34890 | 05 Nov 15 04:01 |
| A very good way of sewing, especially in thermo foil, super !!! |
| Skyediamonds1985, Image # 34891 | 04 Nov 15 21:32 |
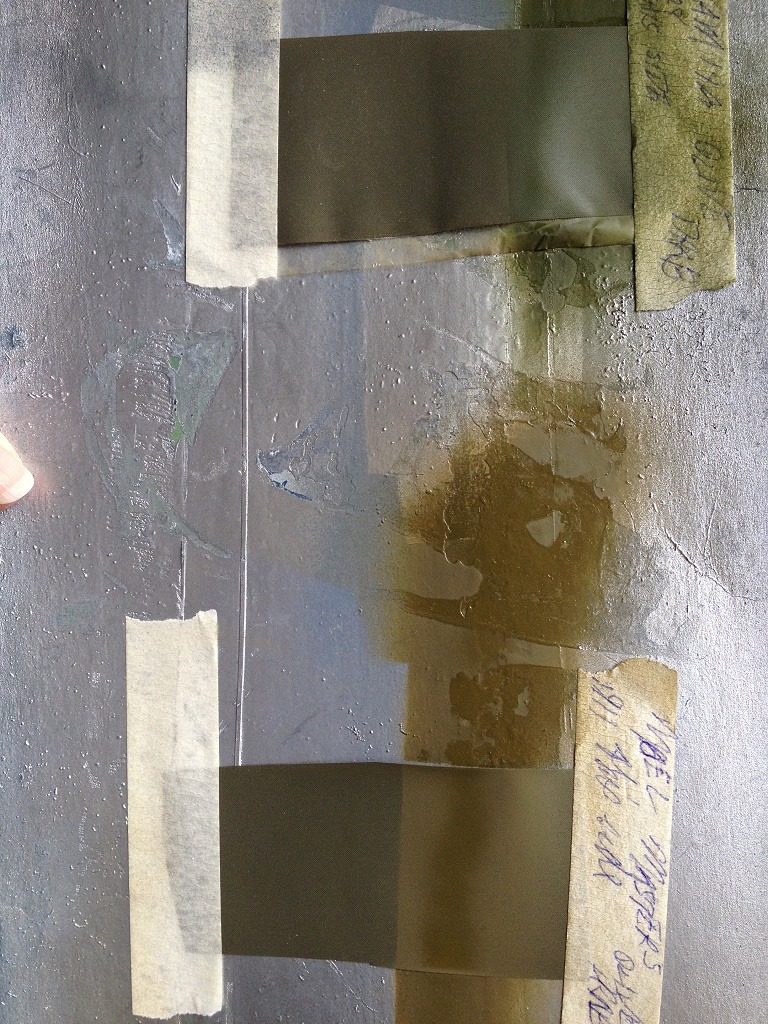
One final experiment, was the matching of olive drab color of the Solartex with spray paint from a can. Since I live in a small apartment, I don't have the room (Read that, luxury) of having an air gun with compressor. I was very happy to note that between Model Masters and Tamiya, Tamiya # TS-28 olive drab matches the Solartex beautifully. This means that I can add metal paneling around the engine area using plastic sheets (or glossy paper) and simply spray Tamiya's olive drab for a perfect match. That's it for now. It'll be a couple of days for me to work on the model. |
| Skyediamonds1985, Image # 34890 | 04 Nov 15 21:25 |

Yes. It appears to have worked. Among several prominent features of the S.E. 5, besides the radiator and top wing-mounted machine gun, was the fuselage stitching. Instead of simply adding cross stitching to the model, I thought it might be kind of cool to actually simulate the upper and lower halves of the fuselage and link the two with stitching, as you can see from the drawing of the real aircraft in the background. |
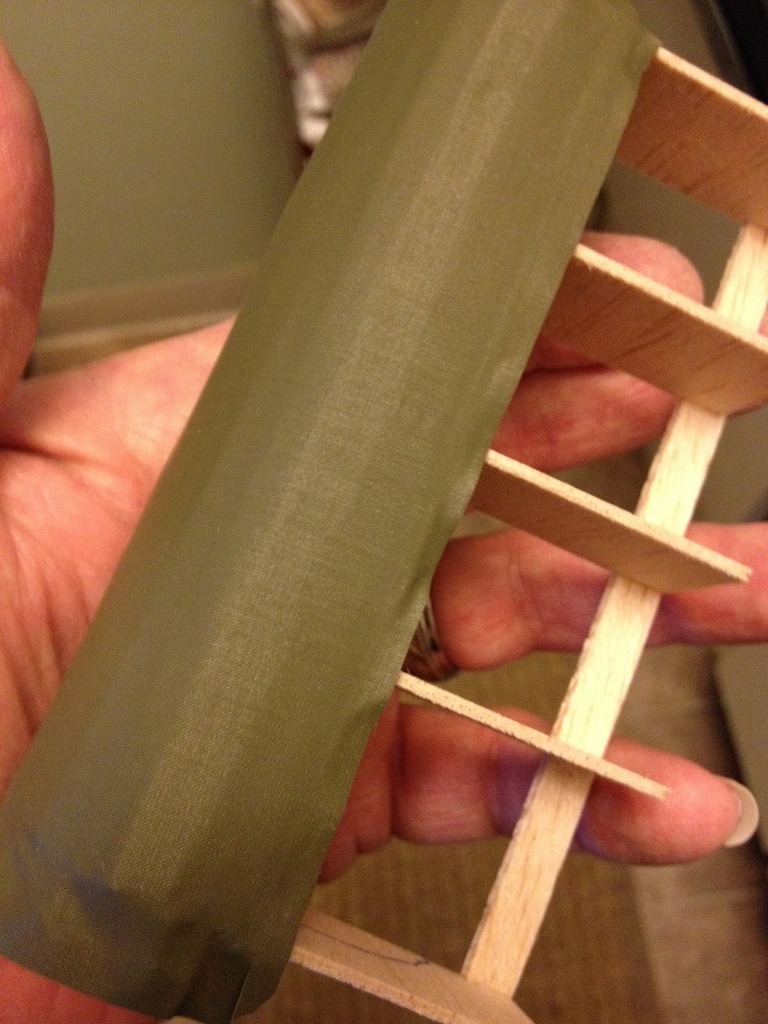
| Skyediamonds1985, Image # 34889 | 04 Nov 15 21:21 |

After covering the sheet balsa, I then glued it to the lower half of the "faux fuselage" for final view of my desire to simulate the fuselage on the real aircraft |
| Skyediamonds1985, Image # 34888 | 04 Nov 15 21:19 |
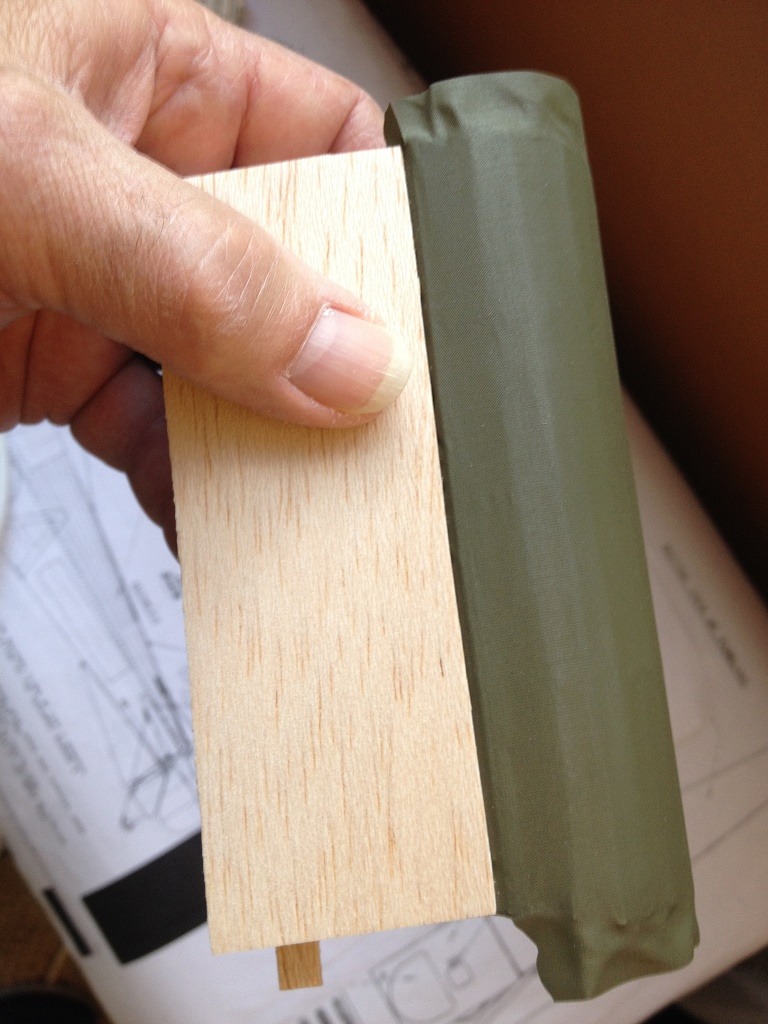
I gave my 1/16" sheet cut balsa one last check for fit before covering |
| Skyediamonds1985, Image # 34887 | 04 Nov 15 21:16 |
I then trimmed away some of the excess off the ends. Not bad, eh? |
| Skyediamonds1985, Image # 34886 | 04 Nov 15 21:13 |

This is the very first time I've ever used heat-shrink covering. In this case, at the advice of Meku, I used Solartex which has a very fine weave pattern and it comes in various colors. I chose olive drab. So this will help explain, in part, why I chose to fabricte a "faux fuselage" to practice my covering techniques. Its one thinkg to watch dozens of videos on "How to's" but it's another to actually do it myself. |
| Skyediamonds1985, Image # 34885 | 04 Nov 15 21:08 |

I decided to laminate the last two 1/16" strips of balsa to give it added strength to account for any covering shrinkage |
| meku, Comment for image # 34849 | 03 Nov 15 01:37 |
| So, depending on engine type. |
| Build Thread, Page :
<< 36 37 38 39 40 41 42 43 (851 posts, 20 posts per page, 43 pages in total)
|
[ < Prev ] [ Next > ] |
