| Build Thread, Page :
<< 37 38 39 40 41 42 43 (851 posts, 20 posts per page, 43 pages in total)
|
[ < Prev ] |
| John M Oshust, Comment for image # 34849 | 02 Nov 15 21:30 |
| Skye,
Please allow me to submit a possible solution to this enigma. Approximately 5k Se 5 bipes were produced. Off the top of my noodle, I recall two, maybe three engines used as power plants. The museum photo and the Guillows plan may be the same aircraft with a different engine. Hence the decrepancy in design. Just a brain puffer! |
| rayl, Comment for image # 34849 | 02 Nov 15 19:44 |
| Sky: An excellant resource is the "flickr" page of David Whitworth. He is pro photographer with semmingli unlimited acess to Duxford, Old Warden and others. worth the visit. |
| Skyediamonds1985, Image # 34869 | 02 Nov 15 17:23 |
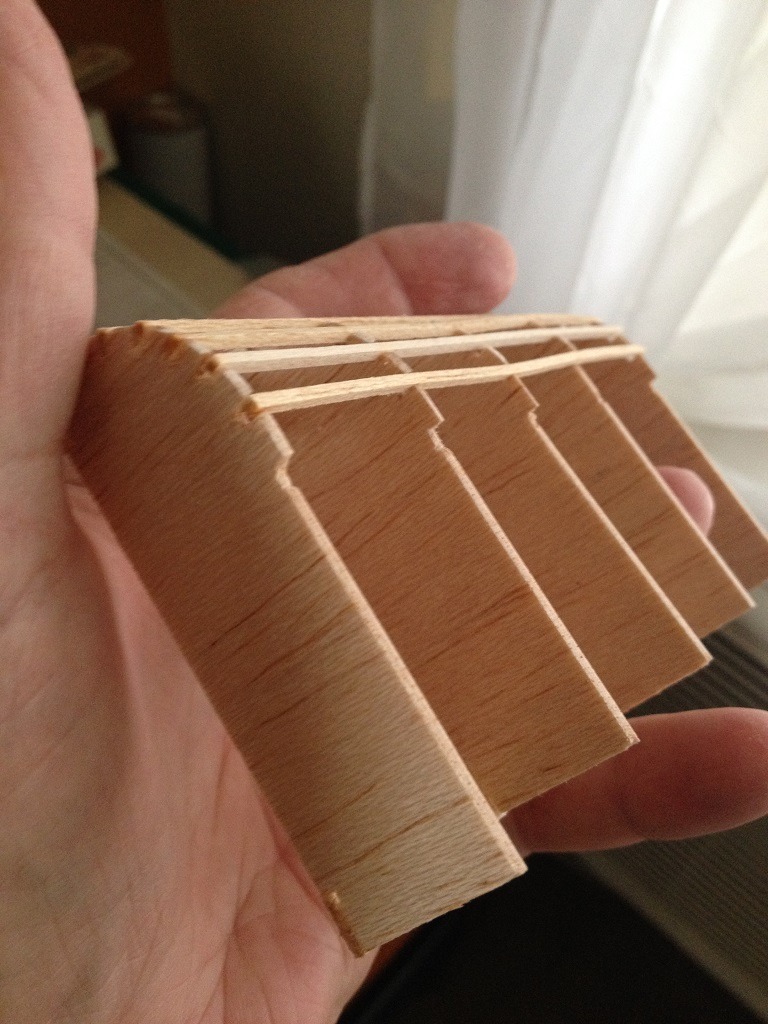
Taking into account of the possible warpage from the shrinking of covering, I reinforced the back of the 1/16" sheet balsa |
| Skyediamonds1985, Image # 34868 | 02 Nov 15 17:22 |
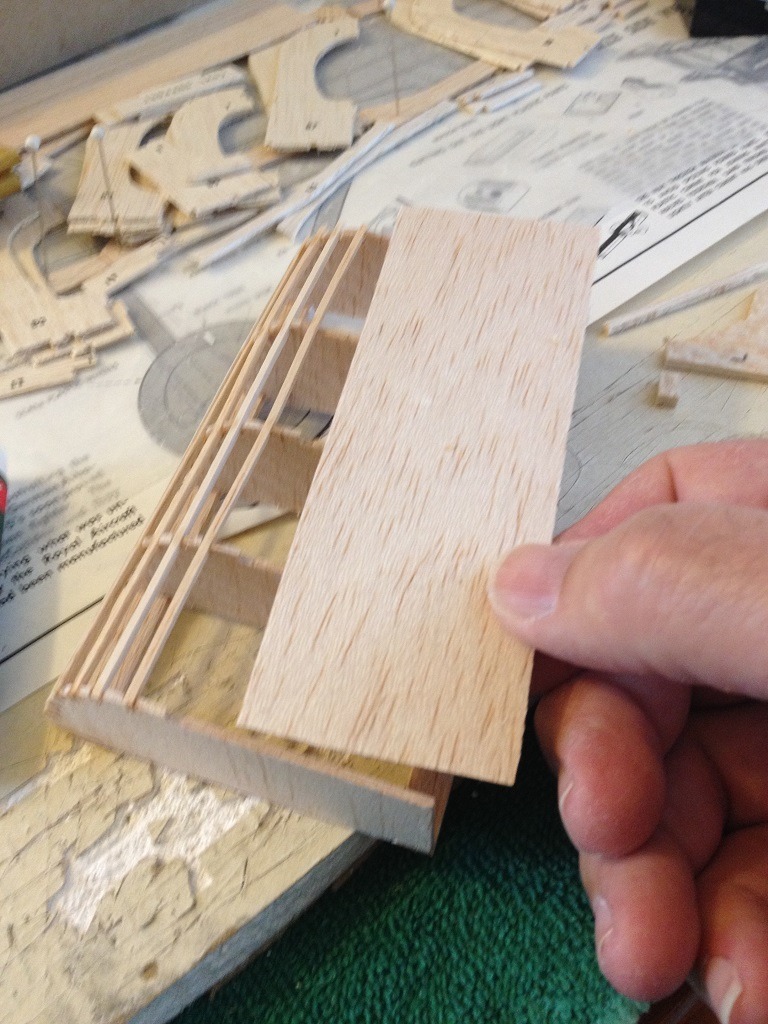
This is the 1/16" sheet balsa to be used over the lower portions of my faux fuselage |
| Skyediamonds1985, Image # 34867 | 02 Nov 15 17:21 |
Another view of my faux fuselage for testing out my ideas. |
| Skyediamonds1985, Image # 34866 | 02 Nov 15 17:19 |
Note the cut out on the lower ends of the faux formers below the stringers. It is here, that I intend to glue on a 1/16" thick sheet balsa |
| Skyediamonds1985, Image # 34865 | 02 Nov 15 17:17 |
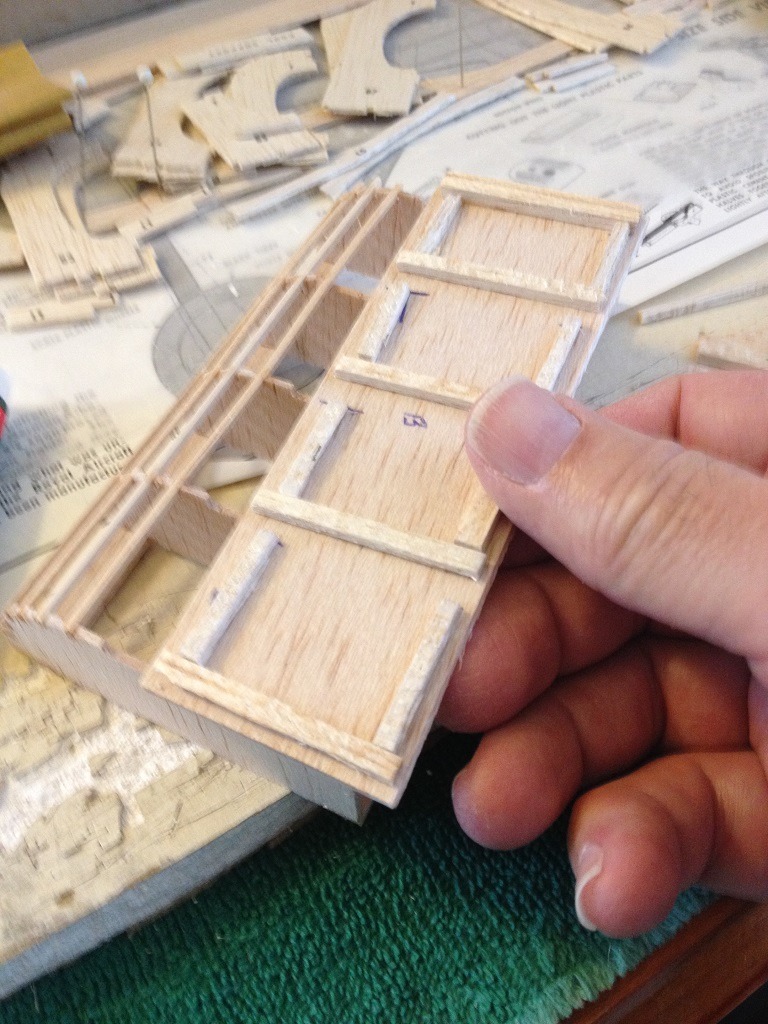
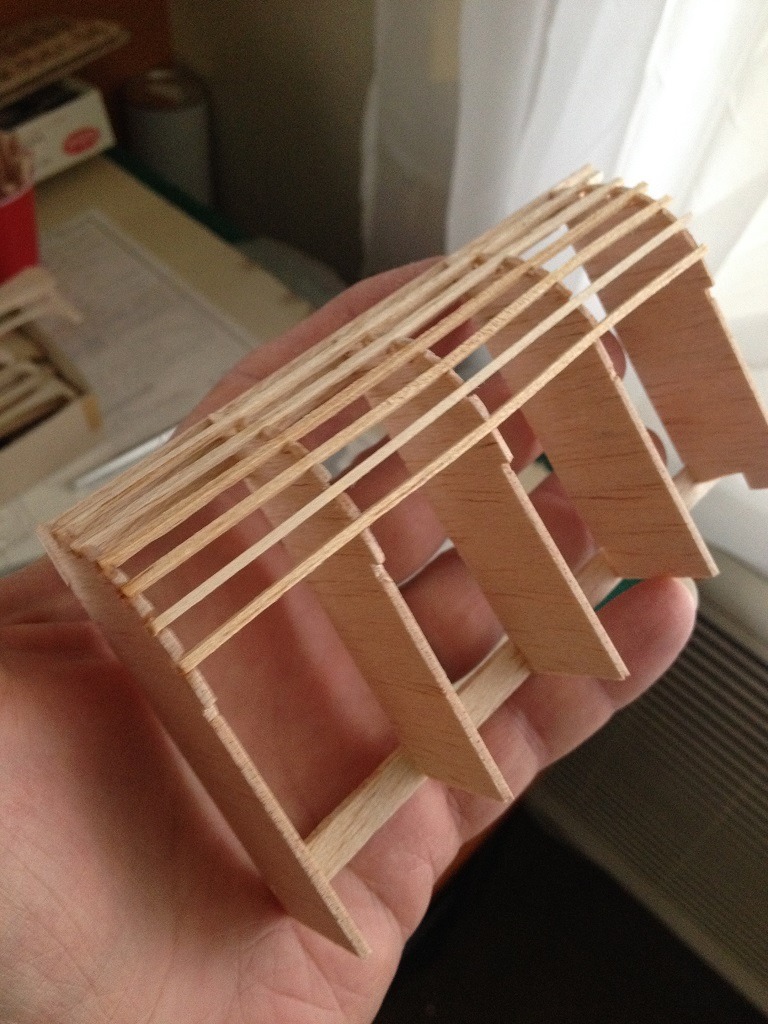
To help test my ideas, I borrowed one of the formers from the fuselage and duplicated it several times to make a faux test article to experiment. |
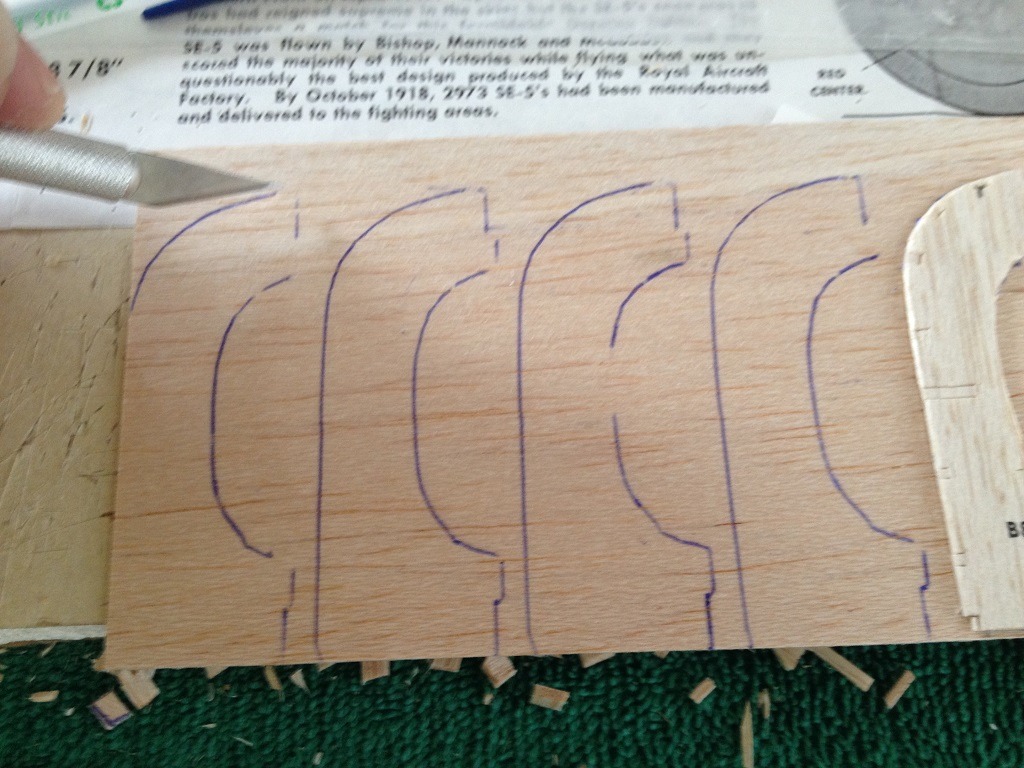
| Skyediamonds1985, Image # 34864 | 02 Nov 15 16:58 |
Still in the planning stage as I build this model, Meku's gorgeous S.E. 5 featured in this VA forum along with the both of us exchanging emails, has been a great source of inspiration and guidance. I am also inspired by Mr. John O's using of fuselage stitching of the fuselage on his JN4D "Jenny" medical biplane featured on this site a couple of years ago. I thank you both. |
| Skyediamonds1985, Image # 34863 | 02 Nov 15 16:48 |
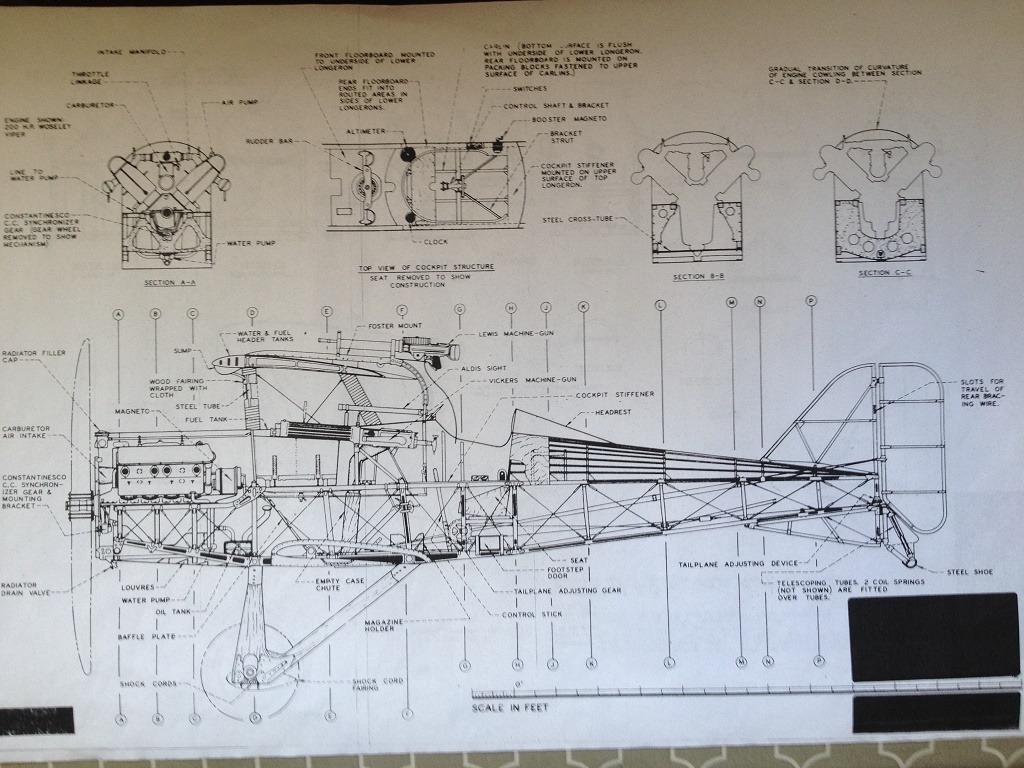
Reviewing the inboard profile drawing of the real aircraft we can see the general arrangement of the cockpit interior and just as importantly, the airfame structure as viewed from the cockpit. The challenge here, is how to emulate the girder-type construction around the cockpit area without actually constructing the whole fuselage in longerons, cross members and upright supports along with their complicated rigging. |
| jgood, Comment for image # 34849 | 02 Nov 15 14:39 |
| Yes, interesting that the Guillow plan seems to follow that diagonal of the side cowl..? |
| meku, Comment for image # 34850 | 02 Nov 15 06:43 |
| It's true, well it can be seen in these photos.
http://aircraft-photographs.s3-website-eu-west-1.amazonaws.com/aircraft-ww1-RFC-SE5A-fighter-biplane.html |
| Skyediamonds, Comment for image # 34850 | 02 Nov 15 00:57 |
| Thank you Mr. DD. I will be drawing both inspiration from you & Meku. Mr Meku has been very generous to share his building experiences with his S.E. 5. Right now, I'm laying out the foundations for my build. This should make it easier & (hopefully) fun for everyone to follow. I'm also optimistic that the coming days, weeks, & months will serve to show such level of detailing doesn't require special tooling of even modeling skills. This project will be mostly about patience (lots of it) & simple imagination. At this point I am going to request input from our fellow VA members & guest to offer any suggestions they may feel worth noting. Thanking you in advance.-Sky |
| David Duckett, Comment for image # 34850 | 01 Nov 15 01:32 |
| I'm sure you will:-) |
| Skyediamonds1985, Image # 34853 | 31 Oct 15 21:01 |
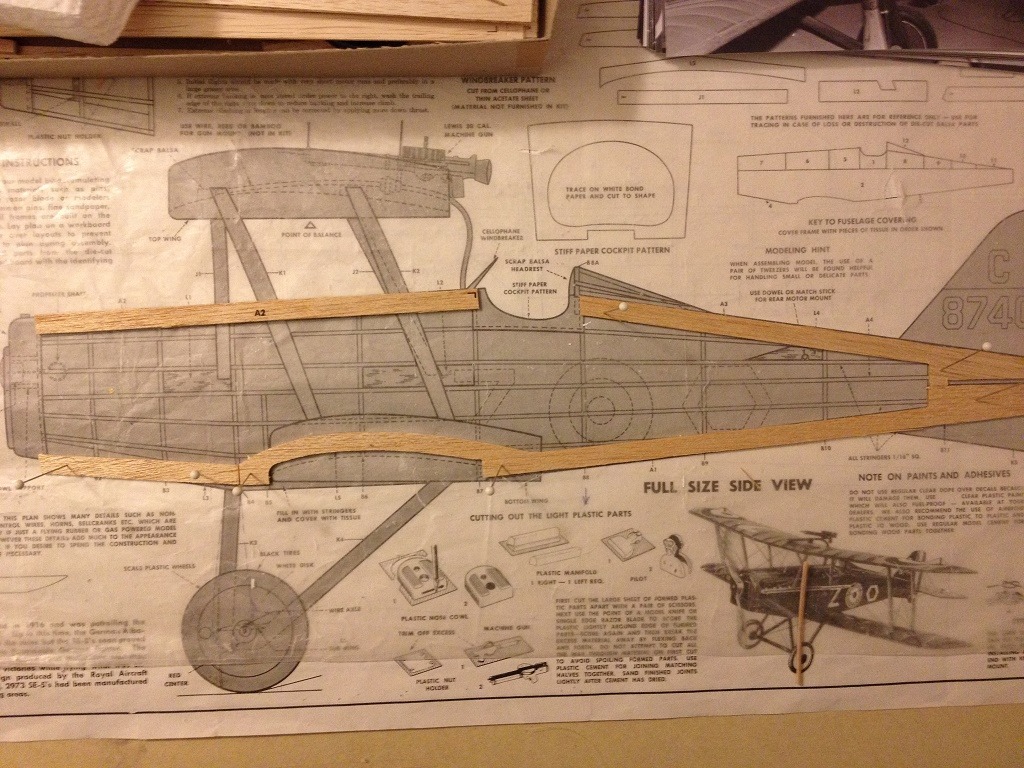
Here is a more close up view of the alteration made to the front end of the fuselage of the S.E. 5. As you can see, I lowered the taper of the bottom keel a bit. There is still a slight taper, but its not as obvious as before. |
| Skyediamonds1985, Image # 34852 | 31 Oct 15 20:47 |
Sorry, guys I'm still new at this posting thing. This is the drawing of the fuselage profile without any distractions. As you can see, the left side profile shows the bottom sweeping upward in a sharp taper to the nose as opposed to the more "boxy" appearance of the real aircraft. |
| Skyediamonds1985, Image # 34851 | 31 Oct 15 20:25 |
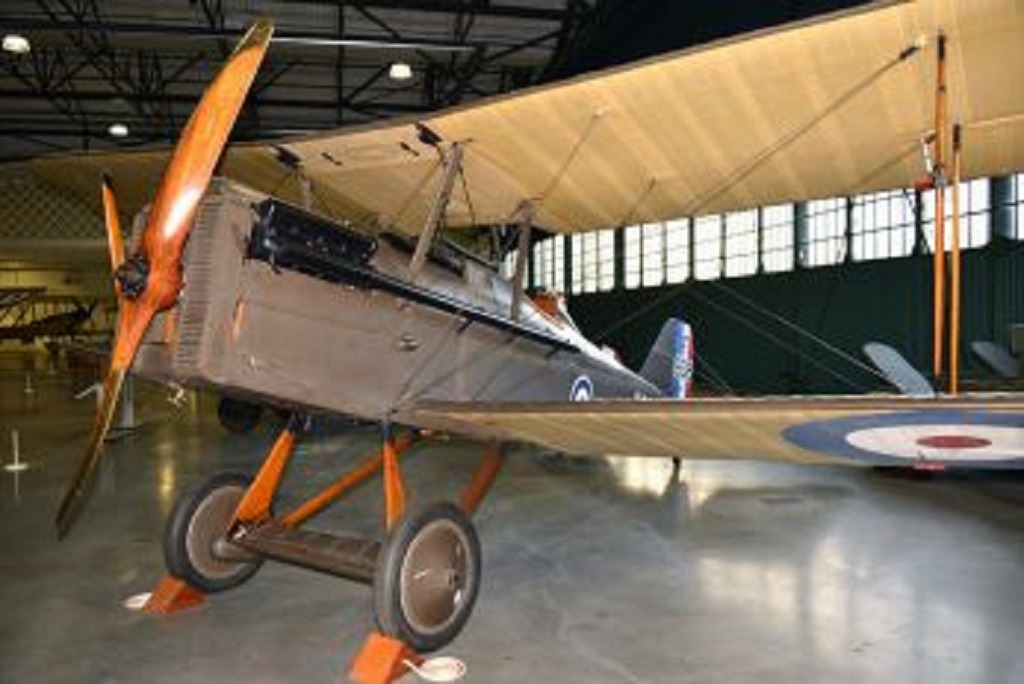
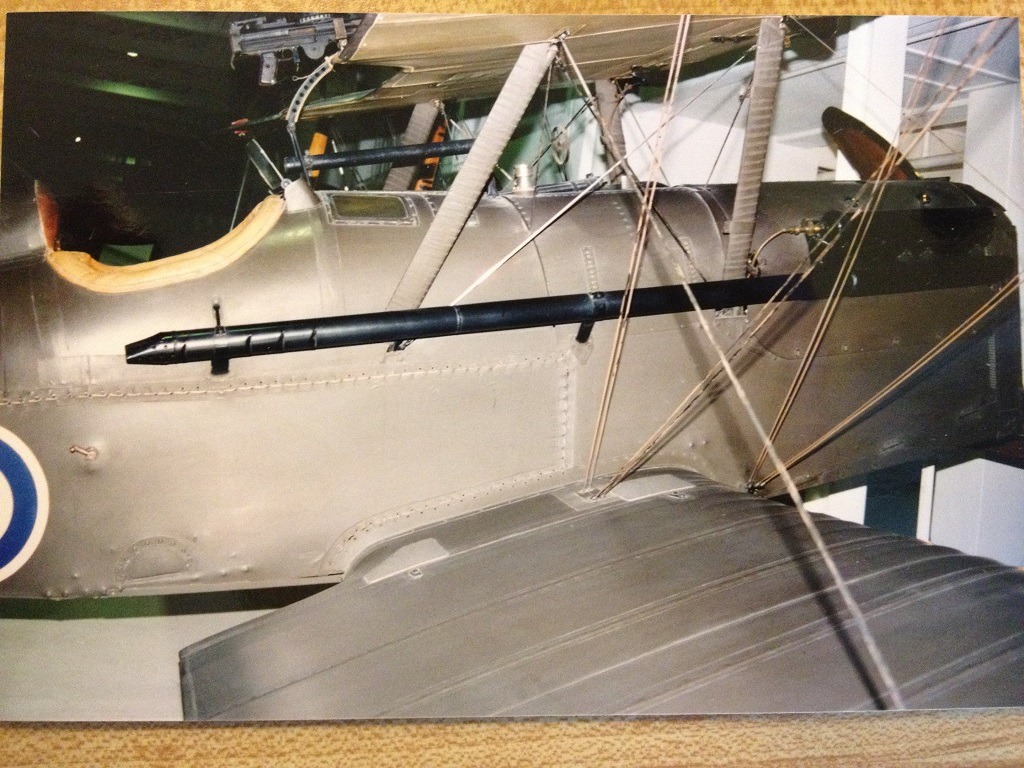
As you can see, this picture of the real S.E. 5 in the museum reflects my original observation of the more squared off appearance of the front end. This photo will also serve as a reference for the underside of the top wing detailing and for rigging as well. |
| Skyediamonds1985, Image # 34850 | 31 Oct 15 20:21 |
I carefully cut the bottom keel and lowered the profile to reflect a more accurate profile if the real aircraft. I am aware that I'll have to cut out new fuselage formers to reflect the enlarged forward portion of the fuselage and this is to be expected. I'm keeping in mind that at this stage of planning, I'll be taking this model to a different level of detailing that is more than what the original kit calls for. |
| Skyediamonds1985, Image # 34849 | 31 Oct 15 20:14 |
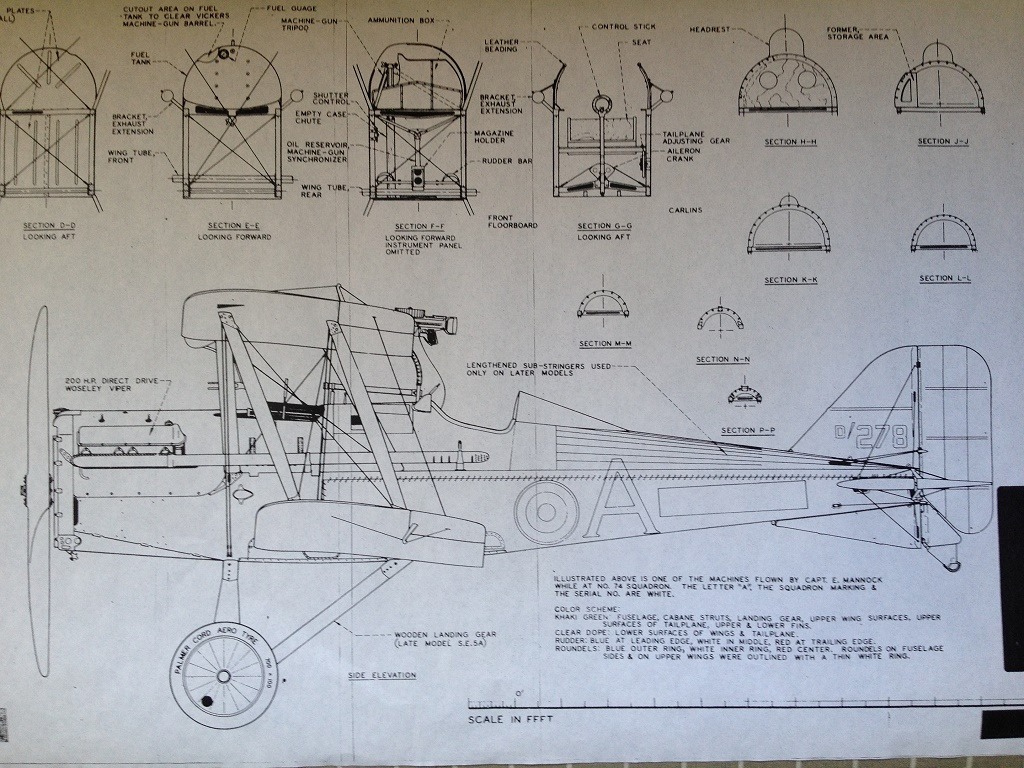
As noted from my previous posting of Guillow's drawings of the fuselage profile, this drawing of the real aircraft shows a more "boxy" squared-on profiile |
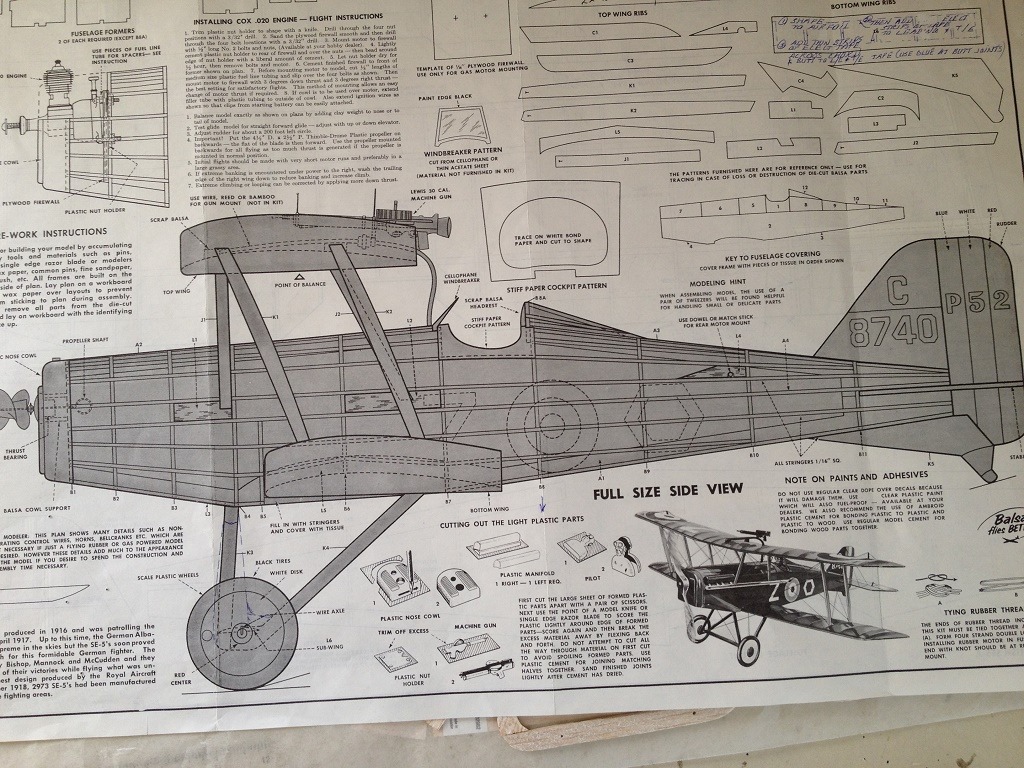
| Skyediamonds1985, Image # 34848 | 31 Oct 15 20:09 |
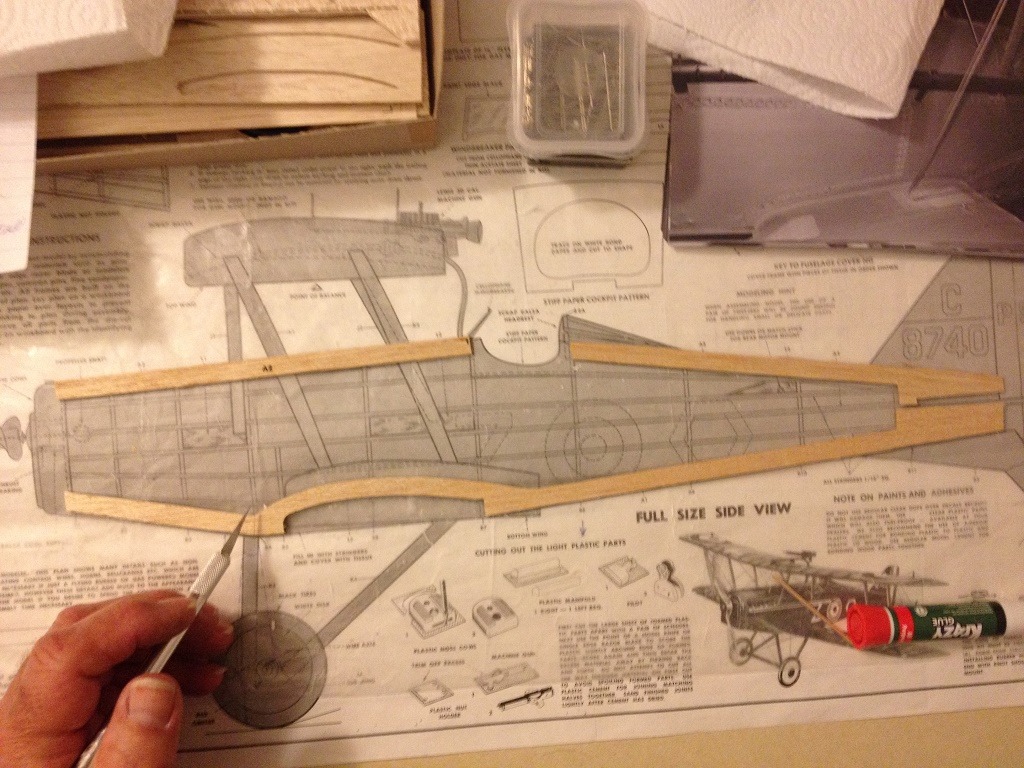
Looking at the instructions, I noted that the bottom of the fuselage tapers upward from the landing gear to the nose. I compared this drawing with those of the real aircraft and noted the real aircraft had a more "boxy" squared-on profile. |
| Skyediamonds1985, Image # 34835 | 30 Oct 15 22:25 |
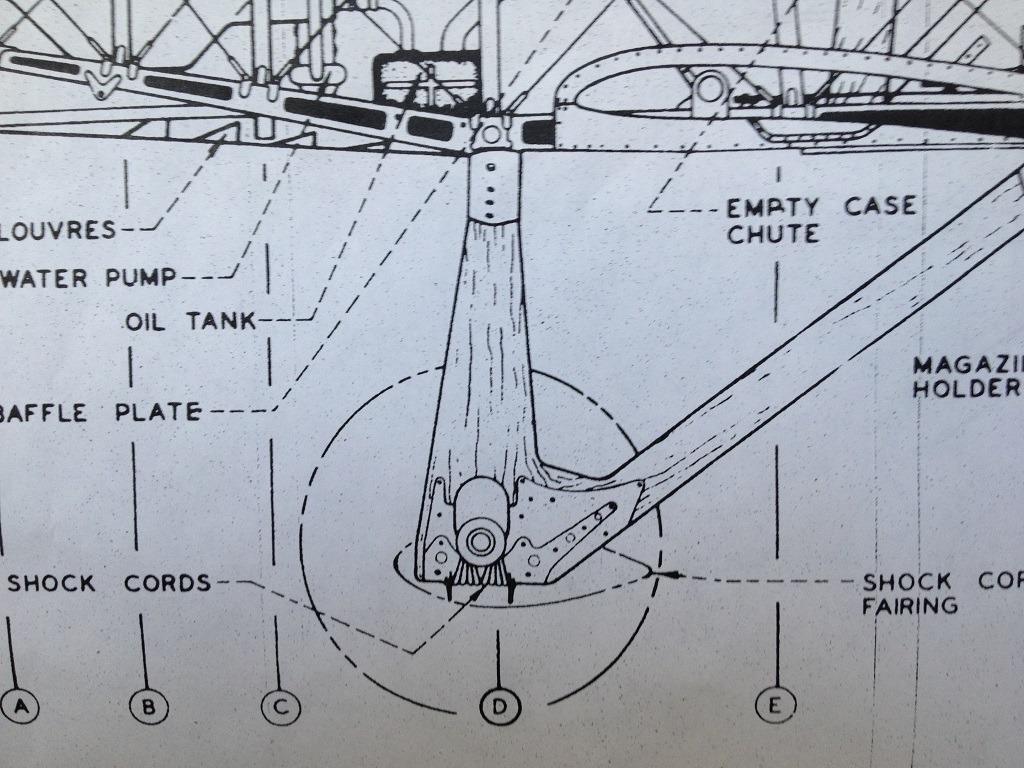
Researching for the proper landing gear configuration |
| Build Thread, Page :
<< 37 38 39 40 41 42 43 (851 posts, 20 posts per page, 43 pages in total)
|
[ < Prev ] |
