| Build Thread, Page :
1 [ 2 ] 3 (47 posts, 20 posts per page, 3 pages in total)
|
[ < Prev ] [ Next > ] |
| elevatoranj, Comment for image # 5080 | 17 Nov 07 12:39 |
| I'm wondering if I should attach the tailfeathers before priming |
| Barnstormer, Comment for image # 5080 | 17 Nov 07 12:36 |
| A work in progress, Keep them coming my friend. |
| David Duckett, Comment for image # 5080 | 17 Nov 07 12:35 |
| And well done, too. |
| elevatoranj, Image # 5080 | 17 Nov 07 12:28 |
I guess there is no such thing as a minor "touch-ups" with micro fill, fixed two small spots, then I fixed two more small spots and the next thing you know, the entire fuselage was covered. |
| Barnstormer, Comment for image # 5024 | 11 Nov 07 17:34 |
| Looking good, your on your way to a nicely detailed cockpit, keep up the good work. |
| elevatoranj, Image # 5024 | 11 Nov 07 15:16 |
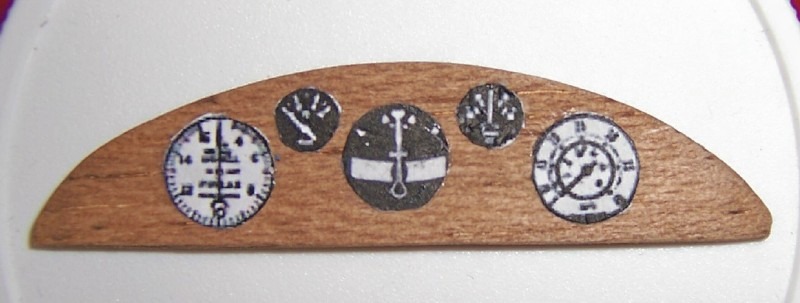
2nd try at the instrument panel. |
| Barnstormer, Comment for image # 4989 | 10 Nov 07 16:25 |
| Looks like your on the right track. You're best bet is to scratch build the cockpit details. If you search the net you may find some cockpit pictures that you can work off of. If you look in my hanger their is an example of a seat that I built from a simple paper pattern tranfered to 1/16 thick balsa, its made from two peices, a bottom, and a back and sides that wrap adound the bottom. Of course you can add as much or as little detail as you like. I hope this helps. |
| John M Oshust, Comment for image # 4988 | 10 Nov 07 16:06 |
| Why wait 6 weeks you could have made them yourself! |
| elevatoranj, Comment for image # 4989 | 10 Nov 07 15:08 |
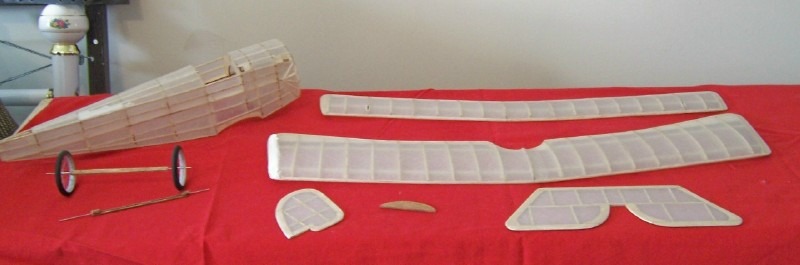
| I am making a dashboard out of balsa and will cut out gauges copied from a decal sheet. I am looking for ideas on what to do for a seat and cockpit interior |
| elevatoranj, Comment for image # 4989 | 10 Nov 07 15:02 |
| NSwheels@comcast.com |
| Barnstormer, Comment for image # 4989 | 10 Nov 07 14:55 |
| Looking very nice. Who did you order the wheels from? They will add a nice touch to the detail. |
| elevatoranj, Image # 4989 | 10 Nov 07 14:51 |
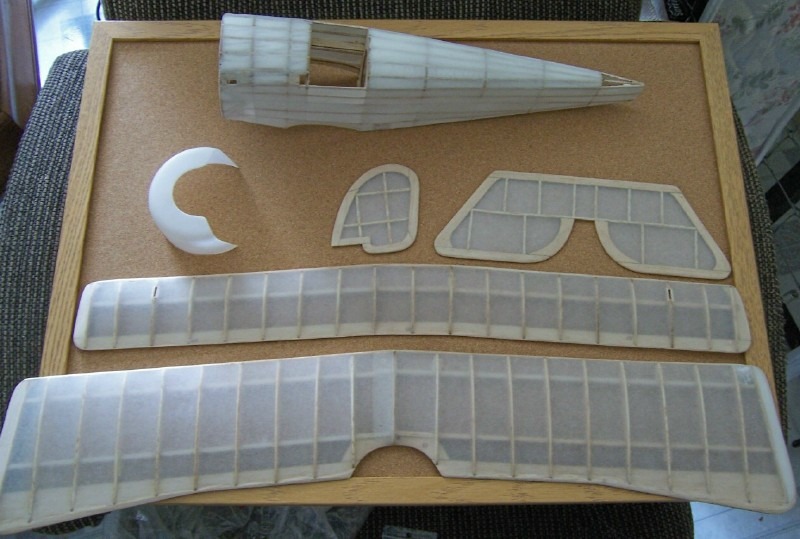
Been a long time since posting due to moving. Here's the Newport II in silkspan. |
| elevatoranj, Image # 4988 | 10 Nov 07 14:48 |
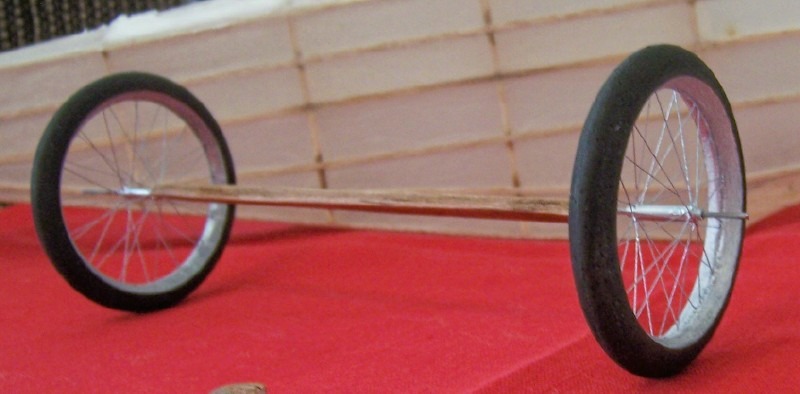
Waited over 6 weeks for these "special ordered" spoked wheels. Had to make up a new axle shaft to accommodate the 1/32th inside diameter hub size. |
| elevatoranj, Comment for image # 4326 | 13 Sep 07 13:27 |
| A cheap Gel Stain from Dept. store. Walnut Noyer color code DS29. I'm going to try black paint over this make laminations |
| brennanj2, Comment for image # 4326 | 12 Sep 07 21:42 |
| What are you using to stain your wood? |
| elevatoranj, Image # 4333 | 04 Sep 07 00:37 |
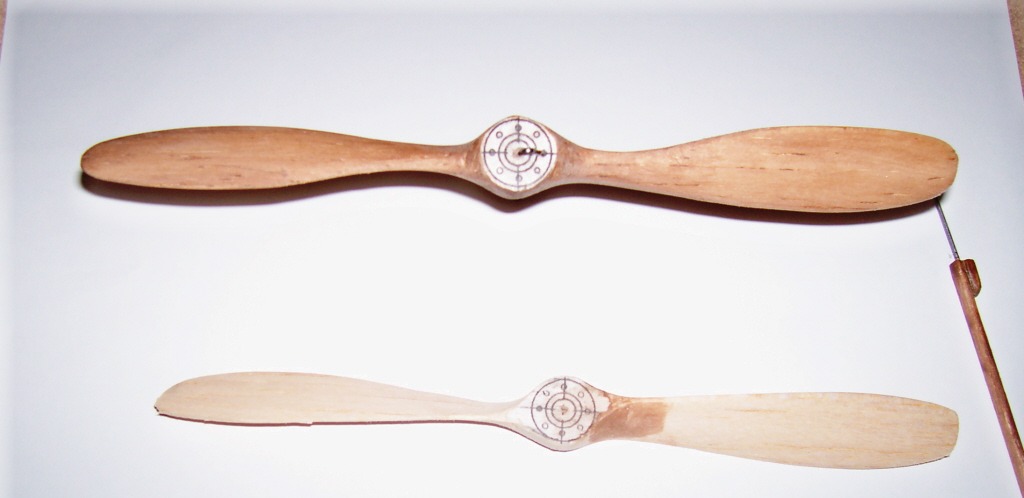
two trys with an X-acto inabout an hour. started the 1st one too thin |
| elevatoranj, Comment for image # 4326 | 03 Sep 07 23:49 |
| all I need now is pictures of a real one, maybe watch the movie Fly Boys again. |
| poppy, Comment for image # 4326 | 03 Sep 07 18:19 |
| Everything is looking great! Well done prop. A few painted lines and would look just like the original laminated ones. |
| John M Oshust, Comment for image # 4326 | 03 Sep 07 17:04 |
| Sweet prop. I made one from walnut for my camel. Try a small drum sander on a drill the next time. It cut my carving time to only 2 hrs! |
| novice builder, Comment for image # 4326 | 03 Sep 07 15:38 |
| Nice prop job? I can see that you've been very busy today. |
| Build Thread, Page :
1 [ 2 ] 3 (47 posts, 20 posts per page, 3 pages in total)
|
[ < Prev ] [ Next > ] |
