| Build Thread, Page :
1 2 3 4 5 [ 6 ] 7 8 (153 posts, 20 posts per page, 8 pages in total)
|
[ < Prev ] [ Next > ] |
| Jedi, Comment for image # 5746 | 11 Jan 08 19:53 |
| My mess included. |
| Jedi, Image # 5746 | 11 Jan 08 19:52 |
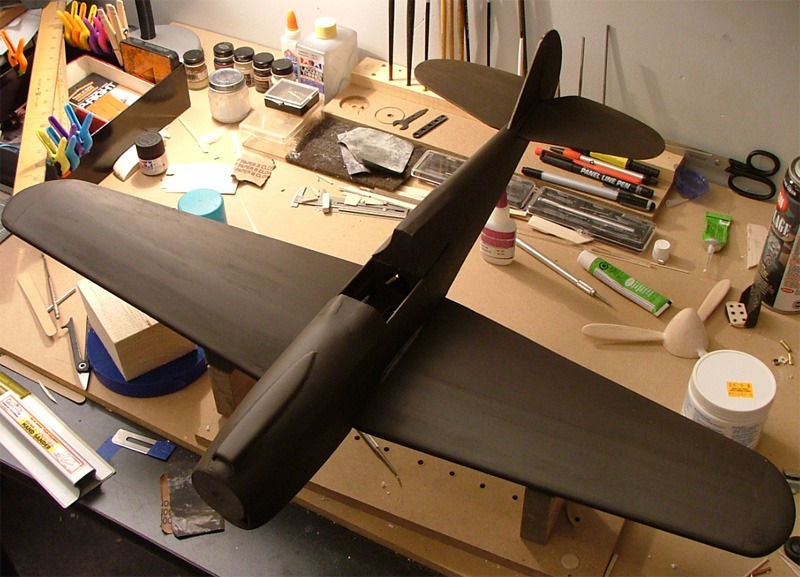
Well, it's been awhile but here is some progress, no where near as smooth as yours Barnstormer but im still learning. |
| Jedi, Comment for image # 5265 | 11 Dec 07 23:22 |
| Thanks guys...I learn so much from all of you.. i hope it turns out right....it sure seems like it's taking me a long time to do each part but i remember some one saying it's not the destination it's the journey..... |
| JohnG., Comment for image # 5265 | 11 Dec 07 18:33 |
| Looking slick. If the spring mechanism holds the wheels in the in-wing position...why not re-engineer it so that the spring mechanism holds the wheel in the up-out position instead and then make a latch that holds the wheels in the in-wing position??? |
| moostang51, Comment for image # 5265 | 11 Dec 07 18:31 |
| Hope you figure it out, because that oleo leg looks fannnntastic. Lotta great work going on here. |
| Jedi, Comment for image # 5265 | 11 Dec 07 07:23 |
| Right now its a square piece of balsa:-)Still in design phase. |
| John M Oshust, Comment for image # 5265 | 11 Dec 07 01:14 |
| The locking mechanism???? How does it work? |
| John M Oshust, Comment for image # 5264 | 11 Dec 07 01:07 |
| Seems like a plan!. Looking good! |
| Jedi, Comment for image # 5264 | 11 Dec 07 00:42 |
| Still very ruff!!! |
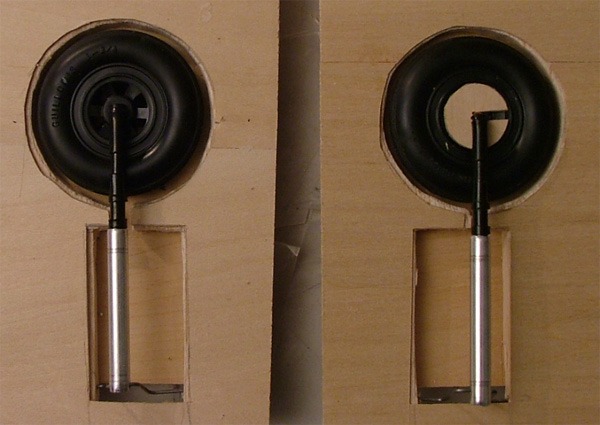
| Jedi, Image # 5265 | 11 Dec 07 00:41 |
In the up position |
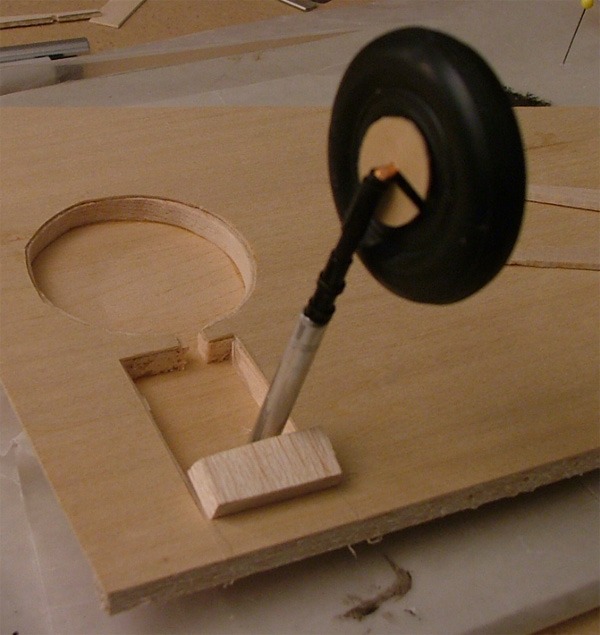
| Jedi, Image # 5264 | 11 Dec 07 00:40 |
My first atempt at retractable landing gear/ First stage |
| Jedi, Comment for image # 5188 | 04 Dec 07 01:15 |
| I could have not said it better!!!! |
| poppy, Comment for image # 5188 | 03 Dec 07 13:22 |
| Remember, when you are finished all you can do is look at it! Reaching the goal is great, but the fun in getting there is what it's all about. |
| Jedi, Comment for image # 5188 | 03 Dec 07 13:09 |
| yeah.... its taking me a month now just to do this. |
| JohnG., Comment for image # 5188 | 03 Dec 07 12:52 |
| Excellent detail. Obviously you are taking your time with this model.....and the results really show. |
| Jedi, Comment for image # 5188 | 03 Dec 07 10:48 |
| I have been trying to find some real thin metal to do that. These are some great idea's ..... thank you. |
| poppy, Comment for image # 5188 | 03 Dec 07 07:40 |
| Jedi, This looks great. I use masking tape cut to size and folded to double thickness for belts. Seat belts are wider than shoulder harness. Thin aluminum from photo etched scrap makes belt hooks and buckles. A fine lead pencil makes stiching on belts. |
| Jedi, Comment for image # 5188 | 03 Dec 07 06:24 |
| buckle....is what i wanted to say |
| Barnstormer, Comment for image # 5188 | 03 Dec 07 06:20 |
| Great work on the seat by the way. |
| Barnstormer, Comment for image # 5188 | 03 Dec 07 06:19 |
| If you look at moostang51's BF 109 build he used 3/16 ribbon for seat belts and very thin plywood to carve out buckels. I used paper clips bent in the shape of an S for the buckels on my DR1 and some light canvas material from an old ammo bandolier for the belts. |
| Build Thread, Page :
1 2 3 4 5 [ 6 ] 7 8 (153 posts, 20 posts per page, 8 pages in total)
|
[ < Prev ] [ Next > ] |
