| Build Thread, Page :
1 [ 2 ] 3 (52 posts, 20 posts per page, 3 pages in total)
|
[ < Prev ] [ Next > ] |
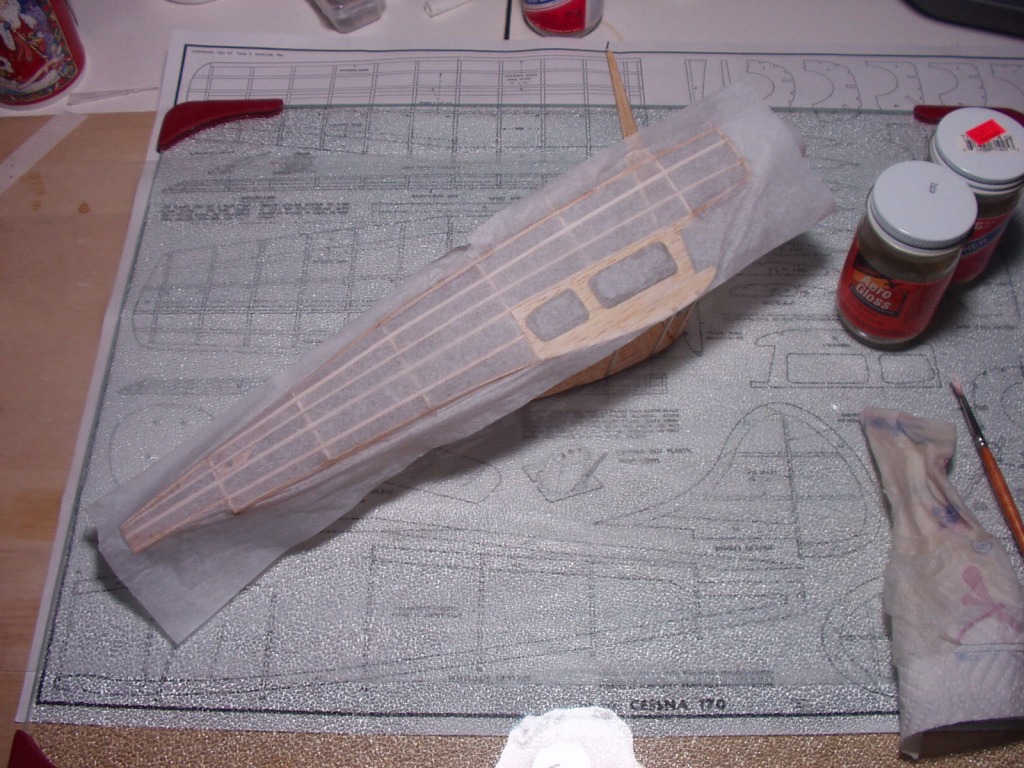
| plasticbuddha, Comment for image # 4389 | 08 Sep 07 15:50 |
| Finally finished covering the fuselage. There are still a few wrinkles and I also managed to sand through on some high spots which required careful repairs. Although I have a long way to go before I get the hang of it, I'm rather pleased with it warts and all. :) |
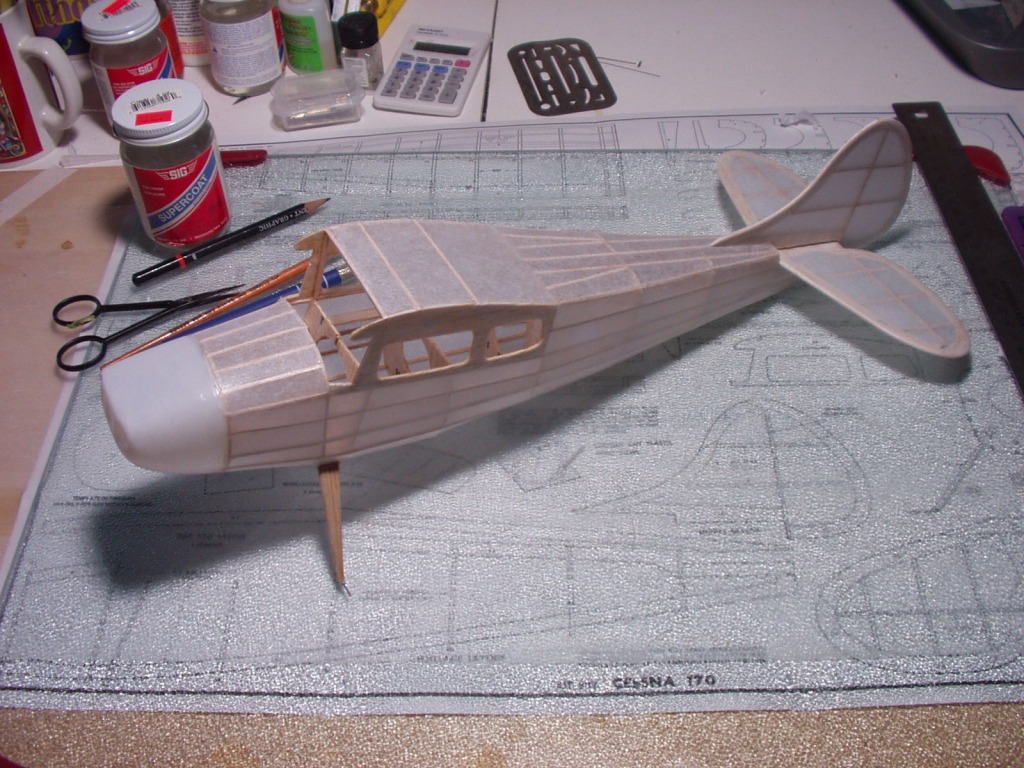
| plasticbuddha, Comment for image # 4388 | 08 Sep 07 15:47 |
| This side turned out reasonably well. I tried to mount the tissue wet on the other side but ended up with quite a few wrinkles and frazzeled nerves! |
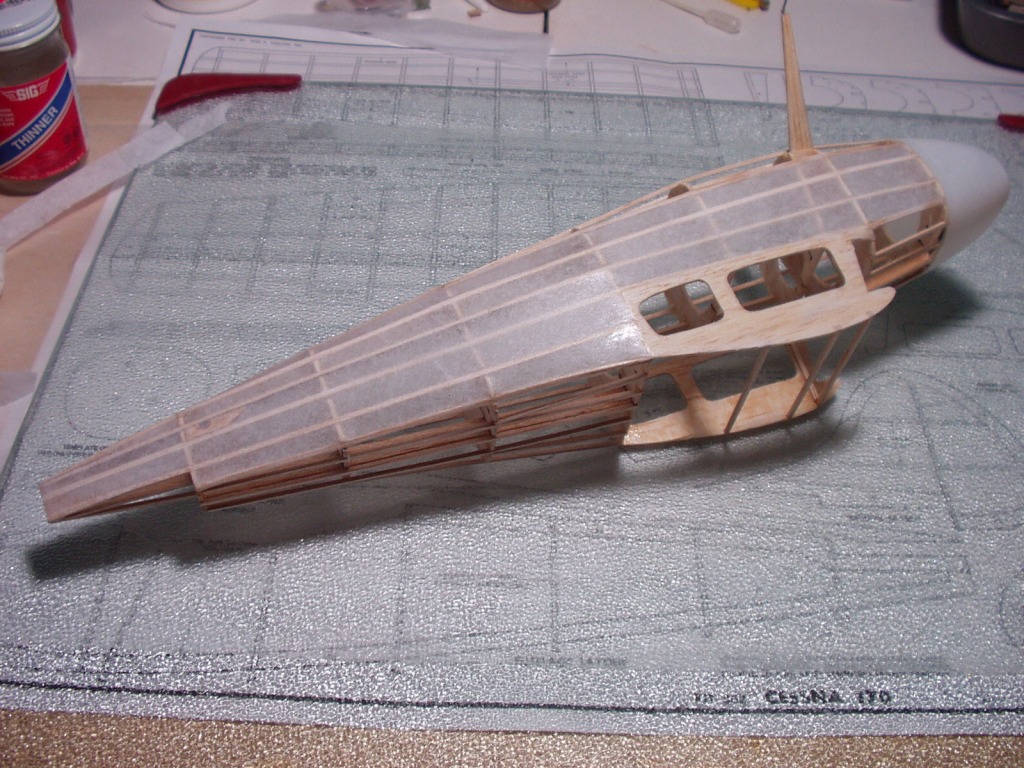
| plasticbuddha, Comment for image # 4387 | 08 Sep 07 15:45 |
| With the fuselage finally framed, it was time to move on to covering. I tried to cover with as few pieces as possible as I still don't know how to do seams well. The tissue was mounted dry and then shrunk by wiping it gently with a soaked piece of paper towel. I also noticed that AeroGloss dope isn't quite as "tacky" as SIG dope. |
| plasticbuddha, Image # 4389 | 08 Sep 07 15:42 |
|
| plasticbuddha, Image # 4388 | 08 Sep 07 15:42 |
|
| plasticbuddha, Image # 4387 | 08 Sep 07 15:41 |
|
| hjlittman, Comment for image # 4347 | 07 Sep 07 20:25 |
| Most people that I know, who make this model to fly, make a one piece wire axle that is attached to the former in front of the landing gear instead of the two short axles shown on the plans. For the one I am building this week (Sorry, I am cameraless at the moment.) I installed the axles as shown on the plans but bound them to the strut, at the top and bottom, with carbon fiber and C/A. Normally, I would have used ordinary sewing thread as a binding for the wire, but someone gave me a few feet of carbon fiber so I went high tech. |
| jgood, Comment for image # 4347 | 07 Sep 07 13:27 |
| Looking good, PB. |
| cdwheatley, Comment for image # 4347 | 07 Sep 07 02:40 |
| The SE5a is progressing nicely thanks, more pictures to post soon I hope. I haven't thought that far ahead to be honest PB, but I would imagine the stock Lewis gun arrangement will make it onto the finished model. How is your Stearman build going? Or are you concentrating all your efforts on this model at the moment? |
| cdwheatley, Comment for image # 4339 | 07 Sep 07 02:34 |
| John, I don't know why but for some reason the comment attributed to a photo when actually uploading it can only be relatively short. Subsequent comments, it seems, can be of any length! |
| jgood, Comment for image # 4339 | 06 Sep 07 19:50 |
| Howard, I think that young lady might have a dream job? :) |
| John M Oshust, Comment for image # 4339 | 06 Sep 07 19:18 |
| How do you get so many words into your comments. My comments seem to cut after a bit? |
| hjlittman, Comment for image # 4339 | 06 Sep 07 18:05 |
| Guillows is using better wood. The current production wood is 10 pounds per cubic foot, very flyable, but not as resistant to the fingers of inexperienced young builders as the former 17 plus pound per cubic foot wood was. Their dies are, obviously, wearing out. The worn dies cut more poorly on the lighter, softer wood. They have ordered two new laser cutters and have a young lady working full time on re-drawing the parts layouts for the laser cutter.
The next series to go laser cut will be the 400 series. I order to check the accuracy of the redrawn parts layouts a model has to be cut and built. The same young lady builds the models. It generally takes at least five cut and build sessions before the bugs are out of the laser cutting routines for a model. How would you like to have that job?
The 500 series models will probably never be laser cut because it would raise the kit prices too much for models that size. However, the sales volume is high enough that it may be worth the $7000 per set to make new dies for them.
I am building a 300 series, Cessna 170, with current production wood, for a contest on Sunday. To save time I am building box stock except for my usual nose modifications, and of course Japanese tissue covering. I looks to come out 20 grams lighter than my last 300 series model (Aeronca) which flew rather well. |
| plasticbuddha, Comment for image # 4350 | 06 Sep 07 16:12 |
| I made two struts and "trapped" the tailwheel in place. A bit more bending and some bits of plastic to simulate the leaf springs to follow. |
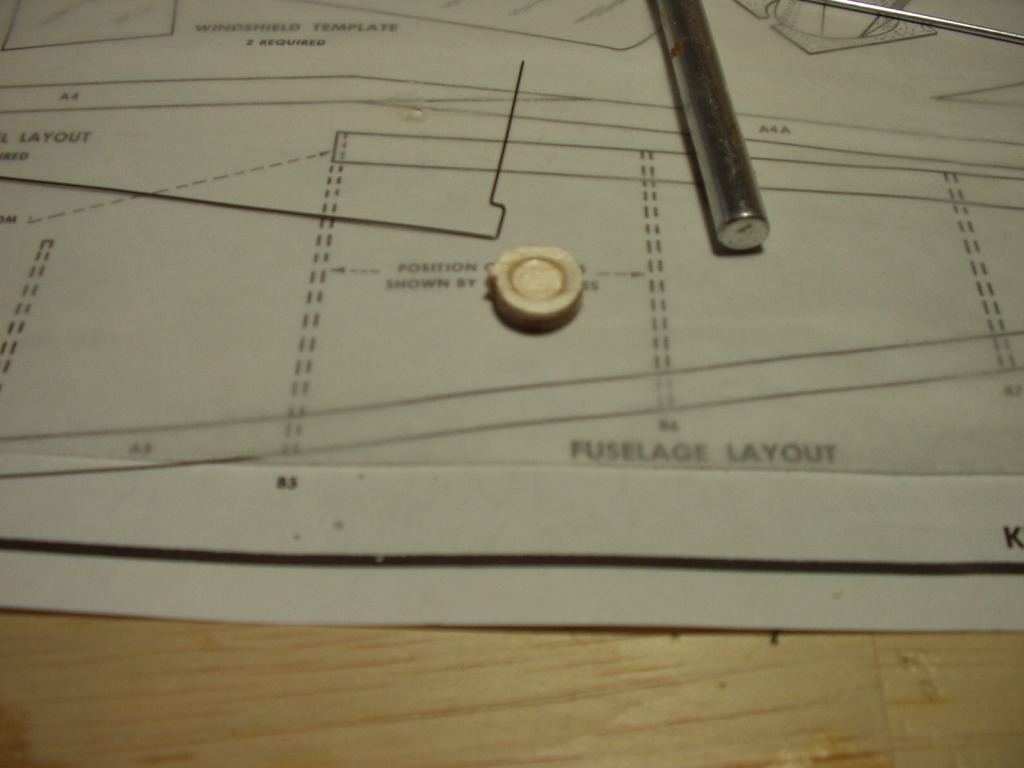
| plasticbuddha, Comment for image # 4349 | 06 Sep 07 16:11 |
| After a bit of sanding and shaping...a bit wonky!! Boy, I sure miss my Dremel! Also inserted an aluminium tube as bushing. |
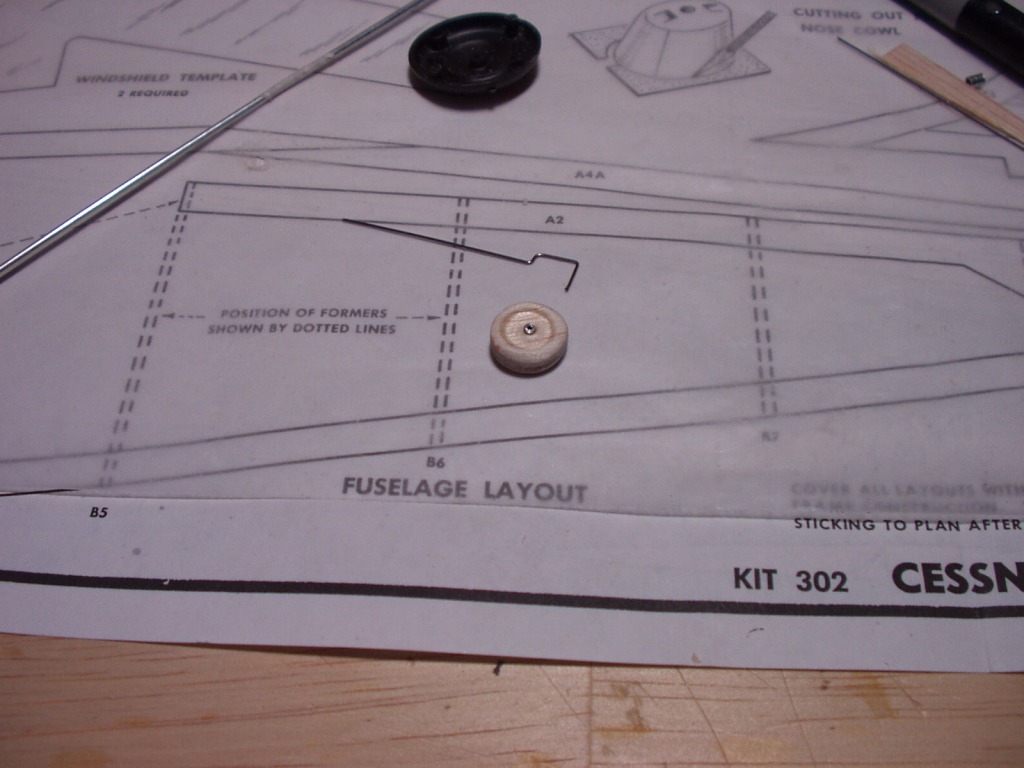
| plasticbuddha, Comment for image # 4348 | 06 Sep 07 16:09 |
| Decided to try and improve the kit tailwheel. I cut out the wheel blanks with the intent on making them roll. I did a bit of experimenting and I found that the balsa took impressions quite well. So I used the blunt end of my X-Acto knife to create a separation between tire and wheel. |
| plasticbuddha, Comment for image # 4347 | 06 Sep 07 16:07 |
| Thanks CD!!! How goes with the SE5? Can't wait to see more pics of your meticulous build. What are you going to do for the armament (Lewis gun on an overhead rail, I think?) |
| plasticbuddha, Image # 4350 | 06 Sep 07 16:04 |
|
| plasticbuddha, Image # 4349 | 06 Sep 07 16:03 |
|
| plasticbuddha, Image # 4348 | 06 Sep 07 16:03 |
|
| Build Thread, Page :
1 [ 2 ] 3 (52 posts, 20 posts per page, 3 pages in total)
|
[ < Prev ] [ Next > ] |
