| Build Thread, Page :
1 [ 2 ] 3 4 5 (96 posts, 20 posts per page, 5 pages in total)
|
[ < Prev ] [ Next > ] |
| rgood, Comment for image # 38244 | 05 Apr 17 11:15 |
| I expect that no-one remembers the Dalton computer! ( I don't know what happened to mine) |
| Don C, Comment for image # 38244 | 05 Apr 17 10:28 |
| Never could master a slide rule, but these seemed to come easy. And having flown over northern Minnesota just south of Dryden and Thunder Bay, I know what you mean by unrecognizable lakes. |
| LASTWOODSMAN, Comment for image # 38244 | 05 Apr 17 10:02 |
| I froze the whole way, even all bundled up in Winter boots and hat, gloves, and parka - at least I was ready for a forced approach - backpack full of survival gear and the mandatory 2 foot axe. It was a relief to call Tower and tell them I had visual on Thunder Bay. Got the plane down barely in the nick of time at darkness before breaking VFR flight regs. |
| LASTWOODSMAN, Comment for image # 38244 | 05 Apr 17 09:57 |
| The last time I used a manual Flight Computer was 30 years ago, on a 4 hour solo cross-country flight in North Western Ontario, departing Thunder Bay, overflying Atikokan, landing and refueling in Dryden, then straight back to Thunder Bay, over myriad unrecognizable lakes and boreal forests in the middle of the dead of winter at -20 deg F, in a Cessna 172 whose heater hardly worked. |
| Huey V77, Comment for image # 38244 | 05 Apr 17 07:30 |
| Learned to use one when I was a student pilot in 1968. Have flown from Pittsburgh to California and back. Cleveland to Florida, and every where in between , haven't used that device since. My common sense computer took its place. |
| LASTWOODSMAN, Image # 38245 | 04 Apr 17 21:49 |

SPOCK used one ... |
| LASTWOODSMAN, Image # 38244 | 04 Apr 17 21:48 |
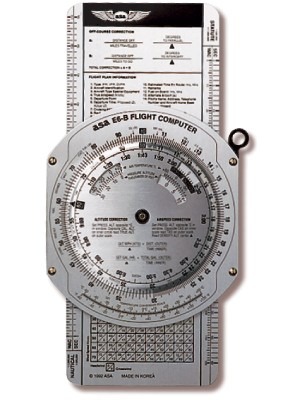
Anybody remember these ? |
| Don C, Comment for image # 38228 | 03 Apr 17 09:52 |
| Nice job. |
| John M Oshust, Comment for image # 38228 | 02 Apr 17 22:04 |
| Well, all of your blood lost was worth it. A nice, neat, clean install. The metal gives character to the graceful air screw. |
| LASTWOODSMAN, Image # 38231 | 02 Apr 17 21:51 |

It was a good thing that I tested out all of this on a practise prop blade first. |
| LASTWOODSMAN, Image # 38230 | 02 Apr 17 21:46 |
I won the war, but a lot of blood was lost. It was quite agonizing trying to make perfect placement of the claddings. |
| LASTWOODSMAN, Image # 38229 | 02 Apr 17 21:43 |
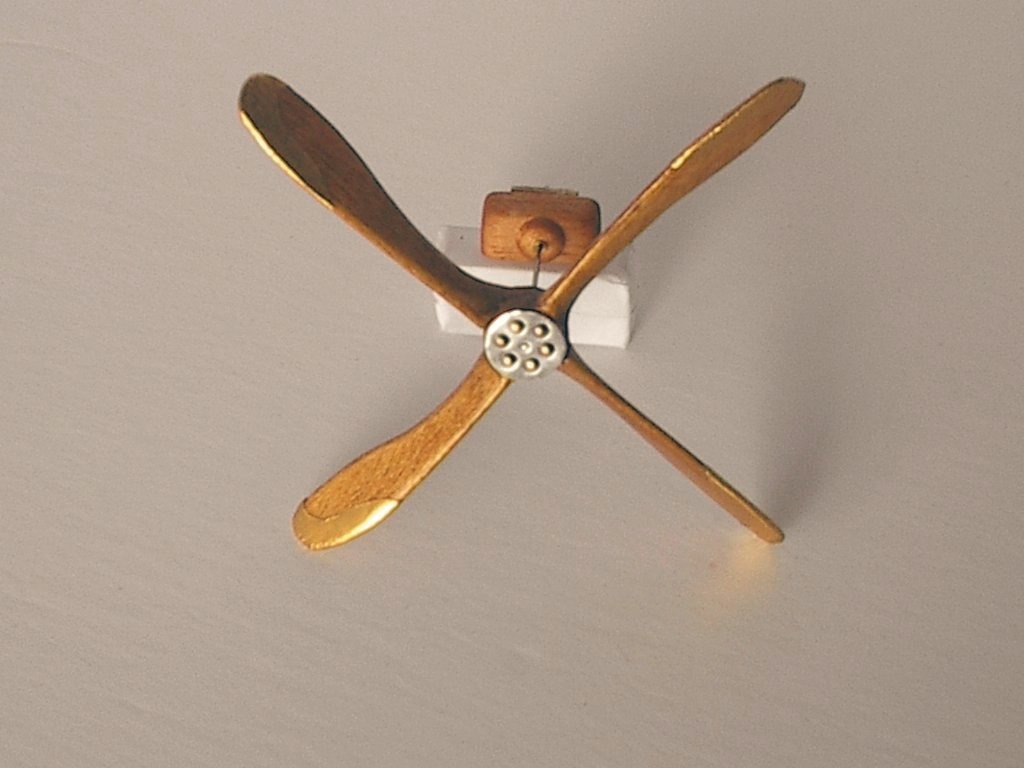
I tried to keep out wrinkles on the faces of the blades, keep the overlaps on the blade edge only, and have the cladding bottoms lline up even with the cladding bottoms on the other side. |
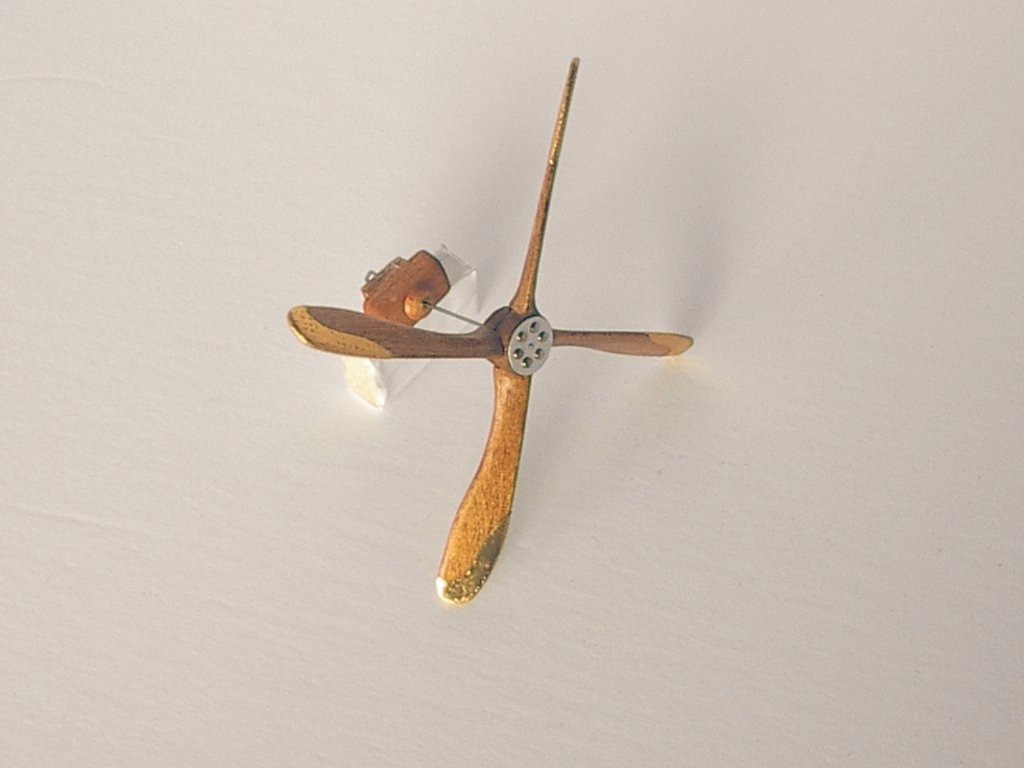
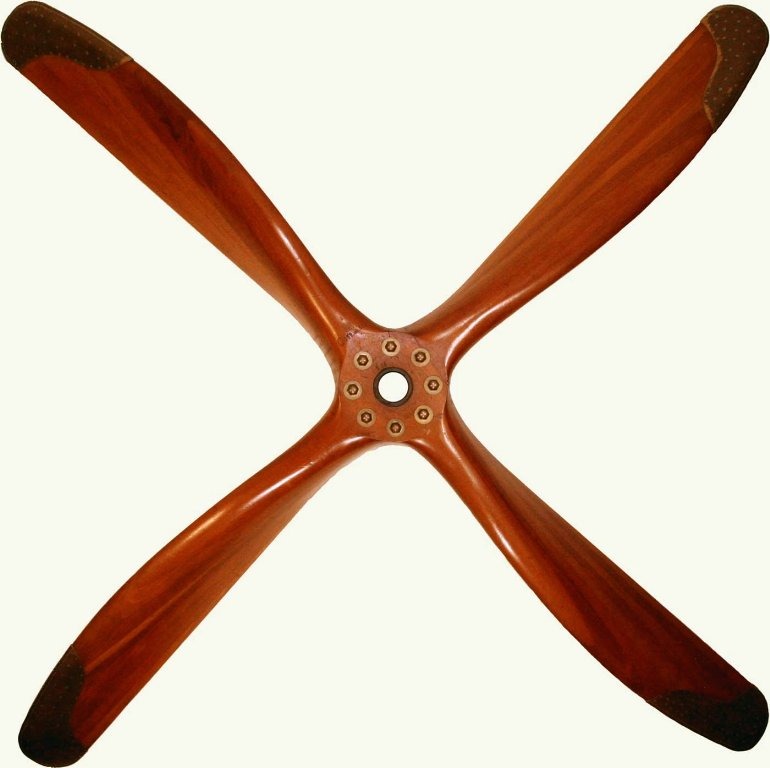
| LASTWOODSMAN, Image # 38228 | 02 Apr 17 21:39 |

Finished prop all cladded up. The wrap arond edge strips were trimmed real close to the prop edge, leaving just enough to wrap the edge of the blade only - glued sparingly with 5 min Epoxy. |
| LASTWOODSMAN, Image # 38227 | 02 Apr 17 21:35 |
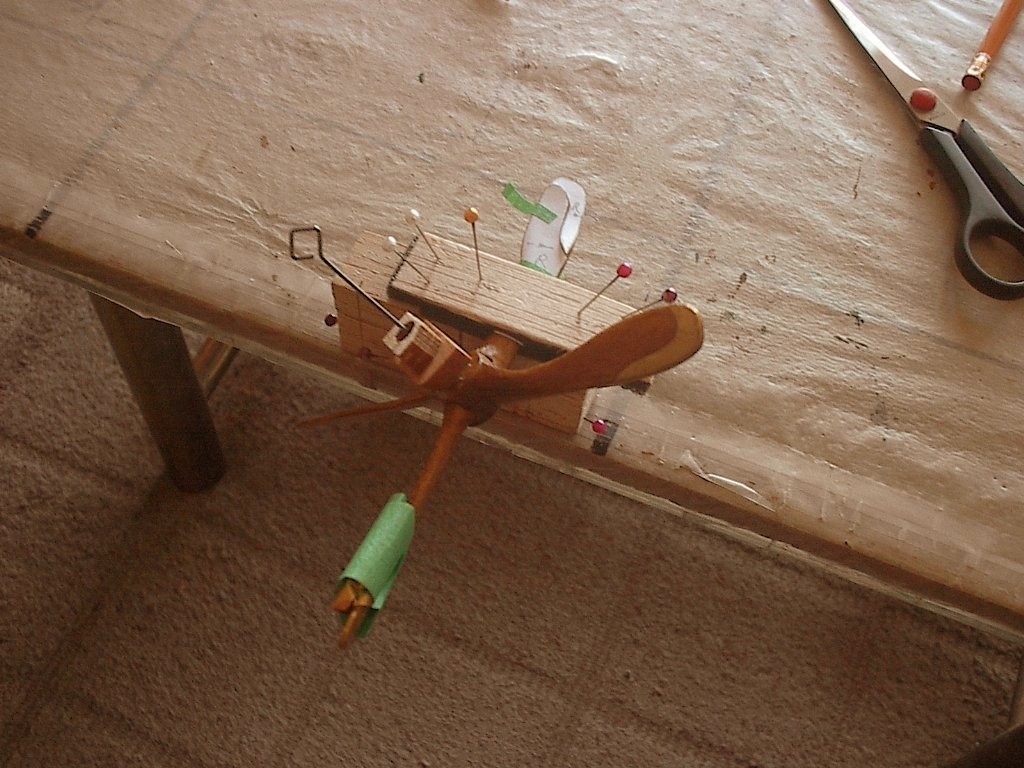
Here it is all clamped and pinned up - black styrofoam on each side of the blade - the white paper templates are lined up with the wooden blade. The green masking tape on the opposite blade is so that I don't accidentally break it off ... |
| LASTWOODSMAN, Image # 38226 | 02 Apr 17 21:30 |
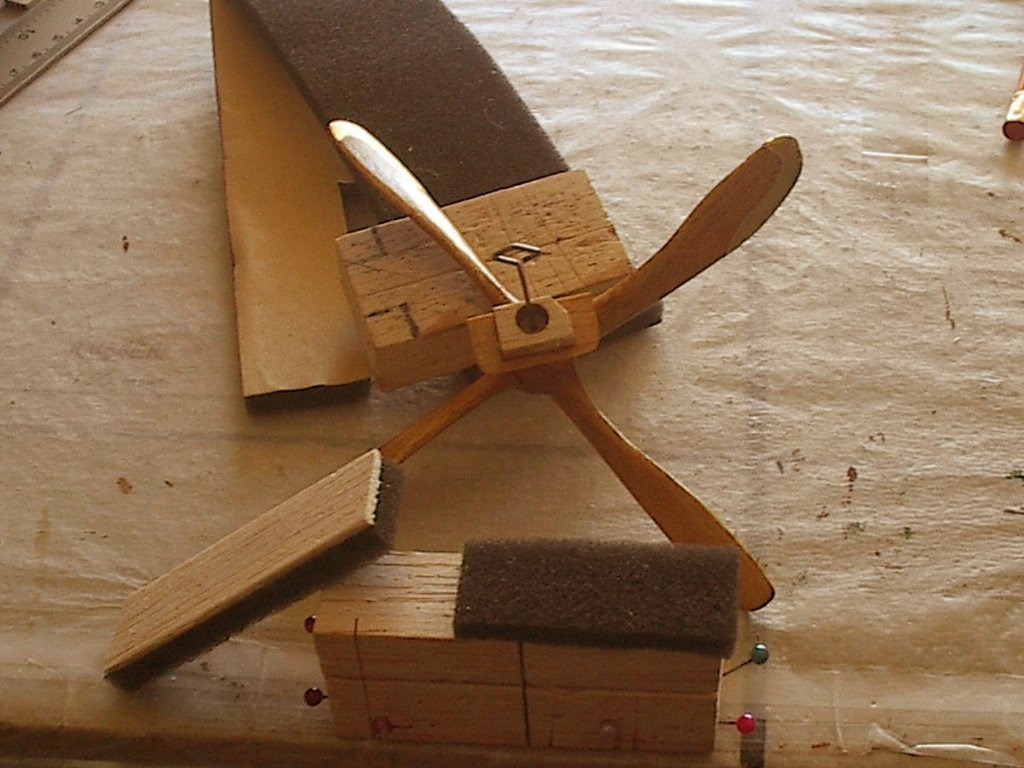
This is the "peel n stick" black styrofoam I used to hold the blade steady in order to press the claddings onto the blade tips. |
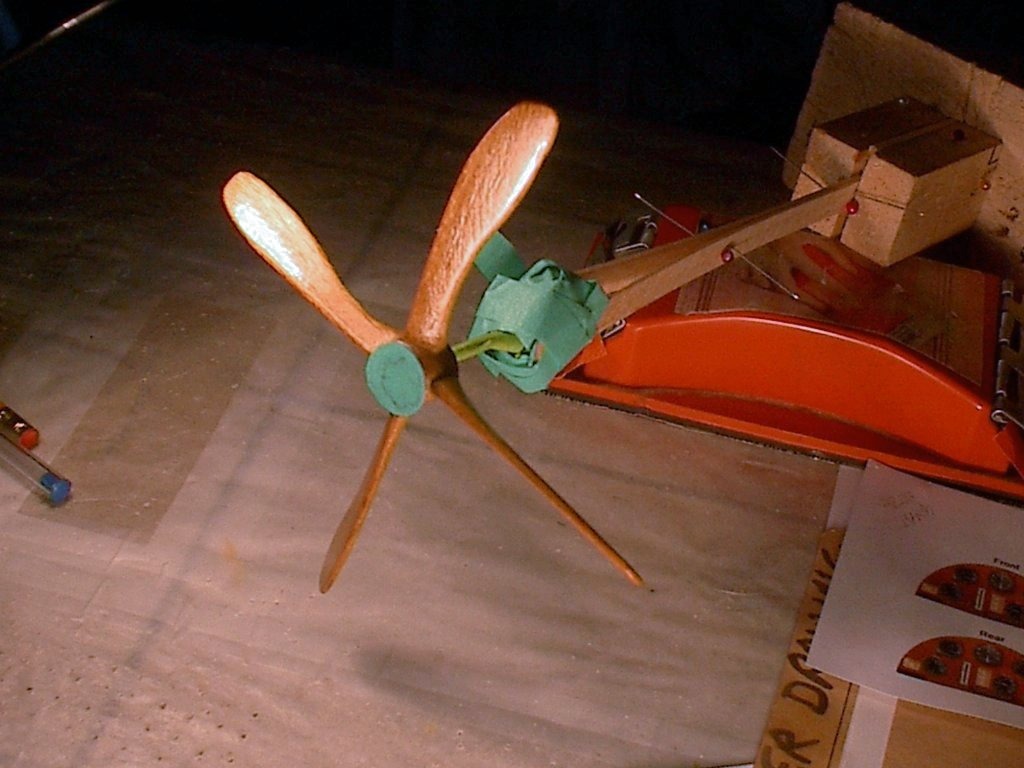
| LASTWOODSMAN, Image # 38223 | 01 Apr 17 09:34 |

The cladding is glued to the prop and the white template paper is bent up so it does not glue. The two balsa strips used to pin down the prop, actually smeared and dented the one-week old Krylon clear finnish - I substituted some padding, for both sides of the prop, using some peel and stick balck styrofoam padding stuck to the pin down strips - that styrofoam padding is used for air conditioner draft seals. |
| LASTWOODSMAN, Image # 38222 | 01 Apr 17 09:26 |
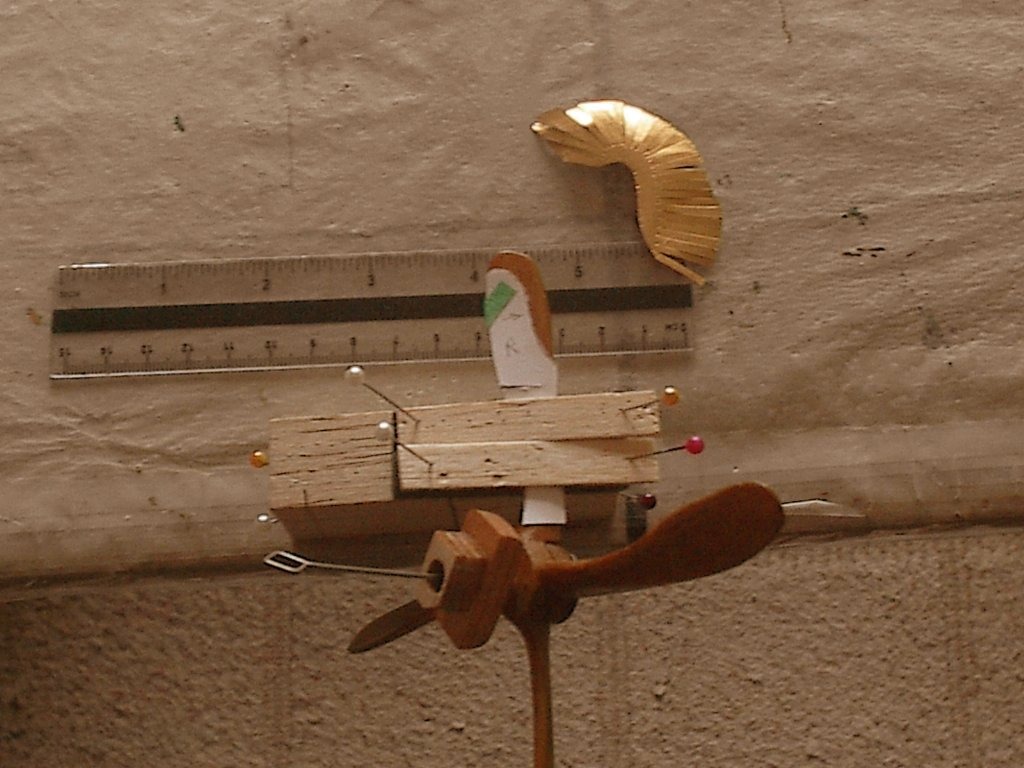
The white template is masking taped to the prop, and I brushed on a thin layer of 5 min epoxy to the wood - the cladding really wanted to slip and move around out of posiiton on a practise blade, which is why I used a template to make sure it was in the right positon as the glue dried. |
| LASTWOODSMAN, Image # 38221 | 01 Apr 17 09:20 |
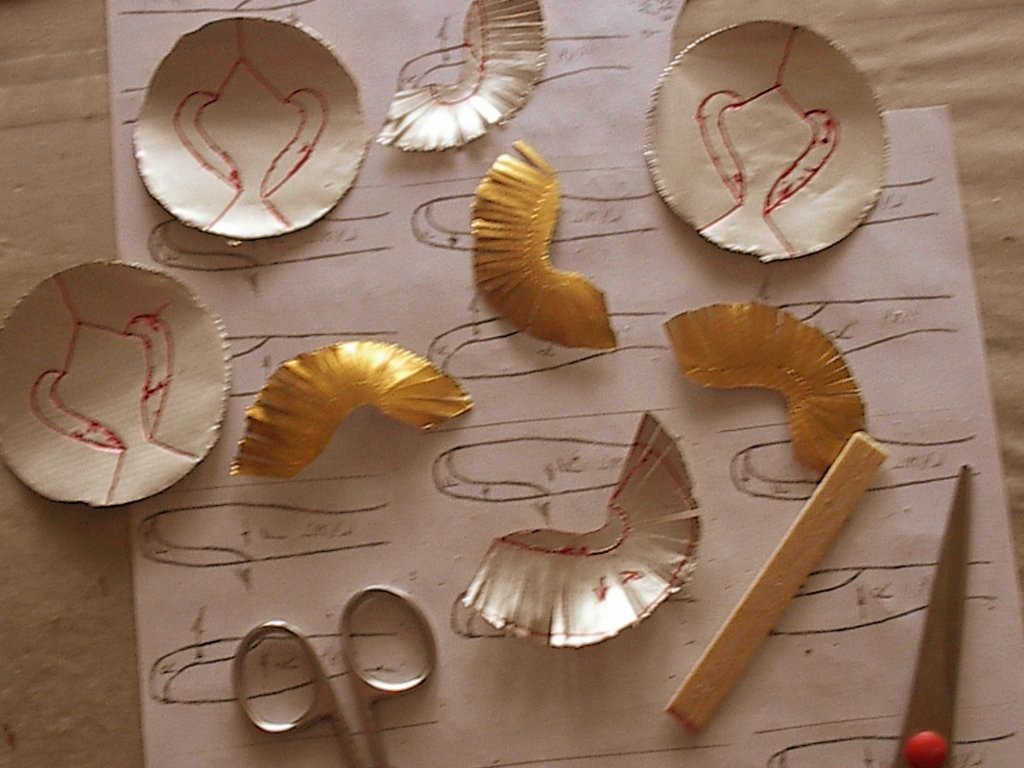
Brass coated coffee jar "freshness seals" (.001" thick) used for "S" shaped cladding cutouts that include extra cutout strips of "stretch out and wrap around edge strips". Template sheet for loating the cladding positions, one piece on each side of the prop. |
| LASTWOODSMAN, Image # 38219 | 31 Mar 17 11:44 |
I removed the old "half circle" claddings from the prop tips, sanded the prop down to 400 grit paper, and sprayed 3 coats of Krylon Clear Gloss acrylic rattle can paint onto the balsa. |
| LASTWOODSMAN, Image # 38216 | 31 Mar 17 11:35 |
I have decided to scrap the old calddings and try to imitate the "S" shaped claddings of the 4 blade DH4 Rolls Royce prop. |
| Build Thread, Page :
1 [ 2 ] 3 4 5 (96 posts, 20 posts per page, 5 pages in total)
|
[ < Prev ] [ Next > ] |
