| Build Thread, Page :
[ 1 ] 2 3 (48 posts, 20 posts per page, 3 pages in total)
|
[ Next > ] |
| John M Oshust, Comment for image # 11058 | 01 Mar 09 20:26 |
| Nice job. This is what I intend to do on my Mig when she comes down for a spring dusting. |
| moostang51, Image # 11058 | 01 Mar 09 16:44 |
Enough with bottom lines. The support for the wings was very influential in this project and "results" could not have occured w/o it. Must incorporate in all future builds. Back to the ceiling with this bird. |
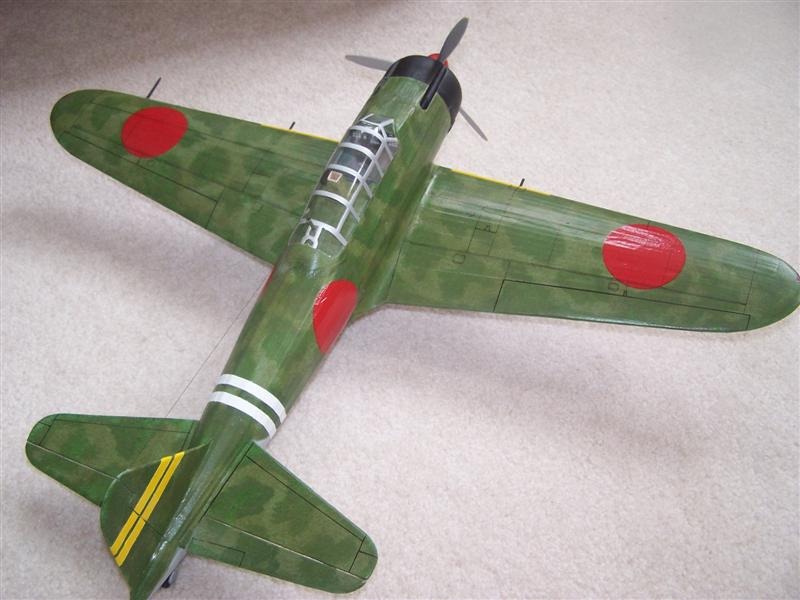
| wingspanner, Comment for image # 11053 | 01 Mar 09 13:38 |
| Looks great! Love the panel lines. They are harder than they look. |
| moostang51, Image # 11055 | 01 Mar 09 13:18 |
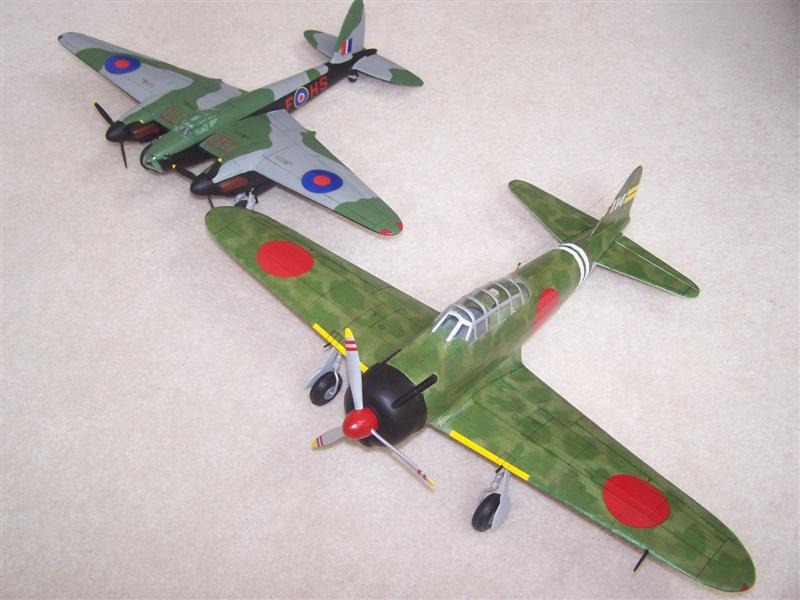
The Mossie is 7/16" scale, while the Zero is 3/4". |
| moostang51, Image # 11054 | 01 Mar 09 12:59 |
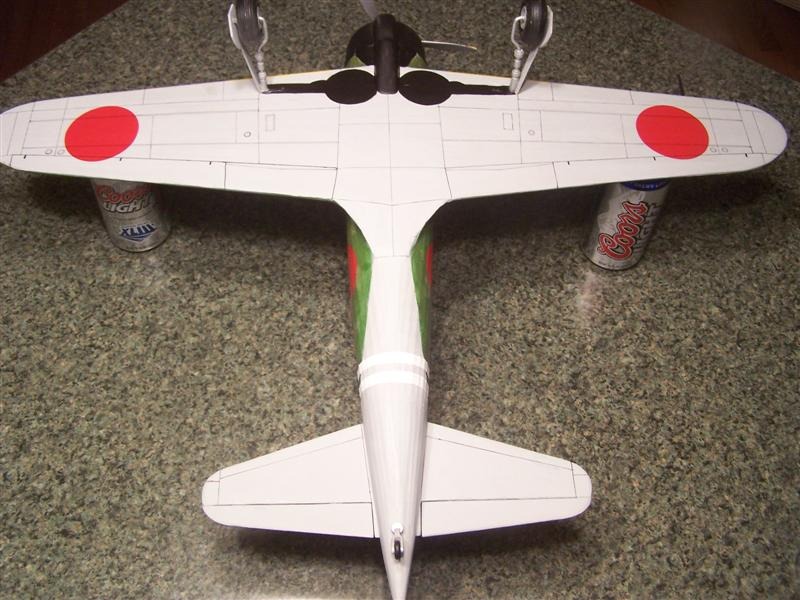
Only punctured silkspan once....urrgghh. Bottom next. |
| moostang51, Image # 11053 | 01 Mar 09 12:57 |
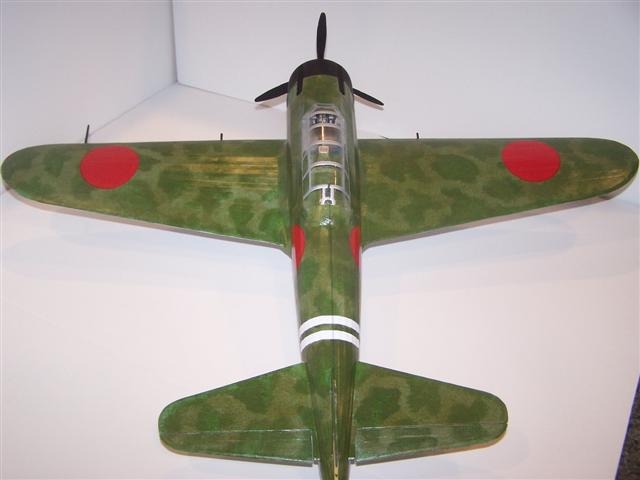
Zero reborn. Took from ceiling to dust, 5 hours later...panel lines, new prop and updated colors. See, they are never finished. |
| John M Oshust, Comment for image # 2428 | 22 Apr 07 20:59 |
| I am learning about cowling gills. May I inquire as to what you use as a filler? Something commercial or talc and Elmer's? |
| John M Oshust, Comment for image # 2428 | 22 Apr 07 20:56 |
| What do you use as filler? Talc and Elmer's? |
| David Duckett, Comment for image # 2500 | 05 Mar 07 09:45 |
| Great job!! |
| Xanadu, Comment for image # 2502 | 04 Mar 07 20:25 |
| Looks great! |
| jgood, Comment for image # 2502 | 04 Mar 07 19:00 |
| Congratulations, it looks very good. That mottled paint job really sets it off. I would like to see a non-flash picture of it, I'm sure that would show it off well. |
| moostang51, Image # 2502 | 04 Mar 07 18:31 |

Ready for the ceiling. Learned a lot more about techique on this one but still haven't decided what to build next. The plastic in larger scale models I'm sure will be the biggest challenge. |
| moostang51, Image # 2501 | 04 Mar 07 18:25 |
View from a fly over. |
| moostang51, Image # 2500 | 04 Mar 07 18:23 |

Right rear view, no number on stabilizer. |
| moostang51, Image # 2499 | 04 Mar 07 18:22 |
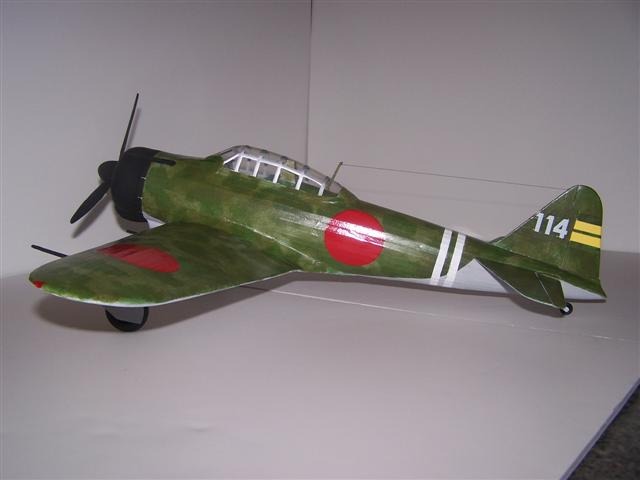
Left side with number markings. |
| moostang51, Image # 2498 | 04 Mar 07 18:20 |
Finally finished. |
| cdwheatley, Comment for image # 2458 | 28 Feb 07 09:20 |
| Thanks for the info, it looks amazing. Can't wait to see it with all the insignia etc in place. |
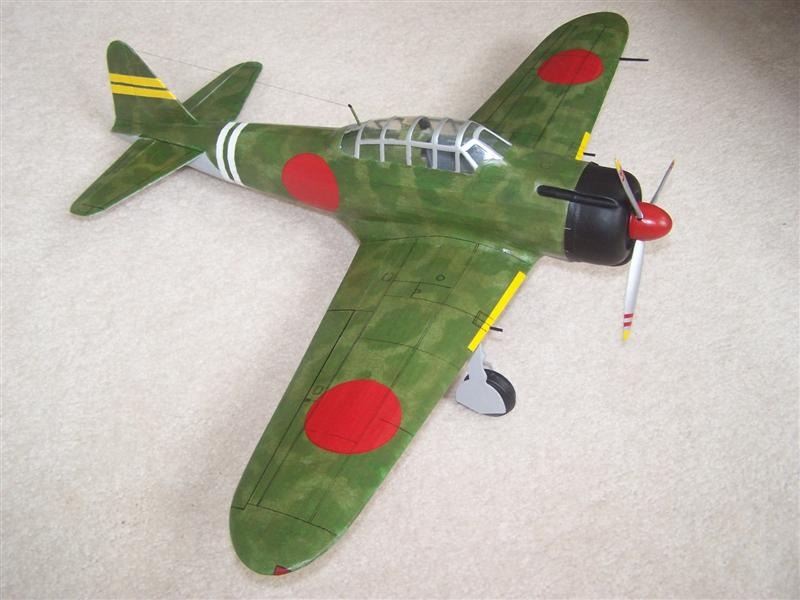
| moostang51, Comment for image # 2458 | 26 Feb 07 19:35 |
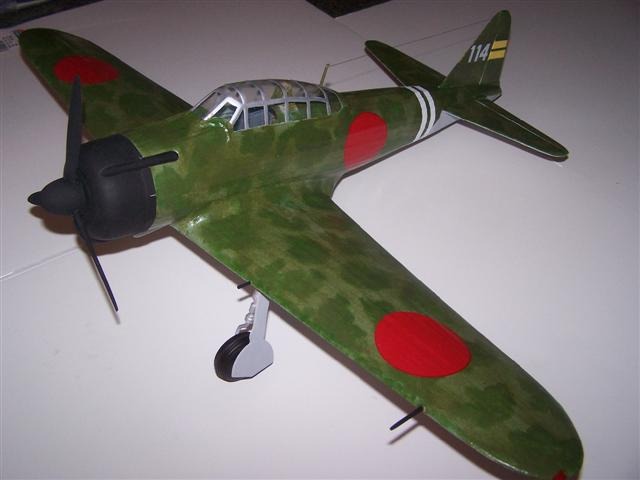
| Thanks cd. Over the light green background I used a 1/2" stenciling brush barely wet with paint and worked out from the center of the darker green marking to almost feather in the edges. After that dried the whole plane was again stenciled with a thinned out olive to achieve the final finish. Up close it appears there are about a half dozen shades of green but only three were used. I had a lot of practice on 1/35 German armor, but those colors were usually dark yellows and umbers. The sheen is a natural buildup of Liquitex acrylic layers. (8 all told including 3 thinned primer light grey) |
| cdwheatley, Comment for image # 2458 | 26 Feb 07 18:11 |
| Nice work moostang51. How did you do the camouflage? |
| moostang51, Image # 2459 | 25 Feb 07 18:08 |

Almost there... finally. |
| Build Thread, Page :
[ 1 ] 2 3 (48 posts, 20 posts per page, 3 pages in total)
|
[ Next > ] |
