| Hangar |
Aircraft |
Category |
Date |
Preview |
| pfinn | Dumas Kit #220, Westland Lysander | Build | 08-Dec-09 03:07 | 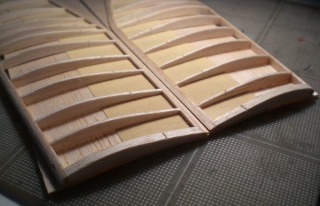 | | Views : 700 | | cutting. I cut down the hinge line with a razor. |
| pfinn | Dumas Kit #220, Westland Lysander | Build | 08-Dec-09 03:05 |  | | Views : 646 | | Back to the wings. Cutting control surfaces. After an almost finish sanding, I double stick taped the wings to some 1/32" balsa sheet to keep things in place while... |
|
| Hangar |
Aircraft |
Category |
Date |
Preview |
| pfinn | Dumas Kit #220, Westland Lysander | Build | 06-Dec-09 00:47 | 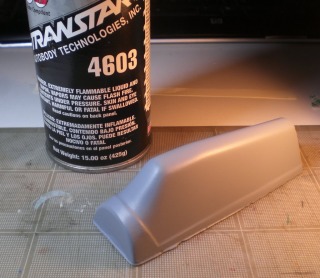 | | Views : 732 | | This is the primer I use. It's the best "Rattle Can" primer I've ever used. EVER. High build, recoat every 5 min. (three coats fills and hides 220 scratch) at 75-80 deg F (10 min today at 60 deg), ready to sand in 1 hour. Sands like a dream come true. Non filling puffy dust. The picture is unsanded. Both my Guillows ser 500 me 109 and jfinn's FW 190 were both primed with this. Covering flexibilty is not an issue. Once again, pricey. $20.00 a can. And again, worth every penny. |
| pfinn | Dumas Kit #220, Westland Lysander | Build | 06-Dec-09 00:29 | 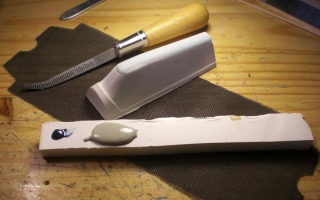 | | Views : 654 | | Rasp for roughing (that's actually my Soapstone rasp). The abrasive mesh is actually a Drywall Mud sanding sheet. Works great with plaster, flller without clogging plus there's abrasive on both sides and waterproof. Home Depot and such. And finally if you don't already, for small, multiple fills (pinholes, accidental rasp diggers ;o0 ), I'll plop down some filler and catalyst. Use a small spatula, oil painting pallette knife works great, scoop up some filler, about a 1/4" bead or so, off to the side, dab the tip of the spatula and pick up a tiny bit of catalyst and mix a small portion, apply, scrape off unused filler before it goes off, wipe off spatula. repeat. This ensures a good bond because you don't end up trying to get that last 10 second too late batch to stick and smooth out. If you don't get it, I'll take a series of pics to show how. My explaination may be a bit....vague. |
|
