| Hangar |
Aircraft |
Category |
Date |
Preview |
| Skyediamonds1985 | Guillows Series 200 - SE5a | Build | 16-Nov-15 11:16 | 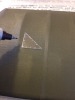 |
| Views : 345 |
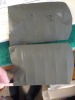
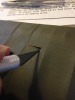
| Using a thin marker, I drew the outlines of the "window" on my sample wing. |
| Skyediamonds1985 | Guillows Series 200 - SE5a | Build | 16-Nov-15 11:14 | 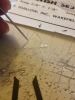 |
| Views : 332 |
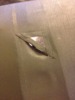
| A close up photo from The Vintage Aviator website revealed that the inspection window had small screws or rivets. So, I used a large pin and pushed out some "rivets" from the backside of the plastic "window." I hope this feature shows through the strips of fabric covering. |
| Skyediamonds1985 | Guillows Series 200 - SE5a | Flying | 16-Nov-15 11:11 | 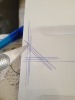 |
| Views : 333 |
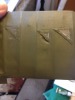
| Marked off the appropriate size and shape of the plastic window itself. The outer and inner most lines denotes the fabric strip used to cover the edges and hold down the window. The middle line is the actual outline of the plastic window itself. |
| Skyediamonds1985 | Guillows Series 200 - SE5a | Build | 16-Nov-15 11:08 | 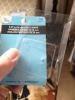 |
| Views : 281 |
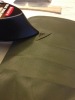
| I started by using some clear plastic packages used for my cylinder rings of the PT-17. Amazing how one manages to save such seemingly items destined to the trash bin |
| Skyediamonds1985 | Guillows Series 200 - SE5a | Build | 16-Nov-15 11:05 | 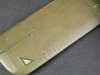 |
| Views : 353 |
| Before starting on the fuselage, I thought I'd try one more experiment. The S.E. 5 was one of the very few, if not the only one, aircraft in production that featured inspection windows on the flying surfaces of both wings and horizontal stabilizer. These windows provided a quick peek at the pulley system and the control cables hidden inside to ensure that the cables had not slipped off the pulley. |
| Skyediamonds1985 | Guillows Series 200 - SE5a | Parked | 14-Nov-15 14:25 | 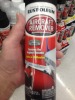 |
| Views : 491 |
| Well guys, it finally happened. No tricks, or gimmicks. Found this can in the paint section of Wal Mart. It's actually a paint stripper, but the title got my attention. My humor for the day:: just spray it up in the air next time a plane flies overhead and see what happens. |