| Build Thread, Page :
1 2 [ 3 ] 4 (67 posts, 20 posts per page, 4 pages in total)
|
[ < Prev ] [ Next > ] |
| mark eggebeen, Image # 42741 | 07 Oct 20 22:58 |
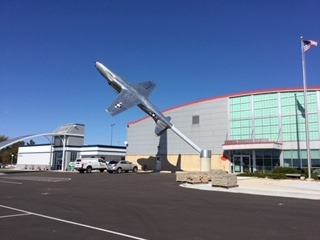
A new building was erected next to the A H C W. Airport headquarters and customs. The pavers in the foreground are for a T-28 that we restored |
| mark eggebeen, Comment for image # 42729 | 02 Oct 20 22:36 |
| now comes the ugly part !! |
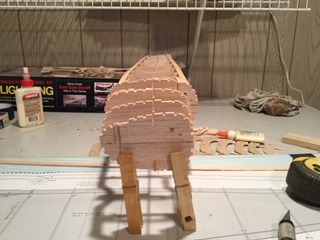
| mark eggebeen, Image # 42729 | 02 Oct 20 10:56 |
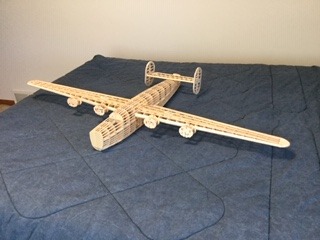
end of phase one... |
| mark eggebeen, Comment for image # 42707 | 26 Sep 20 12:52 |
| strayed from the directions a little. Seemed to work out better for me... |
| mark eggebeen, Image # 42707 | 26 Sep 20 12:47 |
|
| mark eggebeen, Image # 42695 | 19 Sep 20 10:56 |
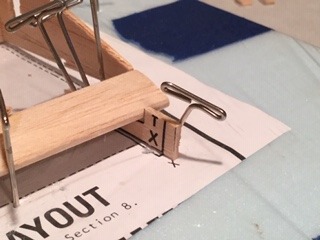
nice little helpful item I've never seen before...one for each corner |
| mark eggebeen, Comment for image # 42669 | 10 Sep 20 22:43 |
| I did a model a while ago and first used spackle and after sanding sealed it with 50/50 white glue...That sealed it up and then sanded to a pretty smooth surface |
| Skyediamonds1985, Comment for image # 42669 | 10 Sep 20 20:35 |
| Watching this with interest. If Spackling compound is used, try using it straight from the tub. If it's diluted. depending upon how much water is used in the mix, that's when it'll start to shrink. The beauty of Spackling, is it's generally softer than the surrounding balsa, so you won't end up over-sanding the surrounding wood and creating gouges. Spackling usually comes off pink in color, then turns white when dry.
**Word of caution that I haven't seen in the previous builds....always sand only in a well-ventilated area (preferably outside and/ or wear a mask). When sanding, that compound gives off a very fine powdery dust that can get into your lungs..... ask me. |
| mark eggebeen, Comment for image # 42669 | 08 Sep 20 22:41 |
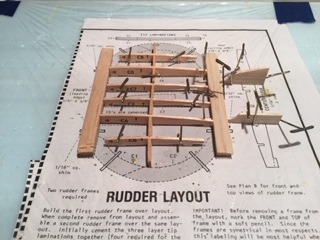
| I am very impressed with this kit so far!! Instructions are very thorough, including lots of pictures. The build is "rugged" lots of reinforcing. landing gear is usually wire, but this one has steel rod bent to shape. |
| Don C, Comment for image # 42657 | 08 Sep 20 10:31 |
| OK, I'll chip in too. I use light spackle, at least 2 coats, usually more. If I have trouble seeing if it is really smooth, I shoot on a coat of sandable auto primer. When you sand the low and high spots really stand out. As Striamed said, sand, coat with dope or---, and cover with silkspan. Then more dope and sanding. |
| Striamed1, Comment for image # 42657 | 08 Sep 20 00:56 |
| I have used the balsa filer sold in the hobby shop. More expensive but decent. Sand it then cover with silkspan after. After a final sand, the seams disappear. |
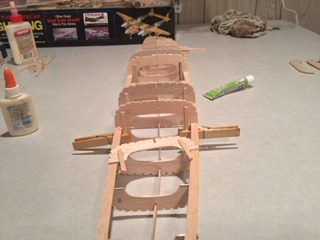
| mark eggebeen, Image # 42669 | 07 Sep 20 22:36 |
Never run out of rubber bands |
| mark eggebeen, Comment for image # 42657 | 07 Sep 20 22:33 |
| I have mixed feelings...the last one took a lot of sanding! a lot!!!! |
| edbecky, Comment for image # 42657 | 07 Sep 20 10:19 |
| Mark, no expert here but I like to use all purpose joint compound (probably the same or close to your spackle). Looks like you're off to a good start on this one. |
| mark eggebeen, Comment for image # 42657 | 06 Sep 20 22:28 |
| on the last one I used spackle (?) but it was soft, so I got some wood filler, but I thing that was too hard. I think it was more for hardwood rather than balsa. |
| mark eggebeen, Comment for image # 42657 | 06 Sep 20 16:08 |
| I need suggestions on a filler for this one...anyone.? |
| mark eggebeen, Image # 42657 | 05 Sep 20 14:23 |
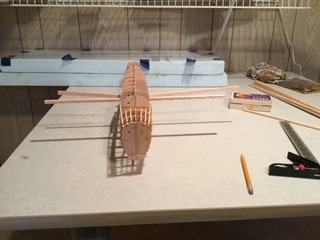
just making sure the wings will line u p!! |
| mark eggebeen, Image # 42656 | 04 Sep 20 23:04 |
moving right along..... |
| mark eggebeen, Image # 42653 | 03 Sep 20 11:49 |
a little rough but should clean up .... |
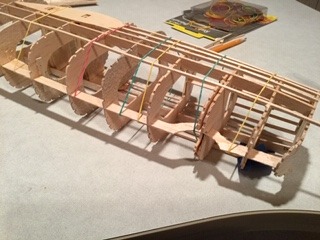
| mark eggebeen, Image # 42647 | 01 Sep 20 22:39 |

left side done nice heavy stringer on this model |
| Build Thread, Page :
1 2 [ 3 ] 4 (67 posts, 20 posts per page, 4 pages in total)
|
[ < Prev ] [ Next > ] |
