| Build Thread, Page :
1 [ 2 ] 3 (53 posts, 20 posts per page, 3 pages in total)
|
[ < Prev ] [ Next > ] |
| jerry campbell, Comment for image # 3772 | 29 Jul 07 13:37 |
| No, they are not LEDs, what ever LEDs are, They are blobs of white glue at the end of modeling pins, and painted. |
| poppy, Comment for image # 3771 | 29 Jul 07 13:33 |
| Now that's my kind of detail. very nice work. |
| mattolson, Comment for image # 3772 | 29 Jul 07 13:31 |
| Nice detailing...are those LEDs on the levers? |
| mattolson, Comment for image # 3773 | 29 Jul 07 13:29 |
| Yea, the belts are pretty slick. Do you purchase those as a set? |
| jerry campbell, Comment for image # 3772 | 29 Jul 07 13:24 |
| In total I spent 21/2 days on the cockpit components. I'm just thankful that there is as much information available on the internet as there is. |
| jerry campbell, Image # 3773 | 29 Jul 07 13:18 |
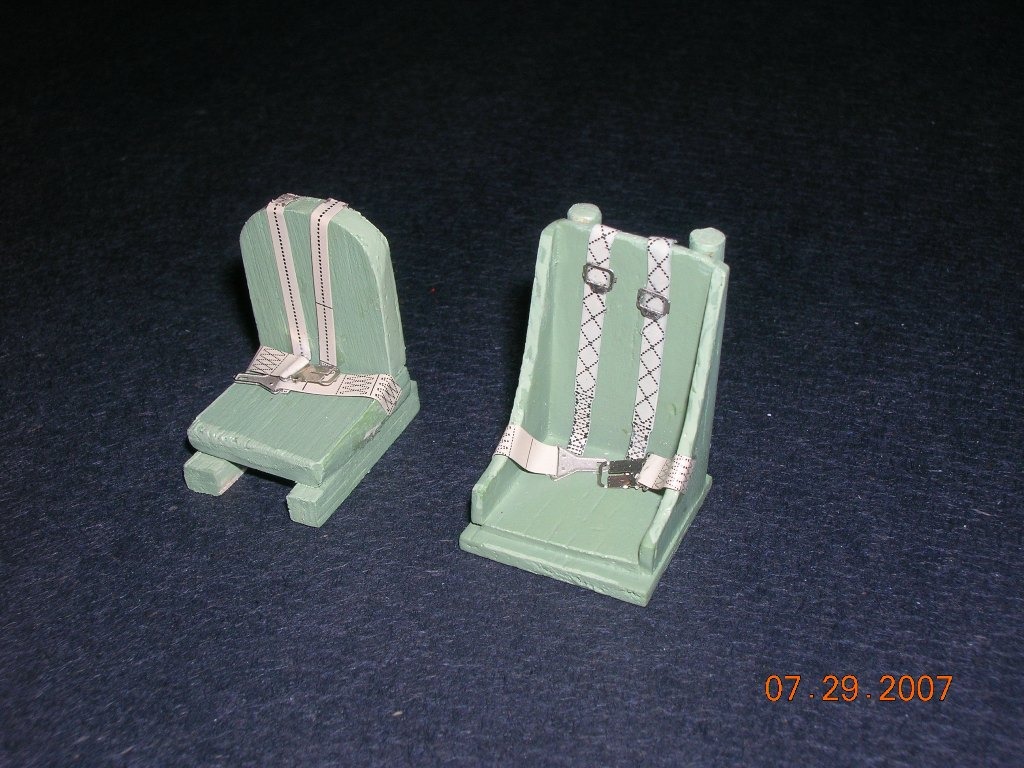
The seats, while i thought would be a problem, turned out to be quite simple. The Eduard prepainted photo etched seat belts add quite a nice detail. |
| jerry campbell, Image # 3772 | 29 Jul 07 13:12 |
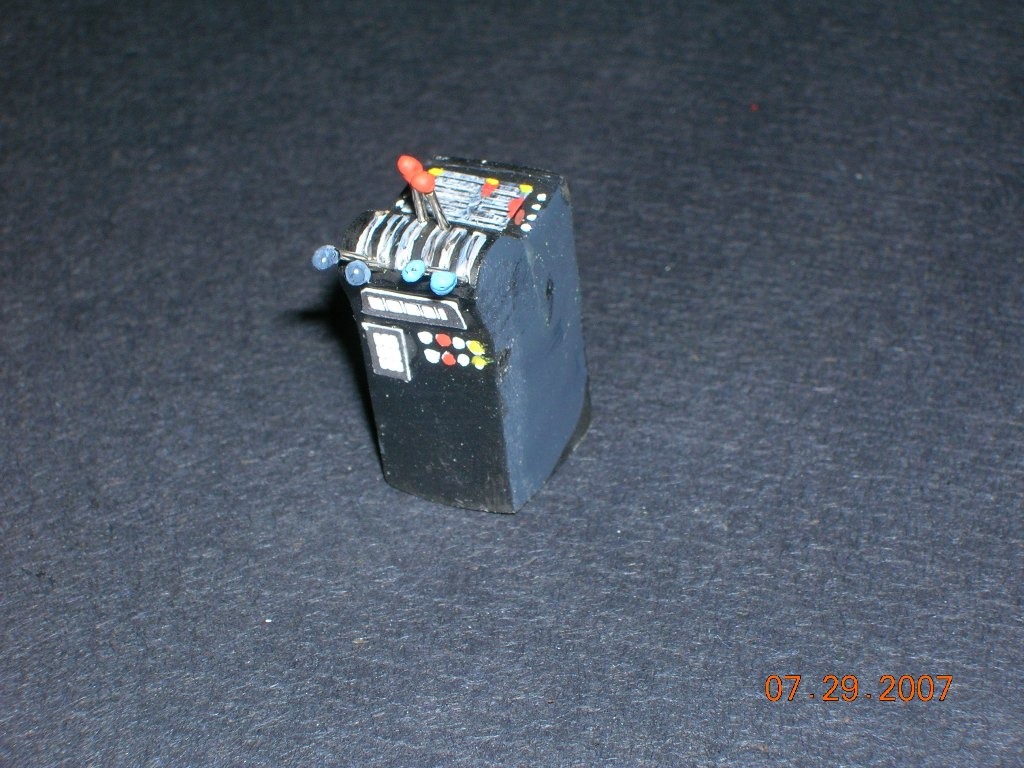
The console that sits just below the instrument panel was the most interesting piece of the components to build. |
| jerry campbell, Image # 3771 | 29 Jul 07 13:06 |
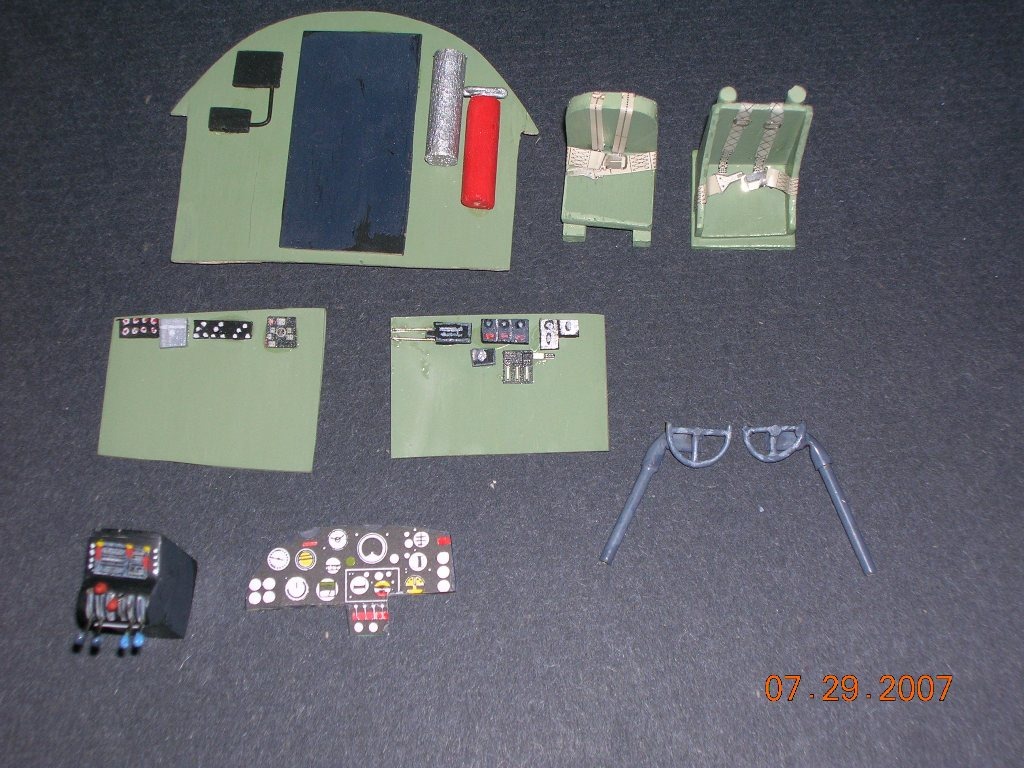
The cockpit components are finished and ready to be installed in the cockpit. However, I'm not going to install them in the cockpit until the B-26 is painted. All have been pre-fitted. |
| poppy, Comment for image # 3730 | 27 Jul 07 06:18 |
| Well done!! It's looking great. |
| poppy, Comment for image # 3733 | 27 Jul 07 06:15 |
| Now THAT is a pic of a true master modeller, whoever it was. Jerry, looks like the Marauder's coming along well. |
| jerry campbell, Image # 3735 | 26 Jul 07 23:17 |

|
| jerry campbell, Image # 3734 | 26 Jul 07 23:14 |
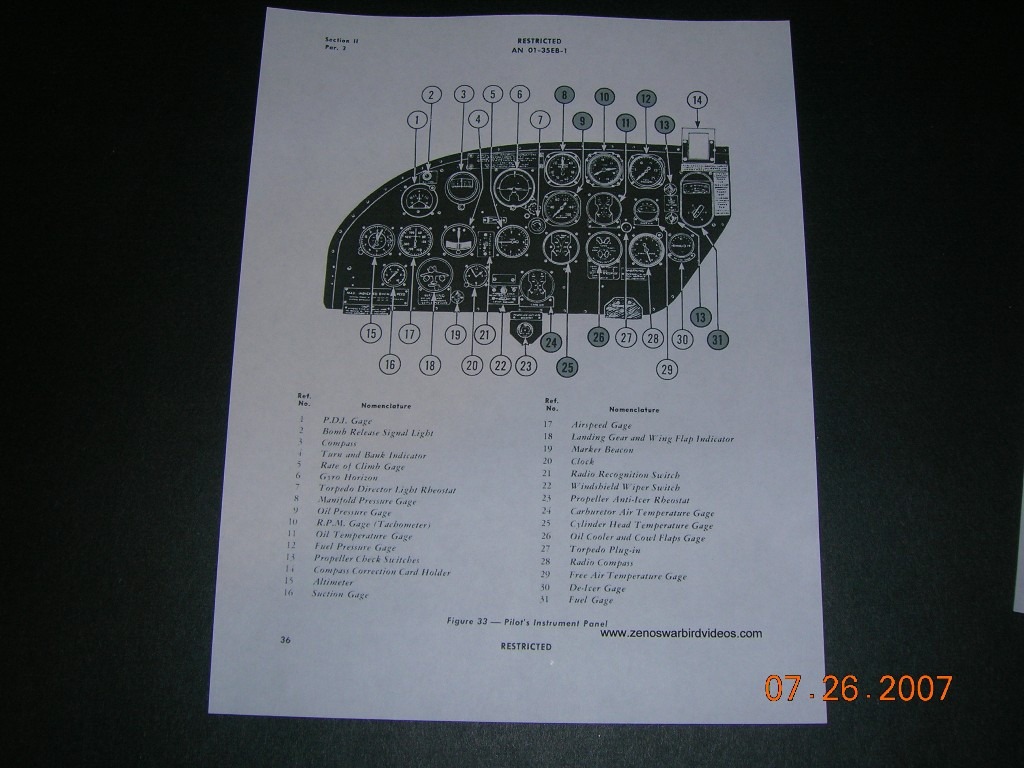
The instrument panel. I also bought a 1/48 scale Eduard photo etched cockpit for reference, t is excellent, especially the illustrated instructions. |
| jerry campbell, Image # 3733 | 26 Jul 07 23:08 |
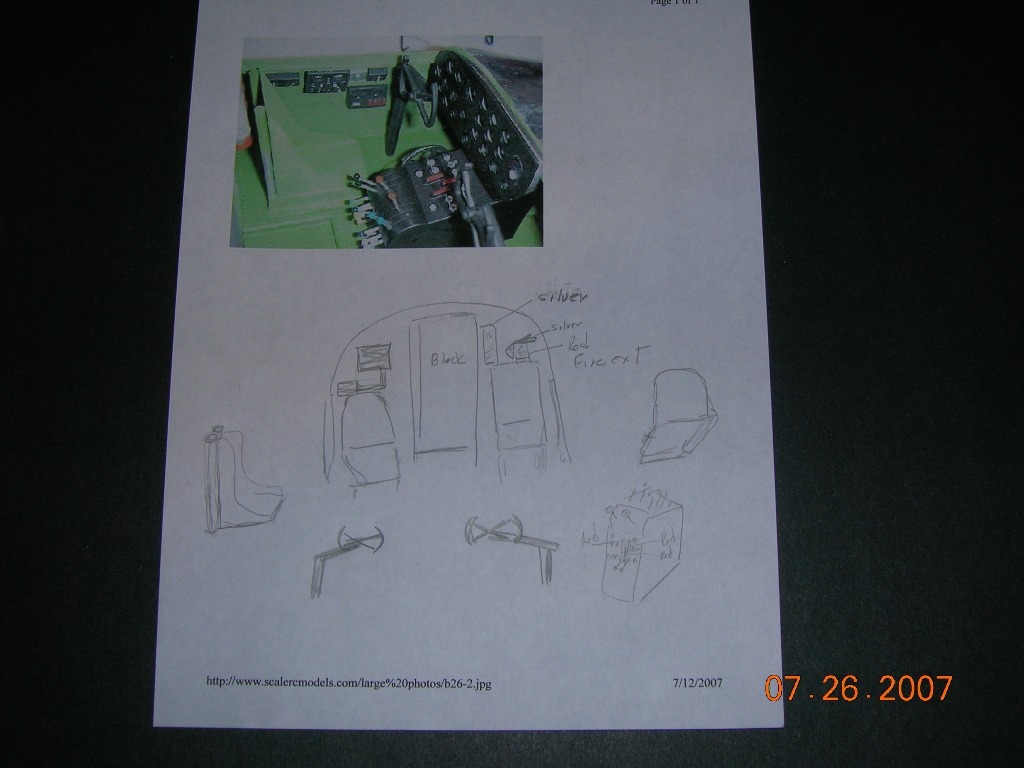
With the papering done it is time to start working on some details. The following are some cdockpit reference photos that I took off the internet as well as some drawings I made from material I could not print out. |
| jerry campbell, Image # 3732 | 26 Jul 07 23:00 |
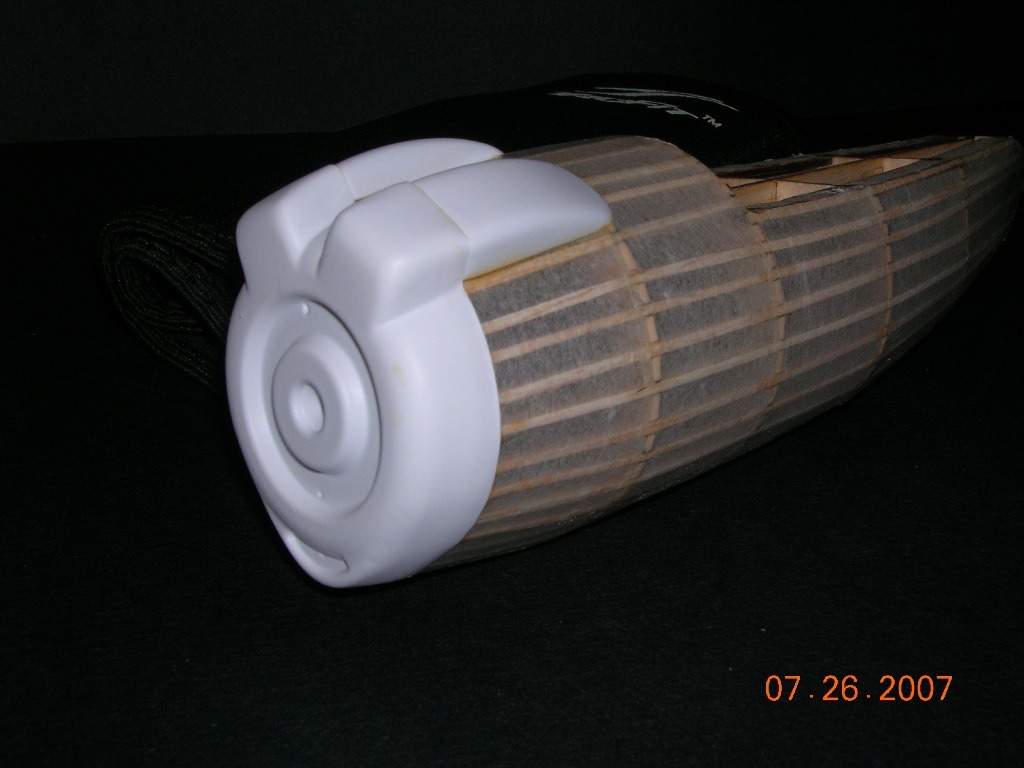
The cowlng and airscoops with some sanding fit nicely. After looking closely at the airscoops I decided to paint the intakes black instead of cutting them out. |
| jerry campbell, Image # 3731 | 26 Jul 07 22:54 |
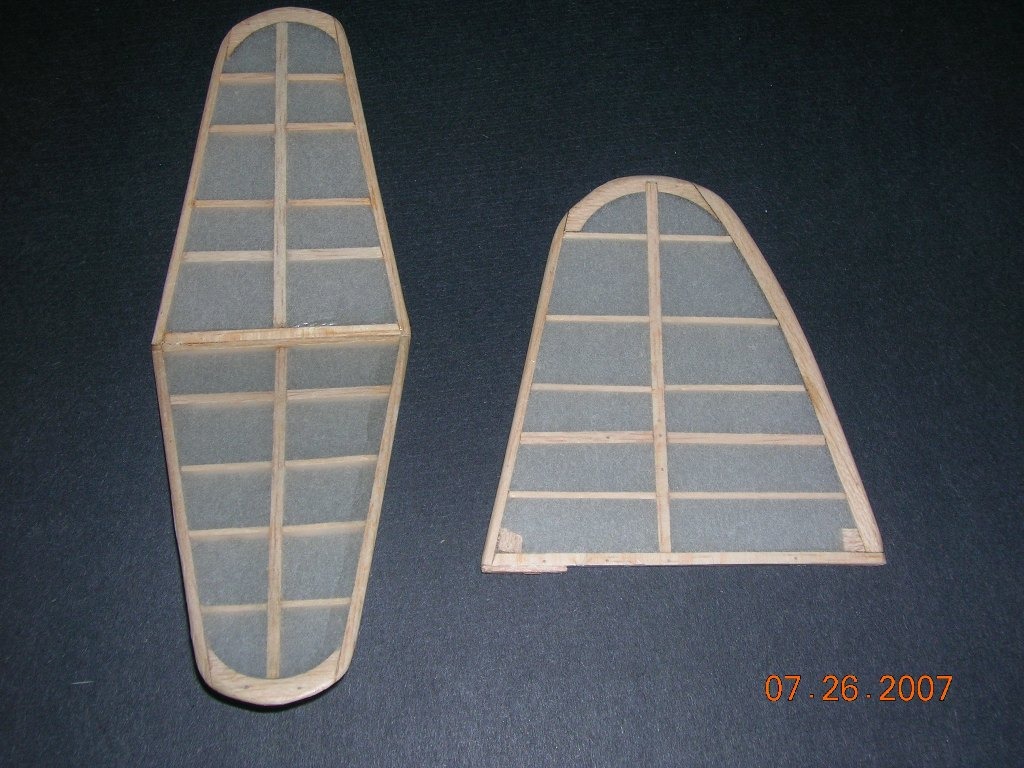
The tail surfaces especially came out nice. |
| jerry campbell, Image # 3730 | 26 Jul 07 22:48 |
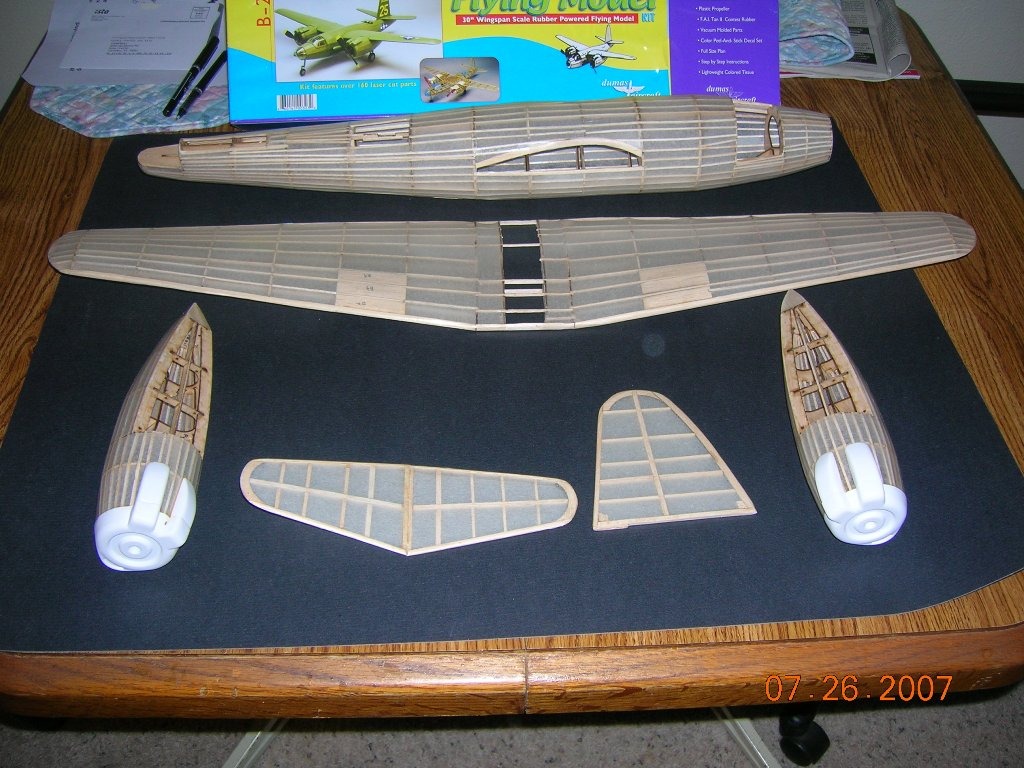
got the papering done. The every thing went well except the fuselage, I ad to remove and replace a numbe of small sections. |
| David Duckett, Comment for image # 3636 | 20 Jul 07 10:03 |
| My kind of model!! |
| poppy, Comment for image # 3636 | 20 Jul 07 09:23 |
| Looking good. A lot of layup work but well worth the effort. |
| moostang51, Comment for image # 3636 | 20 Jul 07 04:01 |
| Very nice work. I also use the dremel and it makes the extra notch cutting a snap. |
| jerry campbell, Comment for image # 3636 | 20 Jul 07 00:28 |
| I added about twice as many stringers as the kit called for, and my notch cutting Dremel tool was money well spent. The instructions were a little vague a couple of times, but Dumas engineering is excellent once I figured out the instructions. |
| Build Thread, Page :
1 [ 2 ] 3 (53 posts, 20 posts per page, 3 pages in total)
|
[ < Prev ] [ Next > ] |
