| Build Thread, Page :
1 [ 2 ] 3 (52 posts, 20 posts per page, 3 pages in total)
|
[ < Prev ] [ Next > ] |
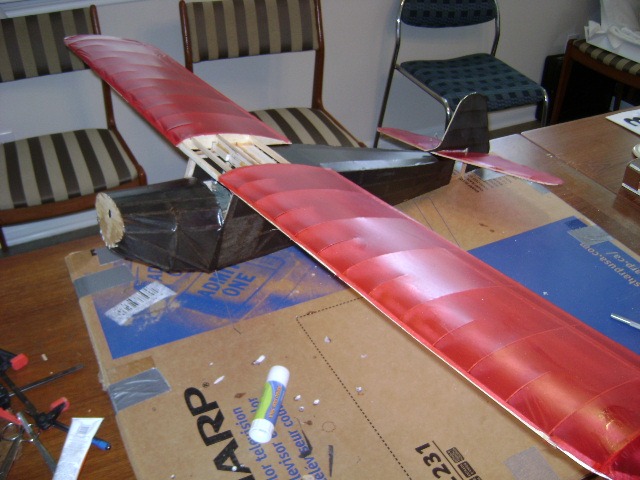
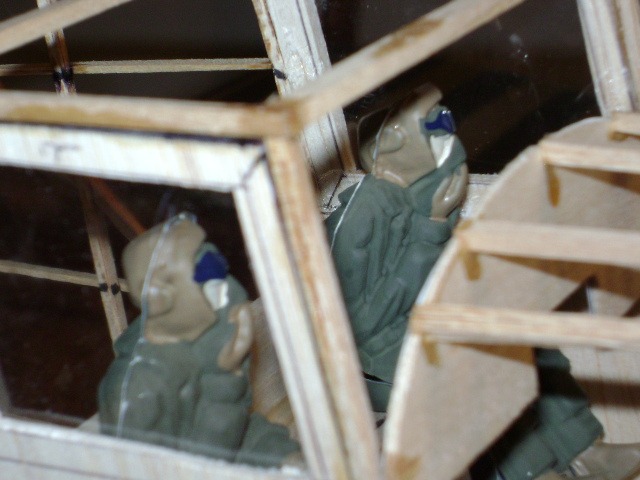
| BillParker, Image # 14627 | 22 Oct 09 16:31 |
|
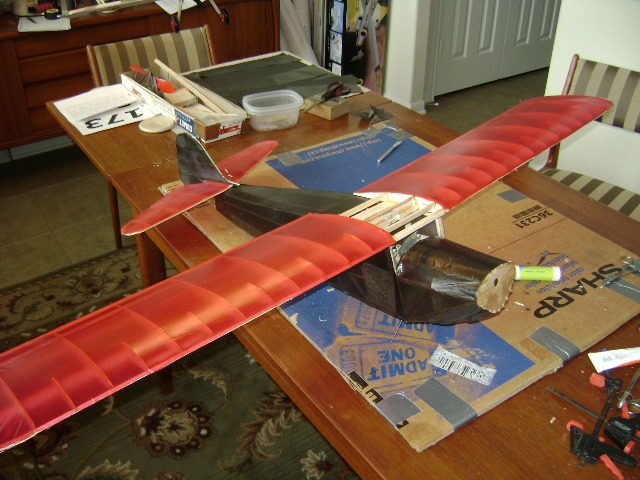
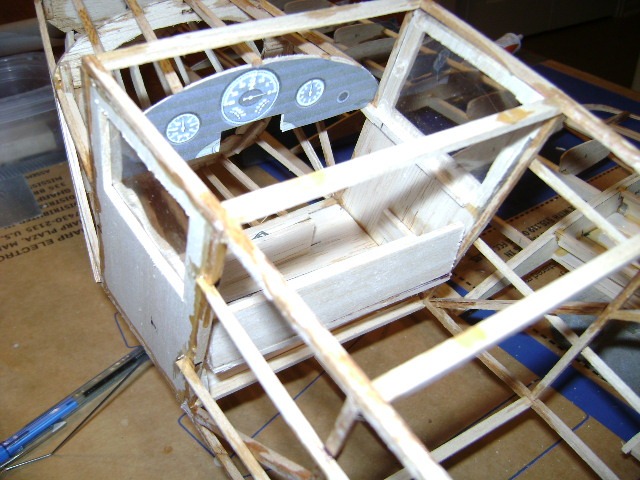
| BillParker, Image # 14626 | 22 Oct 09 16:31 |

|
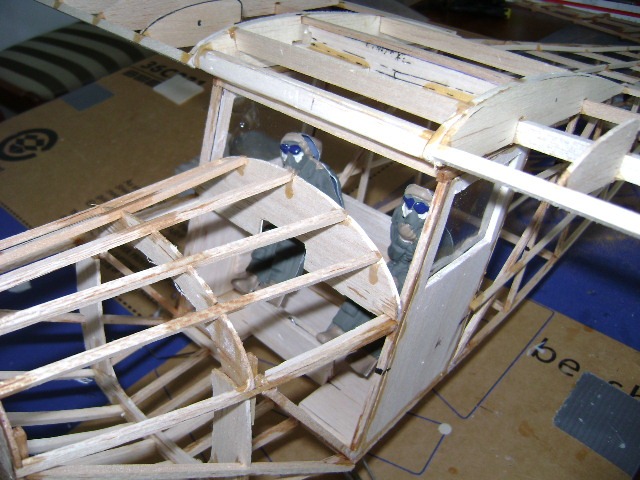
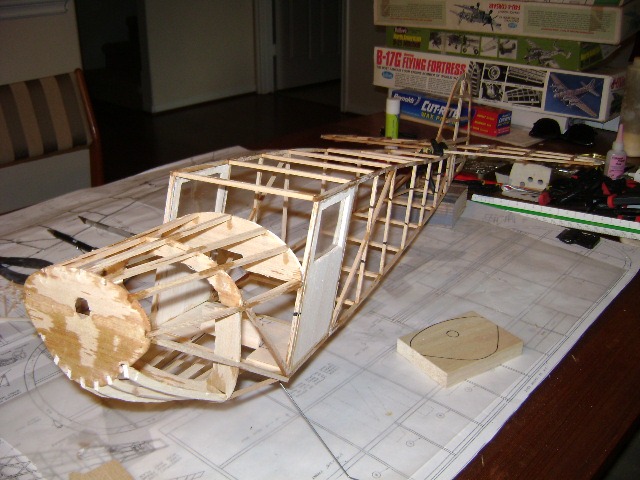
| BillParker, Image # 14625 | 22 Oct 09 16:31 |
|
| BillParker, Comment for image # 14519 | 22 Oct 09 09:08 |
| uh oh.. Now I'm dangerous... I cannot wait to try this chalk stuff. I've even got an old set of pastels in the drawer... |
| John Cooper, Comment for image # 14519 | 21 Oct 09 22:24 |
| Basically you need to rub the chalk gently on the dull side. This page gives a pretty good description of chalking: Easy Built Models - Chalking |
| BillParker, Comment for image # 14519 | 21 Oct 09 18:32 |
| Ok, so you don't have to make your own chalk dust, do you? |
| John Cooper, Comment for image # 14519 | 21 Oct 09 16:53 |
| You can still chalk the red and the black tissue. The red will come out much stronger and the black will become completely opaque. For green and gray camouflage it is better to just chalk one color and then paint the other. That is use green tissue and chalk it with brown or drab green OR use gray tissue and chalk it with gray. Trying to chalk white tissue with green chalk will probably result in a very light and fuzzy green. Covering should be with the grain, the long way |
| BillParker, Comment for image # 14519 | 21 Oct 09 16:14 |
| I bought red and black. Red wings and horizontal, black fuse and vertical... If I was using white tissue and trying for a warbird color scheme I would chalk the tissue in my greens and grays, right? With the red and black, no need. Just be sure to cover using the tissue the "long ways," right? |
| John Cooper, Comment for image # 14519 | 21 Oct 09 15:55 |
| Either way works well. However, if you want to chalk the tissue, you need to have the shiny side out. Chalking is a technique of adding opacity and color, with chalk dust, with little weight penalty. Note also that Esaki has a grain and the grain should be parallel with the longest dimension. |
| BillParker, Image # 14601 | 21 Oct 09 10:43 |
|
| BillParker, Image # 14600 | 21 Oct 09 10:43 |
|
| BillParker, Image # 14599 | 21 Oct 09 10:42 |

|
| BillParker, Image # 14598 | 21 Oct 09 10:42 |
|
| BillParker, Image # 14597 | 21 Oct 09 10:41 |
|
| BillParker, Image # 14596 | 21 Oct 09 10:41 |
|
| BillParker, Image # 14595 | 21 Oct 09 10:41 |
|
| BillParker, Image # 14594 | 21 Oct 09 10:40 |

|
| TJH, Comment for image # 14519 | 21 Oct 09 09:10 |
| Bill, on my Fokker D7 I used the "shiny" side out and it seemed to work OK and looks nice. This stuff is strong and seemed to shrink pretty well too so be careful depending on the strength of the structure. Good luck with it! |
| BillParker, Comment for image # 14519 | 20 Oct 09 23:55 |
| I just bought some "Esaki" tissue...
Does the "Shiny" or the "Dull" side go down, or against the wood?
Can't wait to try this stuff. |
| BillParker, Comment for image # 14537 | 16 Oct 09 15:05 |
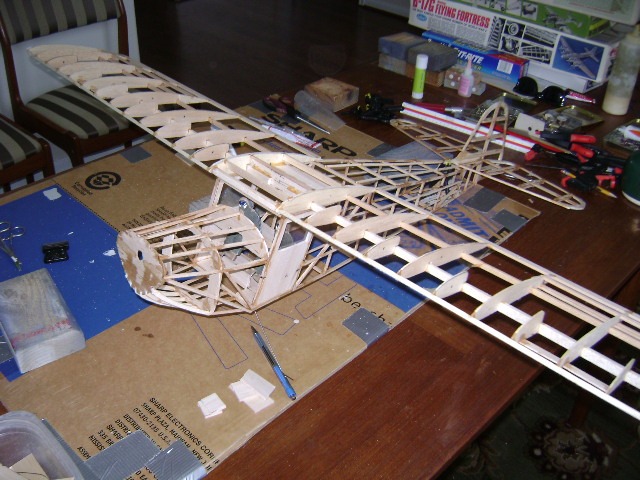
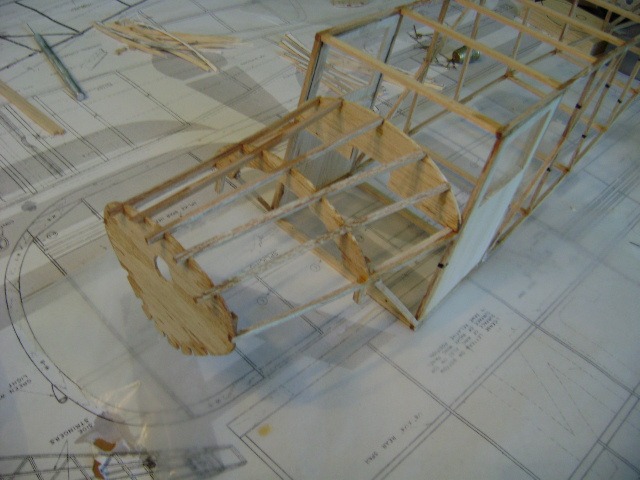
| Thanx, Guys! I have the rest of the cross members on now, and am trying to figure out how to install the nose formers. They're a bit more conventional, like I'm (Guillow's) used to... Trying to hold onto the fuse without destroying it. |
| Build Thread, Page :
1 [ 2 ] 3 (52 posts, 20 posts per page, 3 pages in total)
|
[ < Prev ] [ Next > ] |
