| Build Thread, Page :
1 [ 2 ] 3 (43 posts, 20 posts per page, 3 pages in total)
|
[ < Prev ] [ Next > ] |
| novice builder, Image # 12232 | 04 May 09 07:14 |
|
| novice builder, Image # 12231 | 04 May 09 07:14 |
|
| novice builder, Comment for image # 12097 | 26 Apr 09 17:51 |
| John, Thanks for the instructions on installing the rubber motor and for warning me on how difficult this may be. I like the idea of not covering the bottom section in order to install this. After all, elevatoranj and I are in competition for flying our models against one another to see who stays in flight the longest.. . .of course if you saw his latest post, he's got a lot a much LARGER WING SPAN THAN I DO! |
| John Cooper, Comment for image # 12097 | 26 Apr 09 15:51 |
| The framing looks very nice and accurate. The rubber should be installed after the model is covered. I use a balsa stick to push the loops of rubber into the fuselage and my looking through the nose catch it with the peg. This can be tricky and some people like to leave the section under the rear peg, uncovered so that it is easy to see it attach to the peg. My guess, for this size of model, is 2 loops of 1/4 rubber, with a length that is 50% longer than the distance from the prop hook to the rear peg. The knot in the rubber should go behind the rear peg so as to reduce vibration. Also you should lubricate the rubber (after tying the knot) with a silicon car protectant, like Armor All. You can wind the rubber while it is stretched, with someone holding the rear peg for you. |
| elevatoranj, Comment for image # 12097 | 26 Apr 09 13:25 |
| Come on fellas, I know nothing about rubber powered flight, I can't coach her at all. She is ready to cover her fuselage, and I think the motor should be lubed and in place beforehand, But I don't know |
| FLYBOYZ, Comment for image # 12097 | 26 Apr 09 13:24 |
| Just beatiful indeed!Looks varey super light |
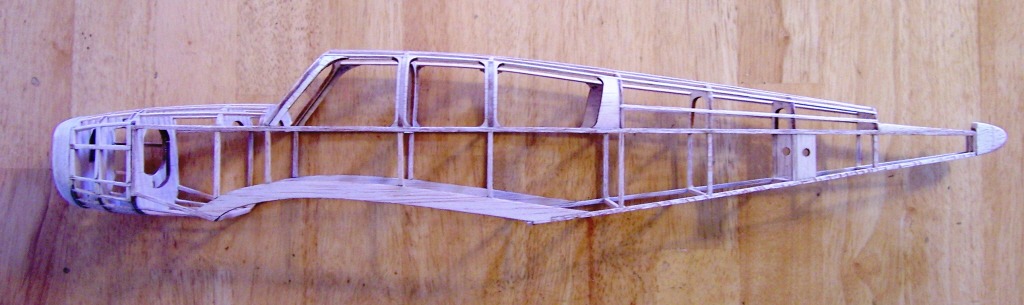
| novice builder, Image # 12097 | 26 Apr 09 10:50 |
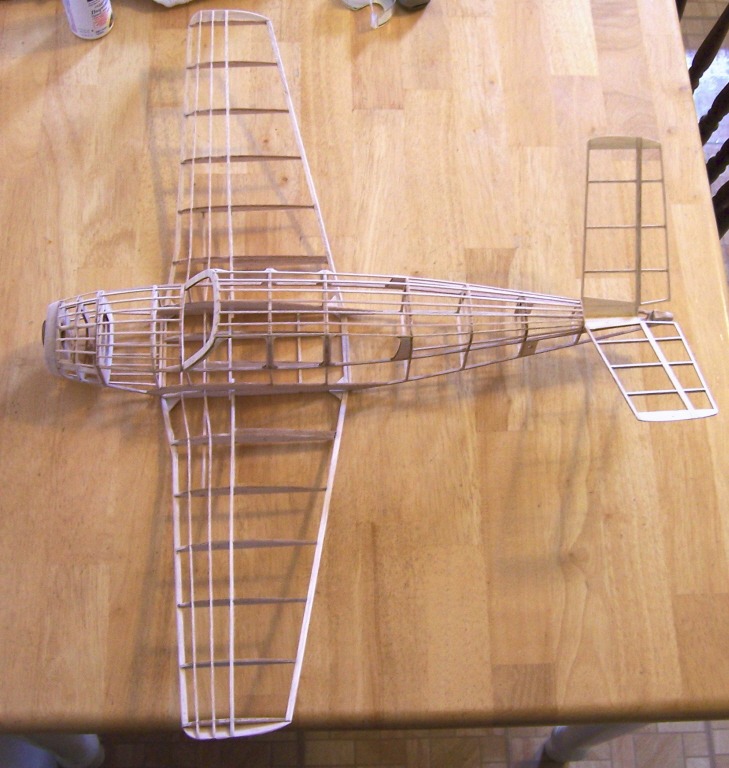
The framing is complete. . . .well ahead of my wonderful husband. The directions say to cover the plane first, then assemble the torque motor. They are vague about this and I'm not sure how to install it. How many loops do I make? Where do I tied the knot in the motor? Should I install the motor first, then cover it? Any help on this would be appreciated. |
| novice builder, Image # 12096 | 26 Apr 09 10:45 |
|
| novice builder, Image # 12095 | 26 Apr 09 10:43 |
|
| novice builder, Comment for image # 11634 | 30 Mar 09 07:39 |
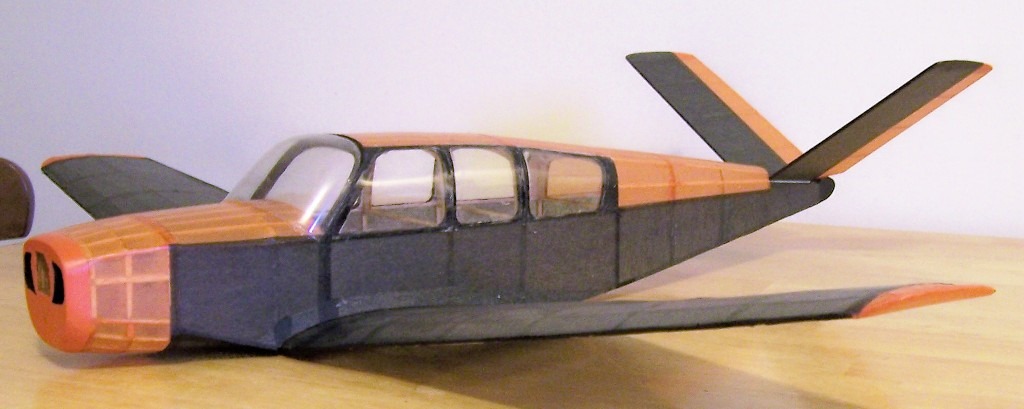
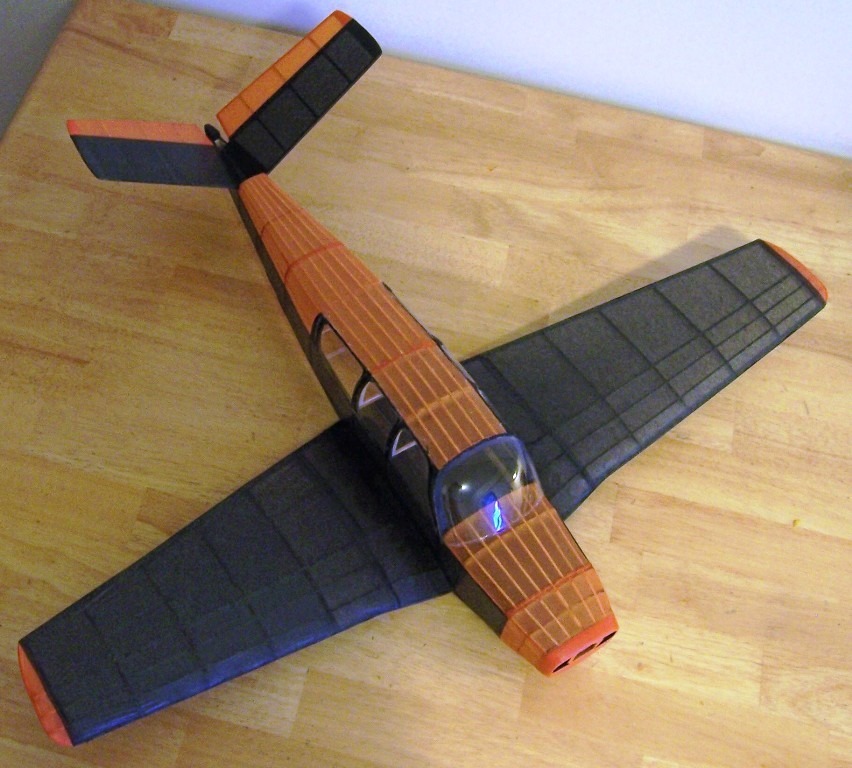
| Good eye Poppy, It is a Beech Bonanza by Herr Engineering. I grabbed it out of THE PILE because I like the speed of a laser cut kit and I want to fly. I am having trouble getting our web host to post new planes, so I posted this as a Ryan by Herr since I just finished a Ryan and it it a Herr. I understand that James Good must be a very busy man and I hate to pester him |
| poppy, Comment for image # 11634 | 29 Mar 09 20:46 |
| This looks a bit like a Bonanza V-tail. |
| novice builder, Comment for image # 11634 | 29 Mar 09 16:38 |
| Oh, Anj bought Esaki, on E-bay, through his E-mail |
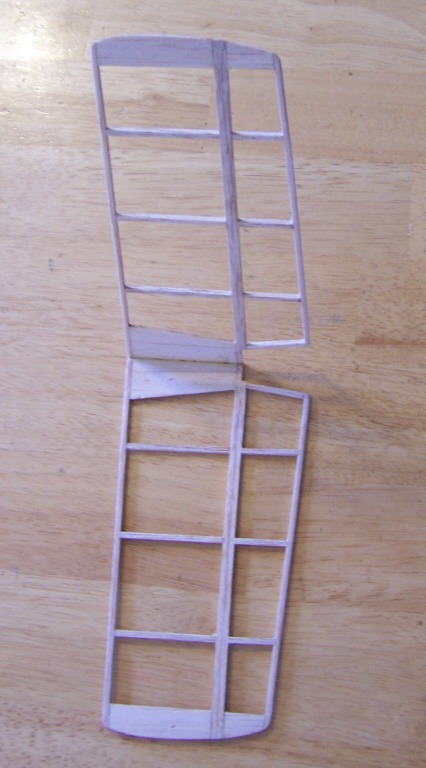
| novice builder, Image # 11634 | 29 Mar 09 16:32 |
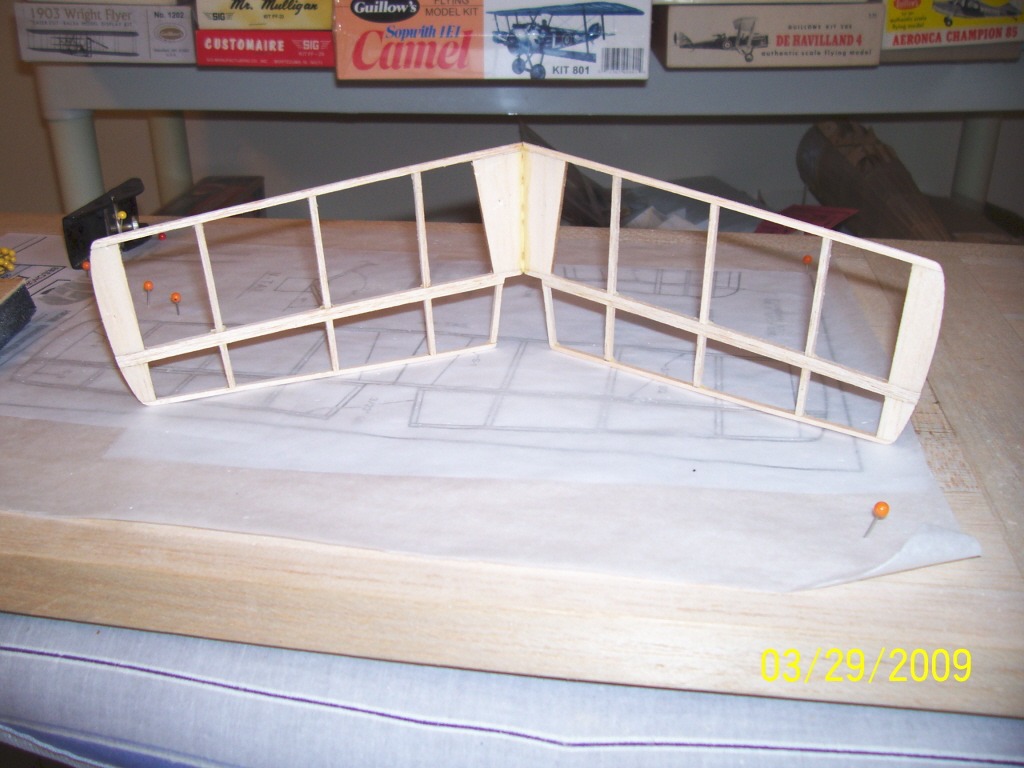
Tail is framed and dihedral set, next is the fuselage |
| novice builder, Image # 11628 | 29 Mar 09 12:03 |
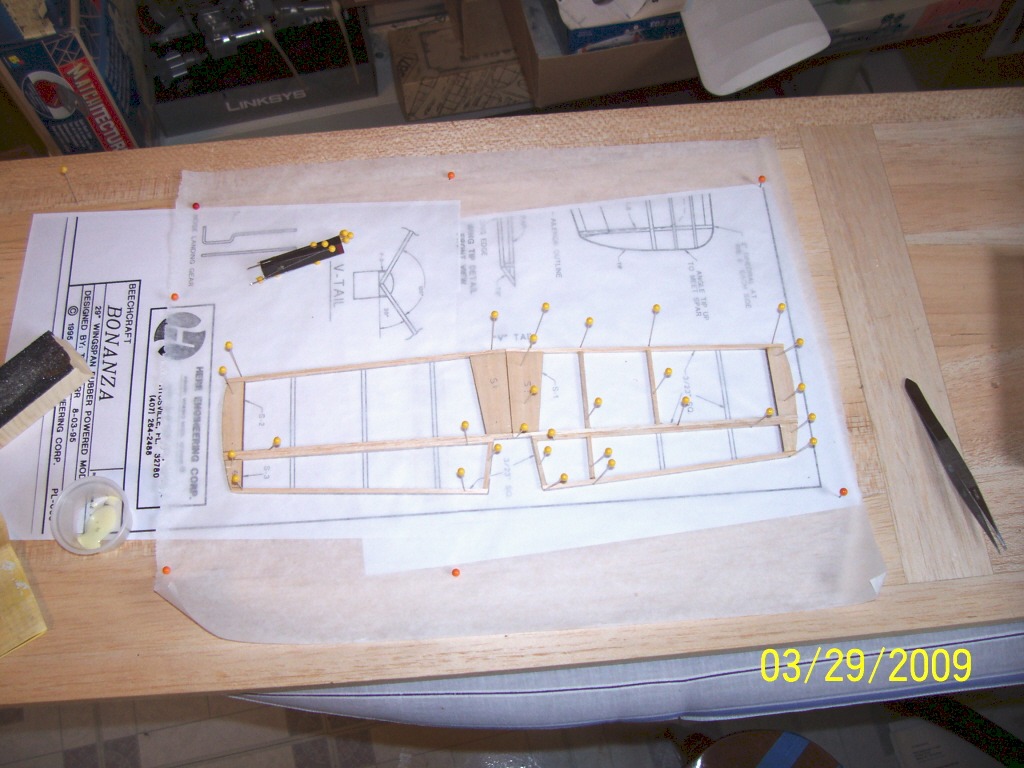
Love the laser cut parts, excellent quality kit |
| poppy, Comment for image # 11610 | 28 Mar 09 20:29 |
| Acrylics need H2O mix only. This is a very nice build. Novice Builder is becoming a master builder. Keep 'em coming! |
| elevatoranj, Comment for image # 11610 | 28 Mar 09 19:10 |
| Your eyes are not bad, John thats the kit prop alright the plane is a dirt dart. |
| John M Oshust, Comment for image # 11610 | 28 Mar 09 18:41 |
| Sorry, my old eyeballs thought this had a flight prop |
| elevatoranj, Comment for image # 11610 | 28 Mar 09 17:03 |
| She never wanted to fly this it has no motor. |
| John M Oshust, Comment for image # 11610 | 28 Mar 09 16:28 |
| BTW..change your name as you are not a novice builder! |
| John M Oshust, Comment for image # 11610 | 28 Mar 09 16:27 |
| Why...if you made it to fly, why add the mass of the glue? All in all it still looks great. After all, the first flight may damage it! |
| Build Thread, Page :
1 [ 2 ] 3 (43 posts, 20 posts per page, 3 pages in total)
|
[ < Prev ] [ Next > ] |
