| Build Thread, Page :
1 [ 2 ] 3 4 (60 posts, 20 posts per page, 4 pages in total)
|
[ < Prev ] [ Next > ] |
| Creosotewind, Image # 13201 | 10 Jul 09 16:29 |
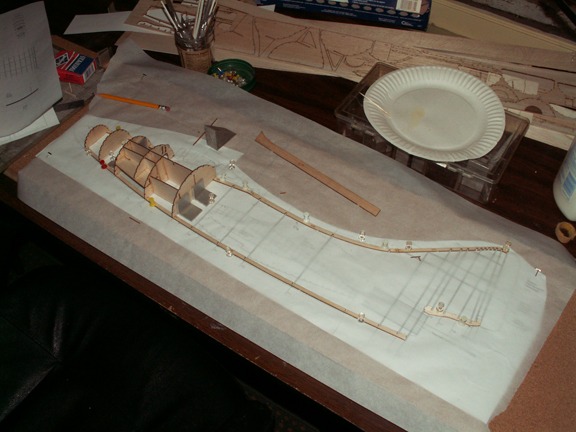
Test fitting the wing root. I'm starting to find a few pieces that need minor adjustments, and some that need major adjustments. |
| Creosotewind, Image # 13200 | 10 Jul 09 16:28 |
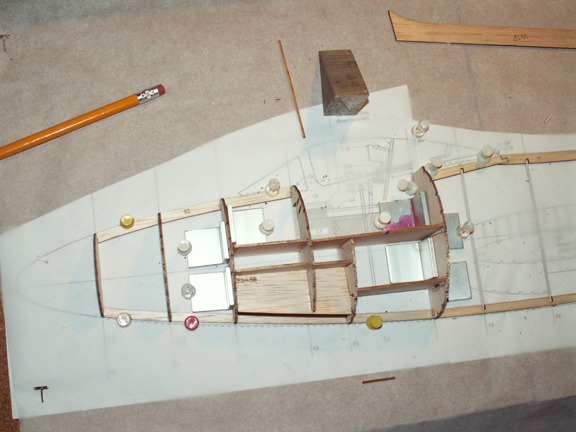
The preliminary cockpit and front landing gear and air brake areas. A bit more complicated that probably needs to be. I may simplify the construction. |
| Creosotewind, Image # 13199 | 10 Jul 09 16:26 |
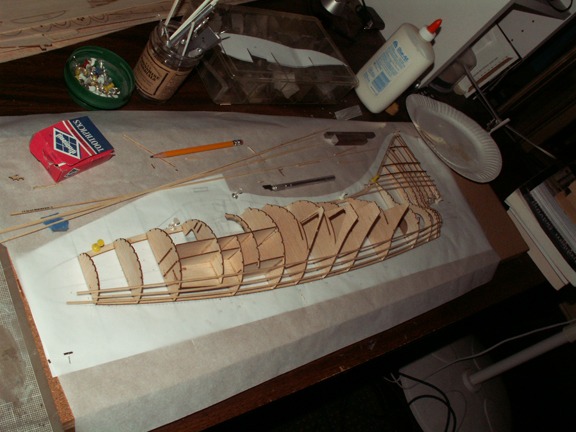
Basic formers in place. Starting on the stringers. |
| Creosotewind, Image # 13198 | 10 Jul 09 16:25 |
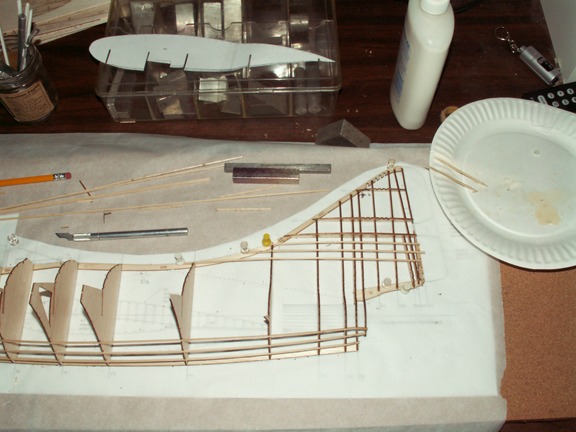
Working on the tail. |
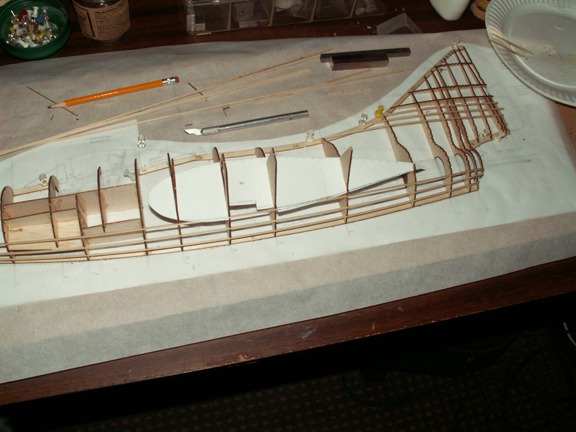
| Creosotewind, Image # 13197 | 10 Jul 09 16:25 |
Beginning test fit of parts. |
| Creosotewind, Comment for image # 12616 | 02 Jun 09 10:34 |
| Poppy, at the very least I want to include drawing info on the landing gear, and either dowels or brass rod. The main gear is pretty simple, and real stout, as you'd expect for a carrier plane. The front gear is pretty unique with the spring offset. |
| poppy, Comment for image # 12616 | 01 Jun 09 19:38 |
| Do I see main wheel hubs with brake pads? Are you planning landing gear for this kit or maiking it an option with details on instructions?
|
| poppy, Comment for image # 12616 | 01 Jun 09 19:27 |
| Tail pipe idea just like the Monogram plastic kit. The design looks spot on. If this turns out the way I think it will, There should be a high demand for this product. |
| David Duckett, Comment for image # 12616 | 01 Jun 09 13:20 |
| Ta dah! |
| Creosotewind, Comment for image # 12616 | 01 Jun 09 13:18 |
| Hey, you're getting ahead of me. Actually there will be a paper tube insert to replicate the exhaust pipe. The tube will be the length of three formers, terminating at the fourth former. You can see that location on the bottom sheet, where the brown half circle is. |
| David Duckett, Comment for image # 12616 | 01 Jun 09 12:40 |
| I think I would use some kind of tube which would fit inside the opening while building. When the structure is done, the tube could be removed. |
| Creosotewind, Comment for image # 12616 | 01 Jun 09 12:17 |
| DD I thought of modeling it with an ejected canopy, but that would be cheating. I haven't worked that out, but it will be vac-formed. Ultimately, a few other parts would be vac-formed as well, such as the nose, air intake and fuel tanks. I'm looking for input as the kit progresses. You're right about the tail cone area, but the laser cutting means a knife won't have to make the delicate cut. One way around this may be to put super glue over those kinds of pieces to reinforce the grain. Thanks for your interest. If I can make it work, I'll produce more of the kit. |
| David Duckett, Comment for image # 12616 | 01 Jun 09 11:20 |
| I fondly remember building the Monogram plastic and wood version of the Panther when I was in high school, late 50's, and it has always been a favorite. With something looking this good, I'm wondering what you're planning for the canopy since something inferior would be a travesty. The last two formers look mighty thin where the tail pipe fits and even though laser cut they look very delicate. I don't mean to pick, I'm already planning on how I would build it and what would make it easier. My check will be in the mail when the kit's ready. |
| Creosotewind, Image # 12616 | 01 Jun 09 10:40 |
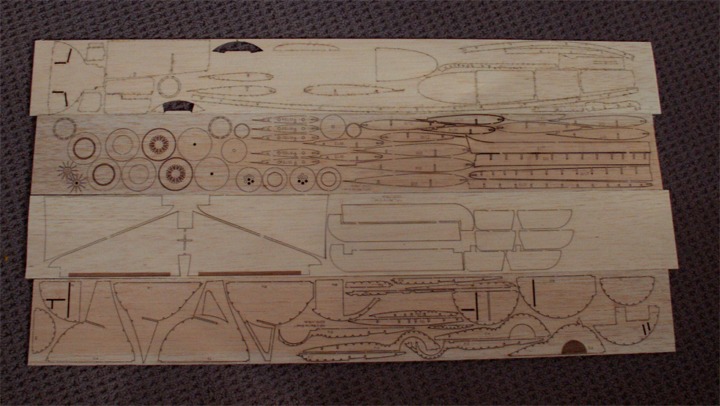
Overall look at the etched sheets. This is for 1/2 of the plane. the final will need two of each sheet. The horizontal stabilizer is a multi-piece laminate that will be sanded to shape. Everything else is pretty typical for a balsa plane. |
| Creosotewind, Image # 12615 | 01 Jun 09 10:36 |
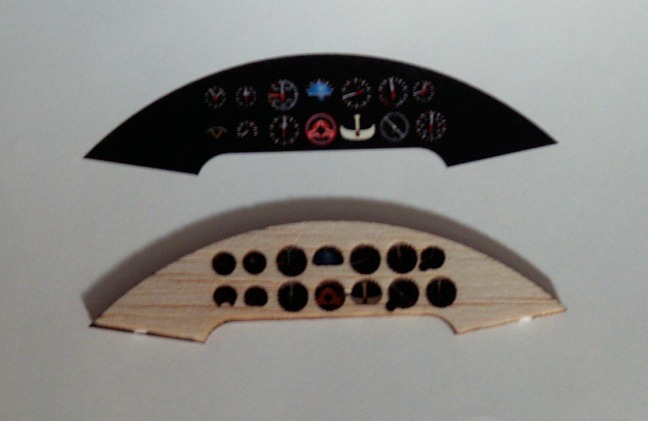
The dash panel with the instruments laid behind. I need to enhance the detail so there is more contrast. |
| Creosotewind, Image # 12614 | 01 Jun 09 10:35 |
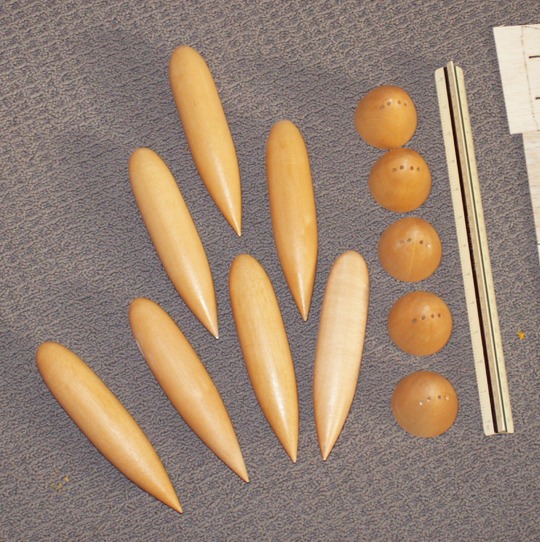
†he results off of Frwyflyr's lathe. Believe it or not, this was the first indication for me on the actual size of the model. Up to this point, everything was done on the computer, so I didn't have a good reference of scale in the actual world. The tanks are about 7 1/4" and look like the pins from an old Skittlebowl game. The wood for both the tanks and nose cones is jelutong. |
| Creosotewind, Image # 12613 | 01 Jun 09 10:32 |
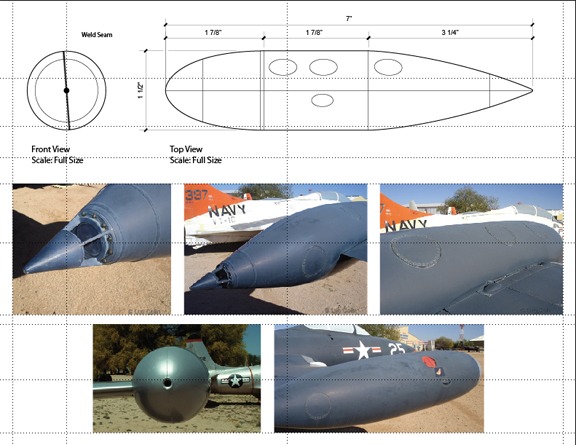
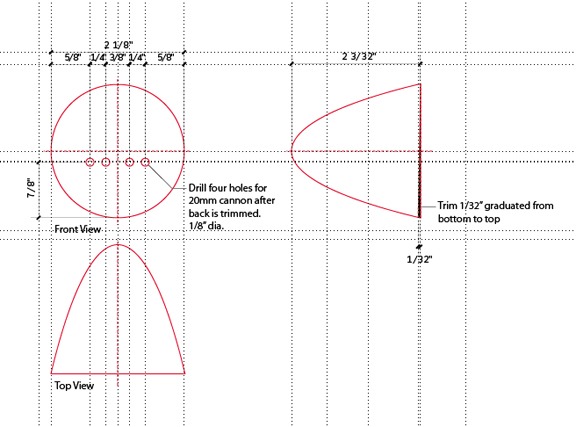
Drawing details for the fuel tanks. Both the nose cone and tank drawings were sent to Frwyflyr to turn on his lathe. |
| Creosotewind, Image # 12612 | 01 Jun 09 10:30 |
|
| Creosotewind, Image # 12611 | 01 Jun 09 10:30 |
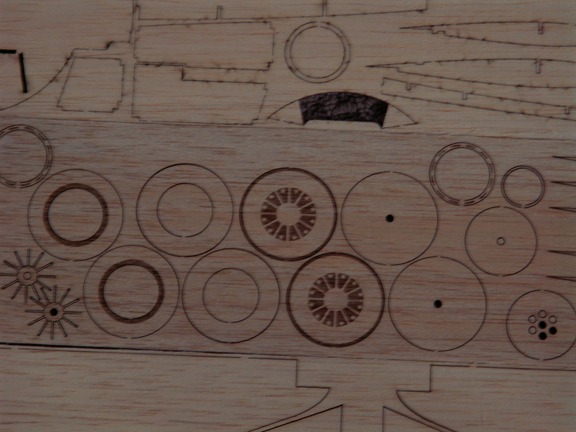
Closeup of the sheet. I intended for the wheels to have relieve via a deep etch. On this sheet, the balsa is only etched on the surface. If they can't deep etch the wood, I'll switch to plastic for some of the parts. That's what I used to make the engine fins on my Piper. |
| Creosotewind, Comment for image # 12579 | 30 May 09 16:18 |
| And I must say that Poppy has been extremely patient with me. This project has been on-going for over a year. There have been several times I sent him and Fwyflyr email that "I am almost ready" just to have something else not look quite right, or I forgot a part. But really, this time I am almost ready. Really. |
| Build Thread, Page :
1 [ 2 ] 3 4 (60 posts, 20 posts per page, 4 pages in total)
|
[ < Prev ] [ Next > ] |
