| Build Thread, Page :
1 [ 2 ] (38 posts, 20 posts per page, 2 pages in total)
|
[ < Prev ] |
| pfinn, Comment for image # 20809 | 27 Jan 11 12:57 |
| Happy to share. But this technique has been around for quite a while. Not my idea. Maybe the tape. He...He..;o)
After the first side is complete, you just flip it and finish the other before removing the cross members. Although, if one were to drill some precision holes down the side walls, maybe 1/2" dia. or so, one could slide some aluminum rod through said holes to create a twin beam perpendicular working plane with some sliding jigs to set wing incedence/dihedral/washout. All adjustable, of course. |
| frwyflyer, Comment for image # 20809 | 27 Jan 11 11:54 |
| WOW!! I DO LIKE your jig solution!! It is much better than what I have been doing. THANK YOU for the insight |
| pfinn, Image # 20809 | 27 Jan 11 11:48 |
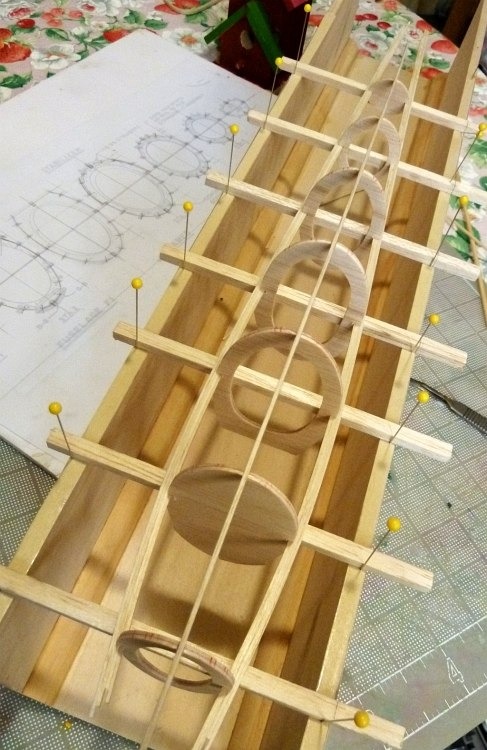
Time for stringers and in-fll where needed. After a couple times, this method could be darn quick. Very straight. |
| pfinn, Image # 20808 | 27 Jan 11 11:43 |
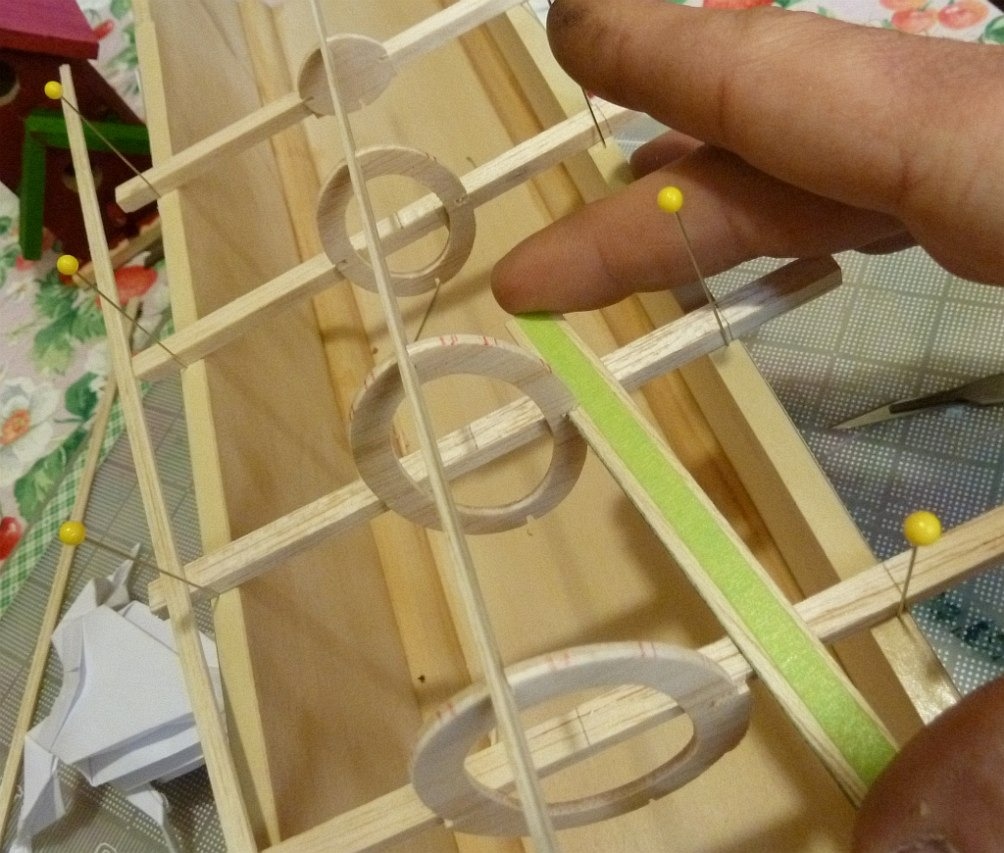
In hindsight, I should have just waited to notch the formers until this point. Not that they were off (well, not too much! ;o) ). |
| pfinn, Image # 20807 | 27 Jan 11 11:39 |
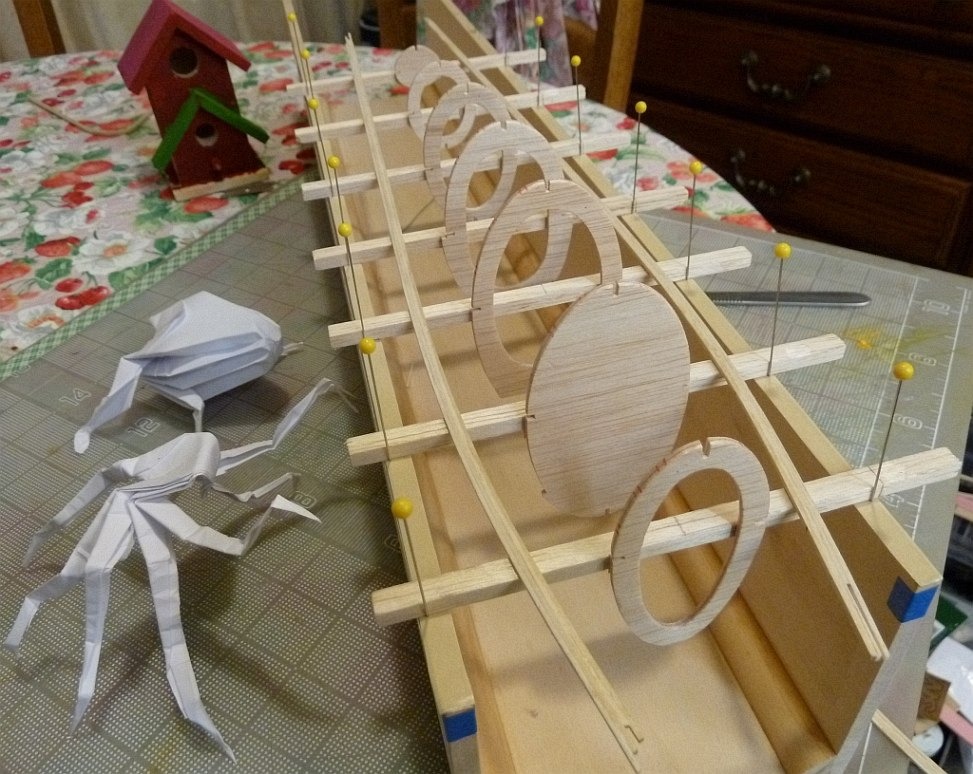
The jig has bulkhead positions marked on the side walls. I used pins to help easily locate tthe bulkheads. Again, double stick tape is used to secure the cross members to the fixture. Other builders use rubber bands to do this using a row of small brads near the base in which to hook the bands to.The 2" offset marks line up with the edge of the fixture so all of the formers line up correctly. |
| pfinn, Image # 20806 | 27 Jan 11 11:30 |
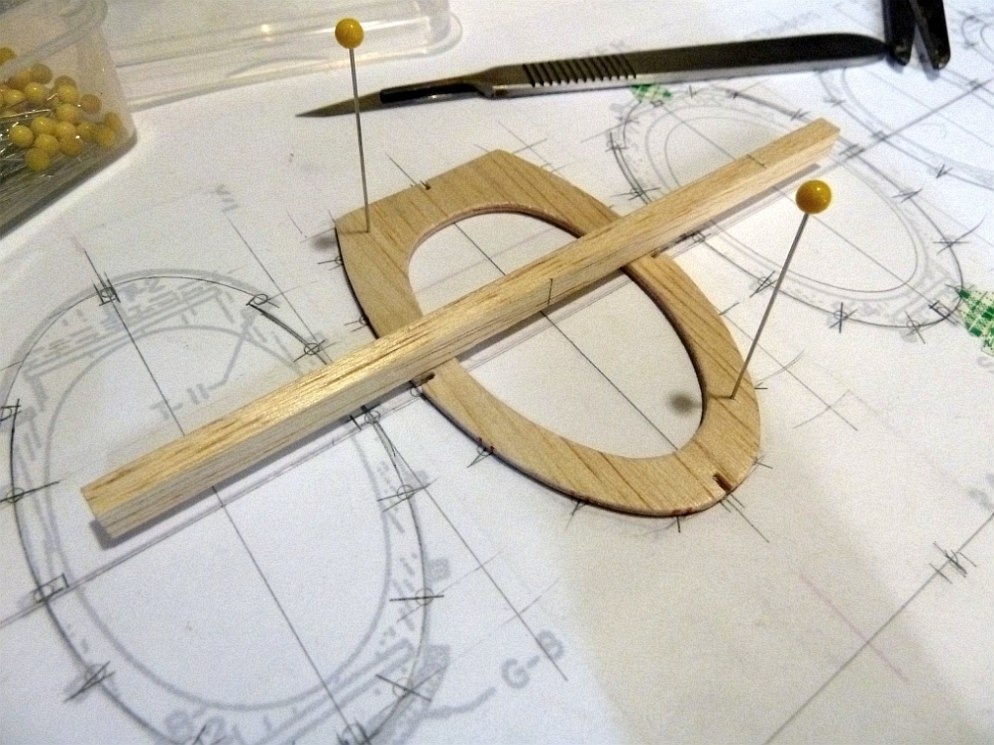
I'm using the fuse jig with a "Top/Bottom" orientation. A temporary cross member adhered to each bulkhead flush (or parallel) to the waist keel formers. I've seen builders tack glue these cross members then use a solvent to remove them later. I used my Super Dilly Delux double stick tape instead. I've marked centerline and 2' offset on the cross members for alignment on the fixture. |
| pfinn, Image # 20754 | 22 Jan 11 22:07 |
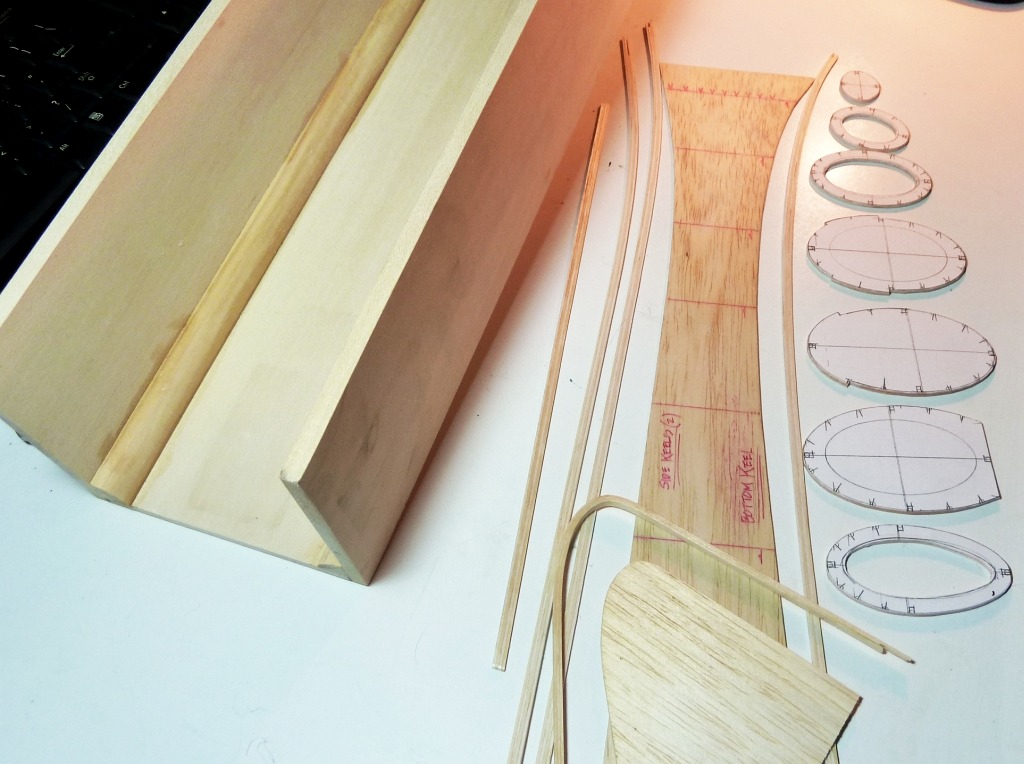
Laminated top, bottom and side Keels with 1/32" Bass/Balsa/Bass/ Balsa. Vert stab profile is all Bass (to be sanded to taper thickness). Formers to be notched only at Keel junctures. I'm going to try building the fuselage on a "Jig". Never done it before. Something new for me. |
| David Duckett, Comment for image # 20688 | 17 Jan 11 08:59 |
| Get a job offer from Scaled Composites? |
| pfinn, Image # 20689 | 16 Jan 11 20:16 |
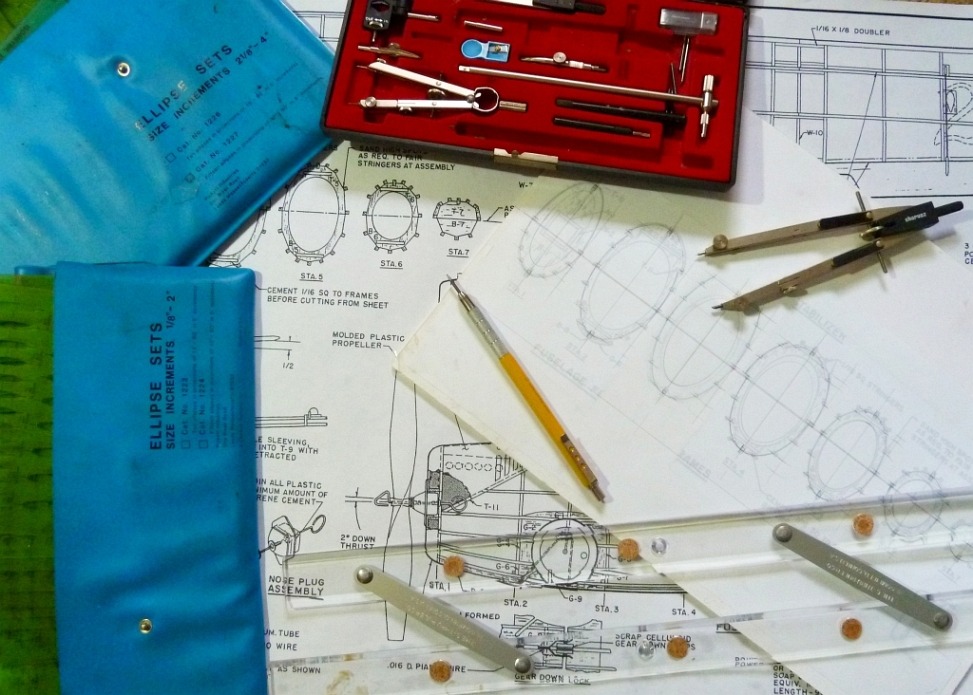
The scanned and then copied formers on the plan turned out to be distorted as well as some of the notches were quite off. I redrew them taking measurements off the side and top views to get the correct sizes and positions. |
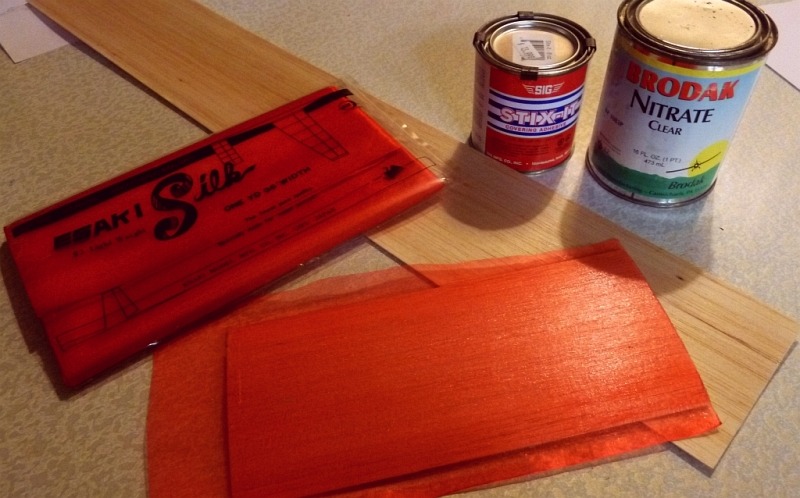
| pfinn, Image # 20688 | 16 Jan 11 20:11 |
The "Stix-It" actually sat for a couple days before I had a chance to heat bond them together. Worked fine. I also laminated the same matl's with white glue. The white glue yielded a more rigid plank. I believe that just a bit of "Resiliancy" or "Give" is a bit more durable. Hence my choice of using the S-I for these particular parts. |
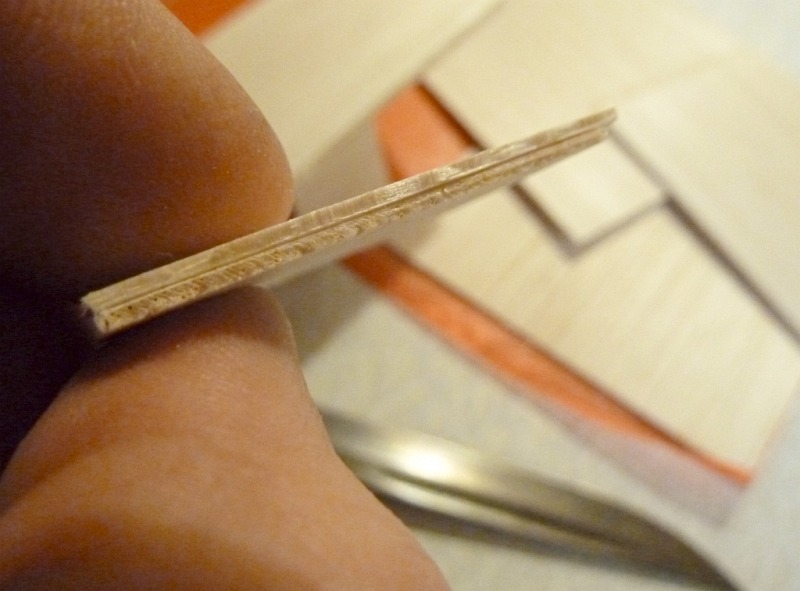
| pfinn, Image # 20687 | 16 Jan 11 20:04 |
I laminated two 1/32" inch Balsa sheets "Crossgrain" to make a more rigid fuselage formers. The forward three formers have a silk layer laminated in between. The silk was doped to the wood first, then, as with the Balsa only laminate, I used "Stix-It" heat activated adesive to join. This worked very well. I used our houshold iron to bond them together. |
| pfinn, Comment for image # 20639 | 09 Jan 11 09:43 |
| Yes. So much for following the game plan of finishing all the unfinished ;o). Well, as a wise man once said, "It's a Hobby. There is no due date." |
| BriandKilby, Comment for image # 20639 | 09 Jan 11 08:39 |
| next project phil? |
| pfinn, Comment for image # 20639 | 08 Jan 11 22:38 |
| The wing, that is. |
| pfinn, Image # 20639 | 08 Jan 11 22:36 |
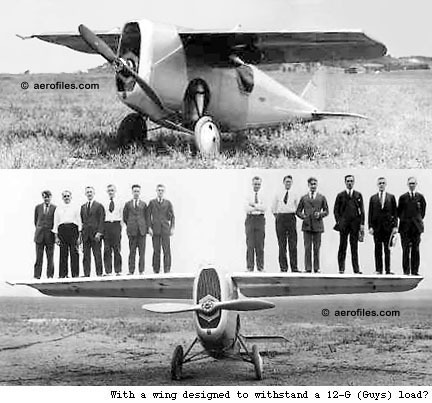
Original was solid balsa with birch ply sheeting! It had "Flapperons as well as drooping leading edge to change the chamber for slow flight. Advanced for it's day. |
| pfinn, Image # 20638 | 08 Jan 11 22:33 |
|
| pfinn, Image # 20637 | 08 Jan 11 22:32 |
|
| pfinn, Image # 20636 | 08 Jan 11 22:32 |
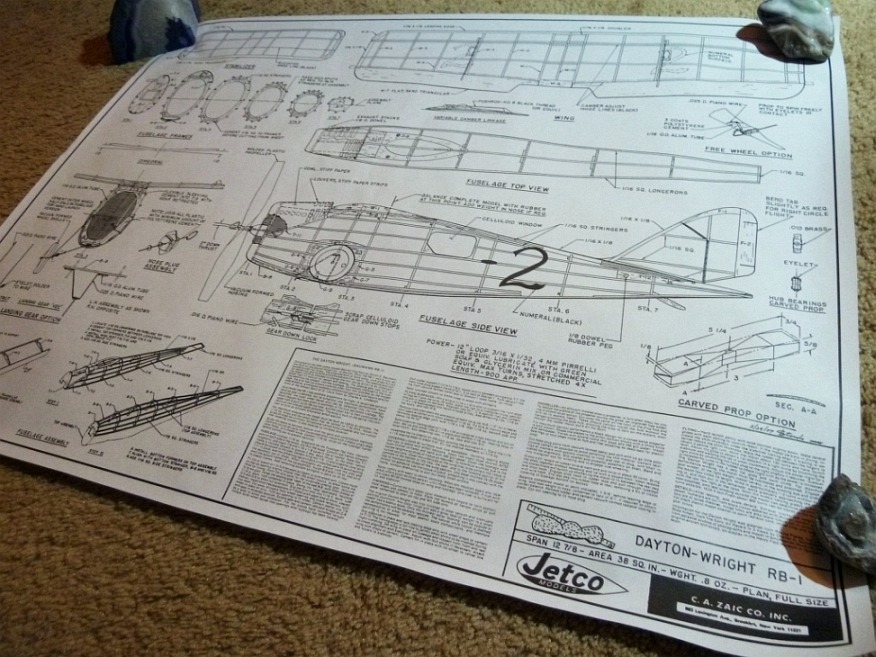
1920. Can't not build this. I'm goning to have to squeeze this in between two aerobatic rc gliders I have to put together. One for my friend and one for myself. He said he'd buy me the kit if i'd build his for him. Couldn't pass that one up! |
| Build Thread, Page :
1 [ 2 ] (38 posts, 20 posts per page, 2 pages in total)
|
[ < Prev ] |
