| Build Thread, Page :
[ 1 ] 2 (38 posts, 20 posts per page, 2 pages in total)
|
[ Next > ] |
| pfinn, Comment for image # 20844 | 26 May 16 11:58 |
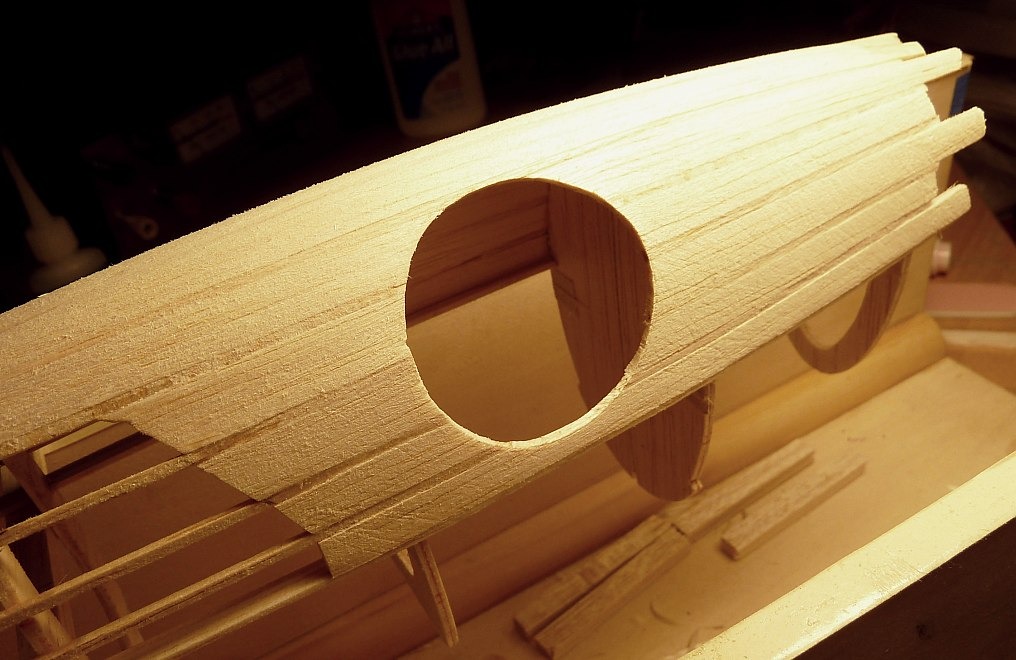
| Goldenboot, This is another way I did some infill and how I made some patterns for each length. Since I made my own bulkheads, I just marked the location of the stringers and thus left out the material between the stringers. With a kit, one could just cut away the "Between Material" after marking the locations on the bulkhead. Another example of this technique is in my BV 215 build. |
| pfinn, Comment for image # 21378 | 01 Mar 11 18:06 |
| Global Hawk, yes. And in my year of working here, this is the first aircraft we've done although there is a very nice C-140 sitting on a shelf (24" WS). Like many other model shops (including PACMIN, frwyflyer) most of these "Patterns" are now built on SLA machines from CAD. Hand crafted models from scratch are few and far between sad to say. There is still a lot of hand finishing and shaping involved with the older machines (which my employer has) so there is still surprisingly quite a bit of work and skill to get a model to an "Appearance" quality standard. These are made of laser cured resin. It sands, files, scrapes and even carves quite well, if you know how to and have the guts ;o). Today I worked on a 24" "Inchworm". Global Hawk...Inchworm...well, it keeps it interesting to say the least! |
| frwyflyer, Comment for image # 21378 | 01 Mar 11 10:23 |
| What did you use?? Renshape? |
| frwyflyer, Comment for image # 21378 | 01 Mar 11 10:10 |
| Send this photo to Fred at PACMIN. Let him eat his heart out |
| simonlschmitz, Comment for image # 21378 | 01 Mar 11 09:45 |
| Is that the Global Hawk UAV? I wish I could build stuff like that at work. |
| pfinn, Image # 21378 | 28 Feb 11 21:47 |
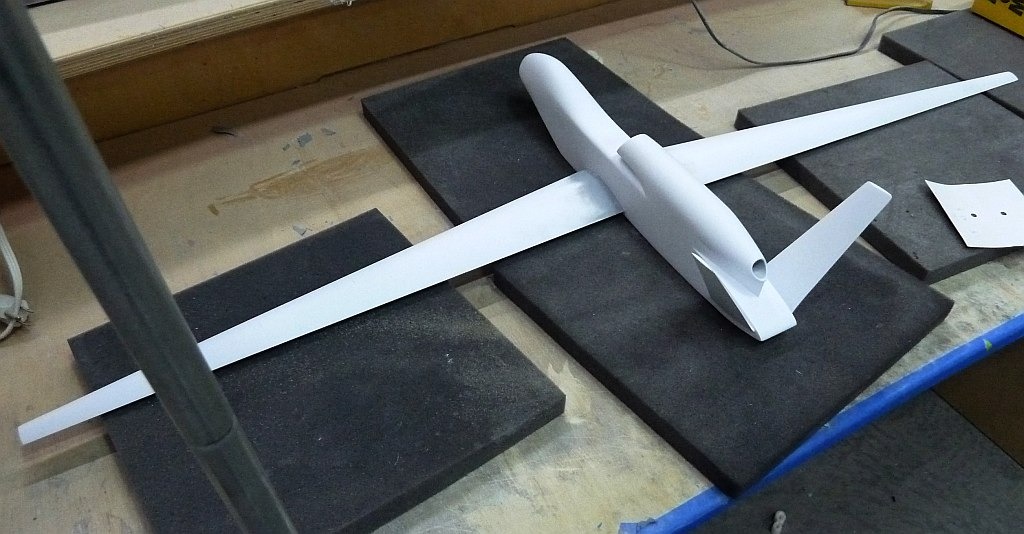
My project at WORK! We don't do too many aircraft, so this was fun. Glad they let me do it. Built an acrylic stand for it today and it's already on it's way to Orlando FL for a trade show. As always, a major rush, so it will come back for decals and clear gloss urethane topcoat. |
| David Duckett, Comment for image # 20637 | 23 Feb 11 08:50 |
| Could you, per chance, use a set of 1 7/8" vintage wheels for this? |
| jgood, Comment for image # 20822 | 14 Feb 11 15:37 |
| It looks like you're pulling it off though, top notch! |
| pfinn, Image # 21190 | 13 Feb 11 23:24 |
After some serious deliberation, I decided to bite the bullet and install scale action retracts. The gaping holes lead to some creative reinforcement while leaving room for the "Monkey Motion". For time time being , I'm leaning towards pneumatics. We'll see. |
| pfinn, Image # 20847 | 29 Jan 11 09:52 |
Bevel the edges to match longeron angles. I used good 'ol Elmers to bond. A little CA at the rear pointy side. |
| pfinn, Image # 20846 | 29 Jan 11 09:49 |

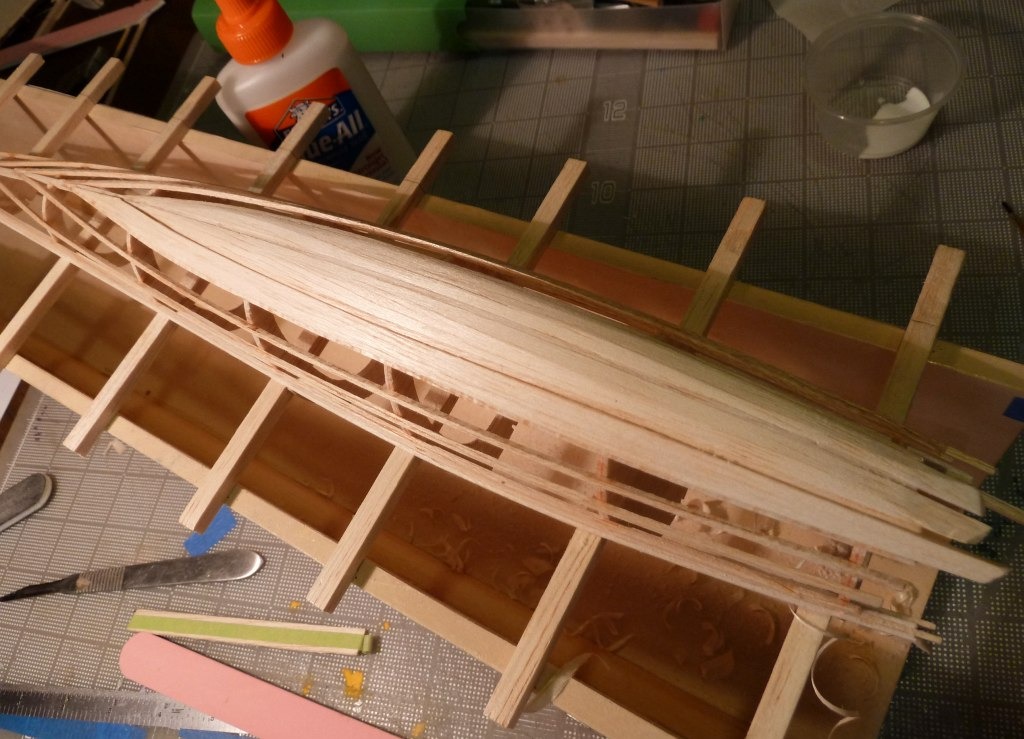
Here is the pattern on the Balsa. Use a marker (before you stick it down!) to make it more visible. When cutting long smooth curves like this I find that during the cut, looking ahead about 3/8" to 1/2" results in a smoother cut that follows the line much more closely. "Leading the cut". |
| pfinn, Image # 20845 | 29 Jan 11 09:43 |
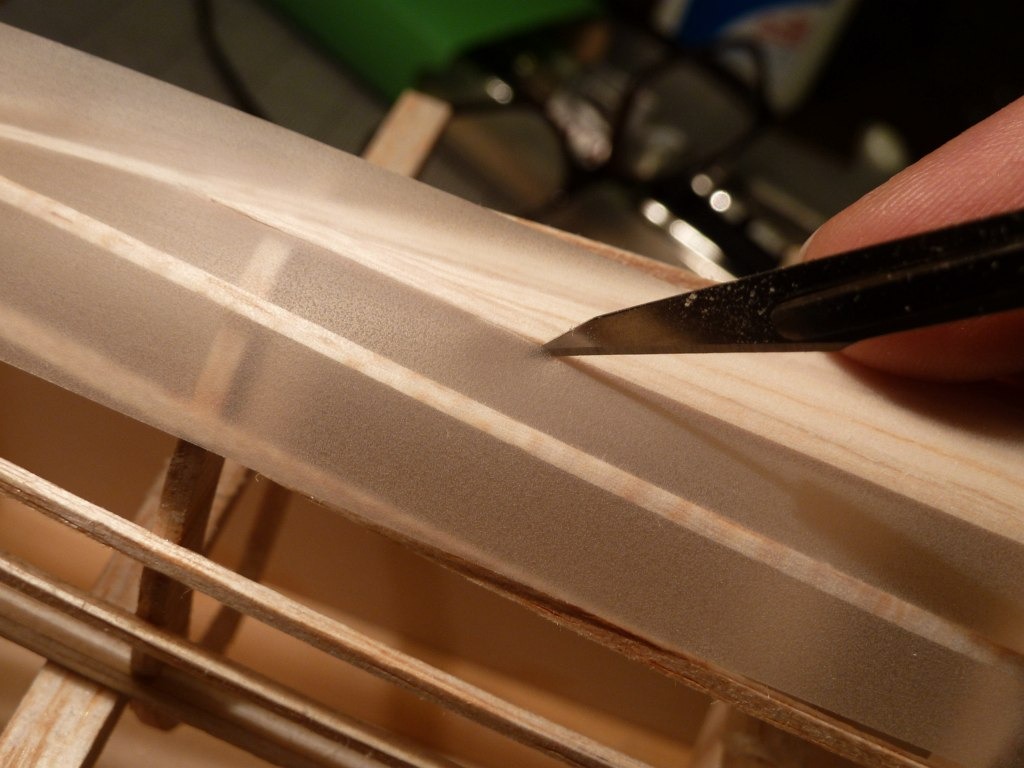
Carefully cut along the edges. |
| pfinn, Image # 20844 | 29 Jan 11 09:40 |
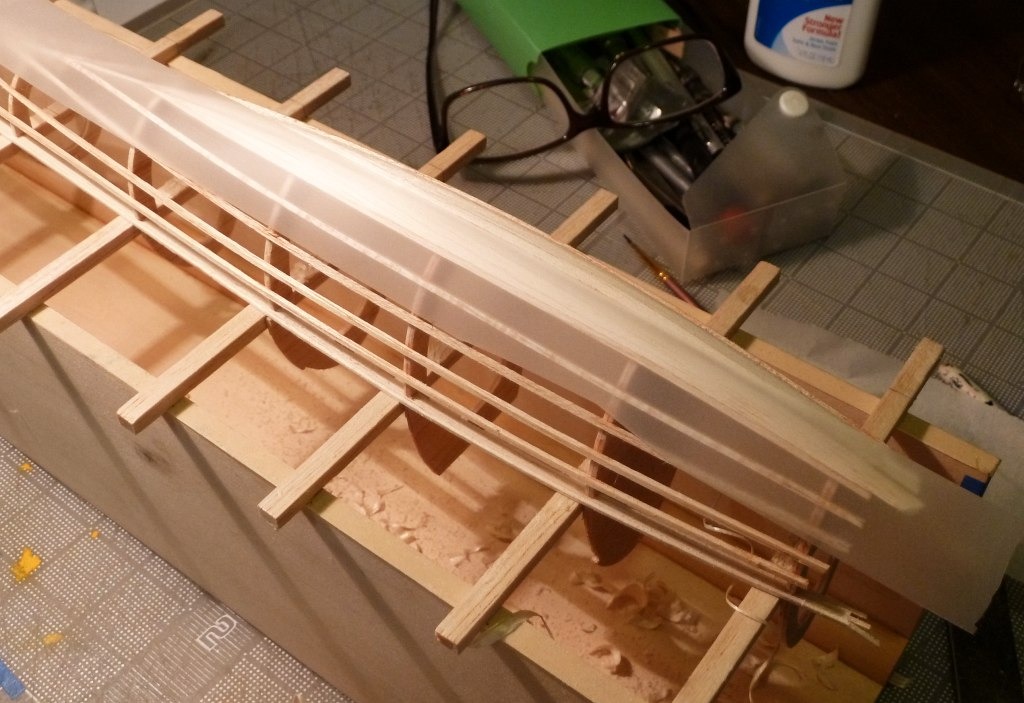
Infilling selected areas between stringers. To make a pattern, I used non-flexible tape (Magic/removable) stuck down only to the two longerons to be filled between. Don't stretch tight. I used a small staightedge and adhered the tape to the edges center out to allow the tape to "Skew" (?) as the plane twisted. |
| David Duckett, Comment for image # 20823 | 28 Jan 11 16:45 |
| As always, a pleasure to see your builds. |
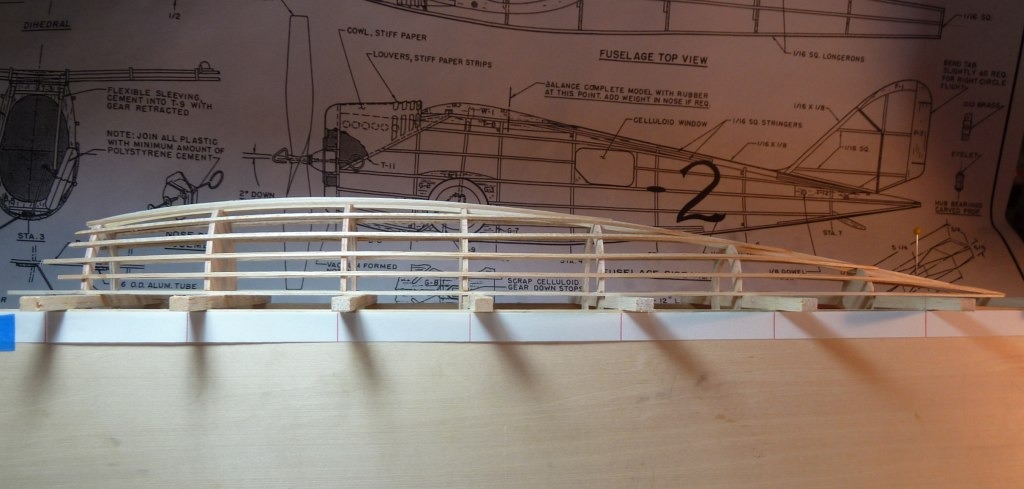
| pfinn, Comment for image # 20821 | 28 Jan 11 16:02 |
| Actually used the "K.i.s.s." method. I used a 1/4" spacer on formers 3,4, and 5 for the first 3 longernons. The longerons have quite a healthy twist after F5 so I kinda eye-balled them after F5. The twist makes them look higher than they actually are. The front were spaced 3/16" at F1 for the first three L's. I added two more longerons than the plan indicates as this is scaled up 150%. Was a "Peanut" scale at 12"WS. |
| frwyflyer, Comment for image # 20821 | 28 Jan 11 15:20 |
| Do you use a surface gauge to mark the spacing? |
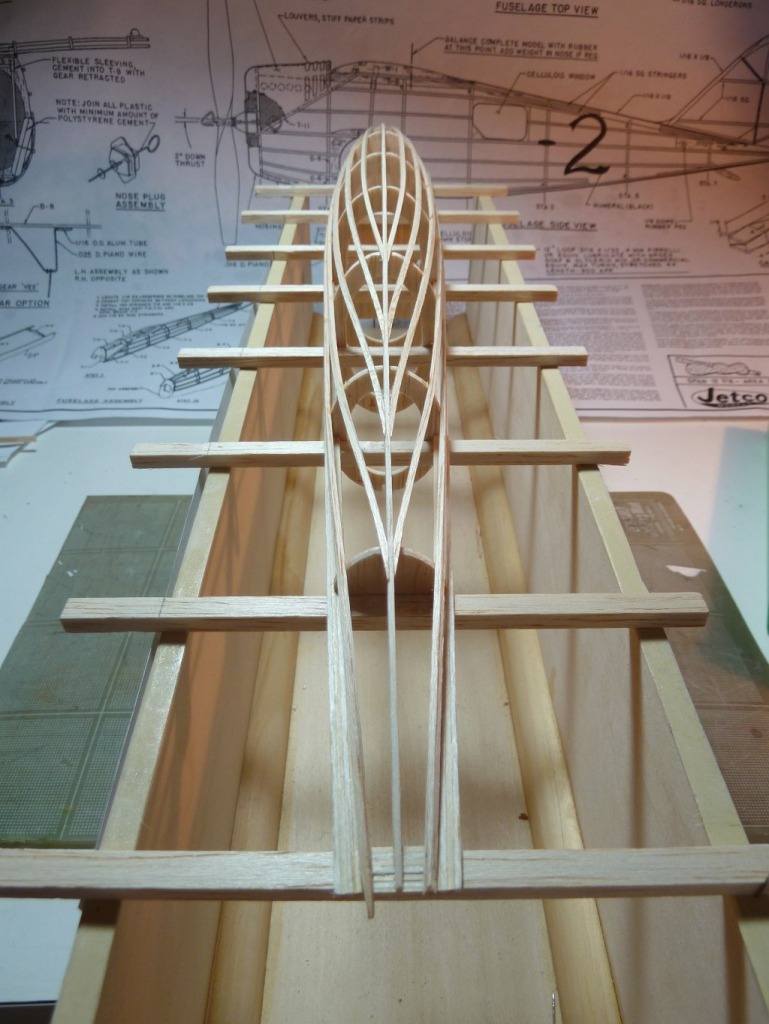
| pfinn, Image # 20823 | 28 Jan 11 14:02 |
I do like using the Jig. |
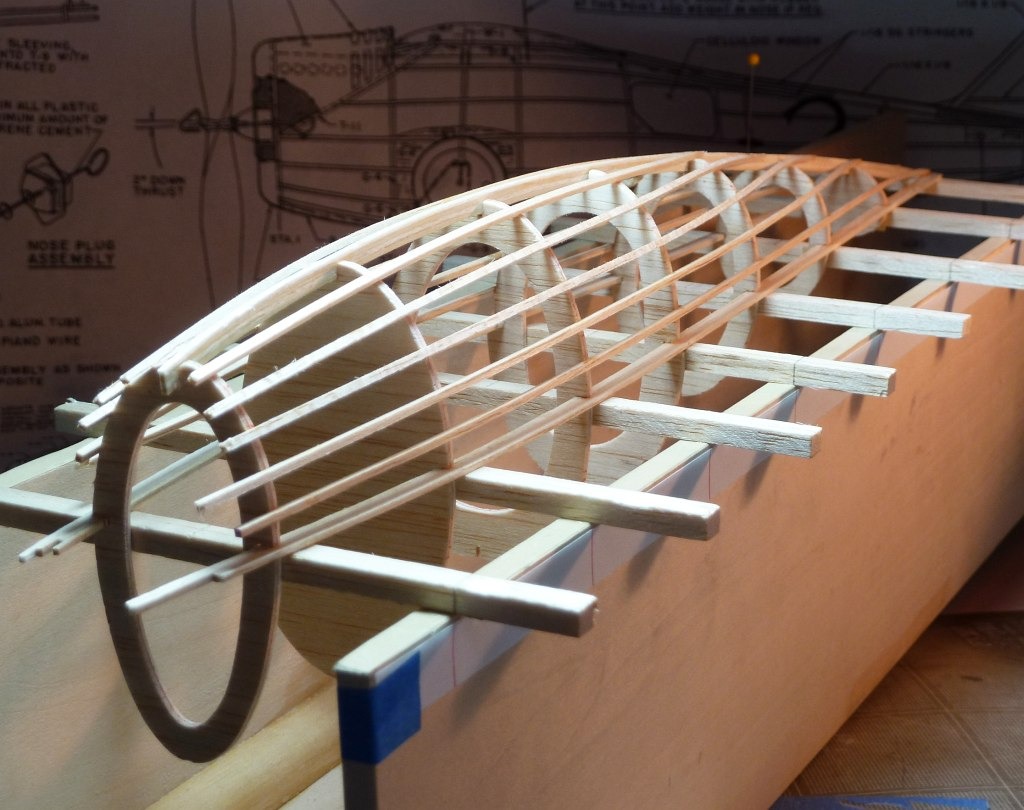
| pfinn, Image # 20822 | 28 Jan 11 14:01 |
This type af layout is a bit challenging in some respects. |
| pfinn, Image # 20821 | 28 Jan 11 13:59 |
As per plan, the stingers are arranged ala "Waterline". Meaning they are parralel to the axis of the fuselage. |
| frwyflyer, Comment for image # 20809 | 27 Jan 11 15:11 |
| That IS an idea! It would certainly help keep things square. |
| Build Thread, Page :
[ 1 ] 2 (38 posts, 20 posts per page, 2 pages in total)
|
[ Next > ] |
